8
D-108 Quick Operation Guide
Flashing
44.1kHz
SETUP
COMPLETED!
FORMAT
87654321
42
OL
0
30
24
18
12
9
6
3
∞
44.1kHz
REMAIN
FORMAT
SETUP
87654321
42
OL
0
30
24
18
12
9
6
3
∞
44.1kHz
FORMAT
SURE?
SETUP
87654321
42
OL
0
30
24
18
12
9
6
3
∞
Flashing
44.1kHz
SETUP
8
7
6
5
4
32
1
FORMAT
SURE?
42
OL
0
30
24
18
12
9
6
3
∞
Formatting a disk
After installing the hard disk in the D-108, you need to format the hard disk for recording and playback.
(This applies to new disks and those that have been used with a computer.)
Connect the D-108’s power cable to the AC outlet.
<Note>
Be sure to connect the power cable to an AC outlet of the voltage specified in the User’s Guide.
Turn on the power to the D-108.
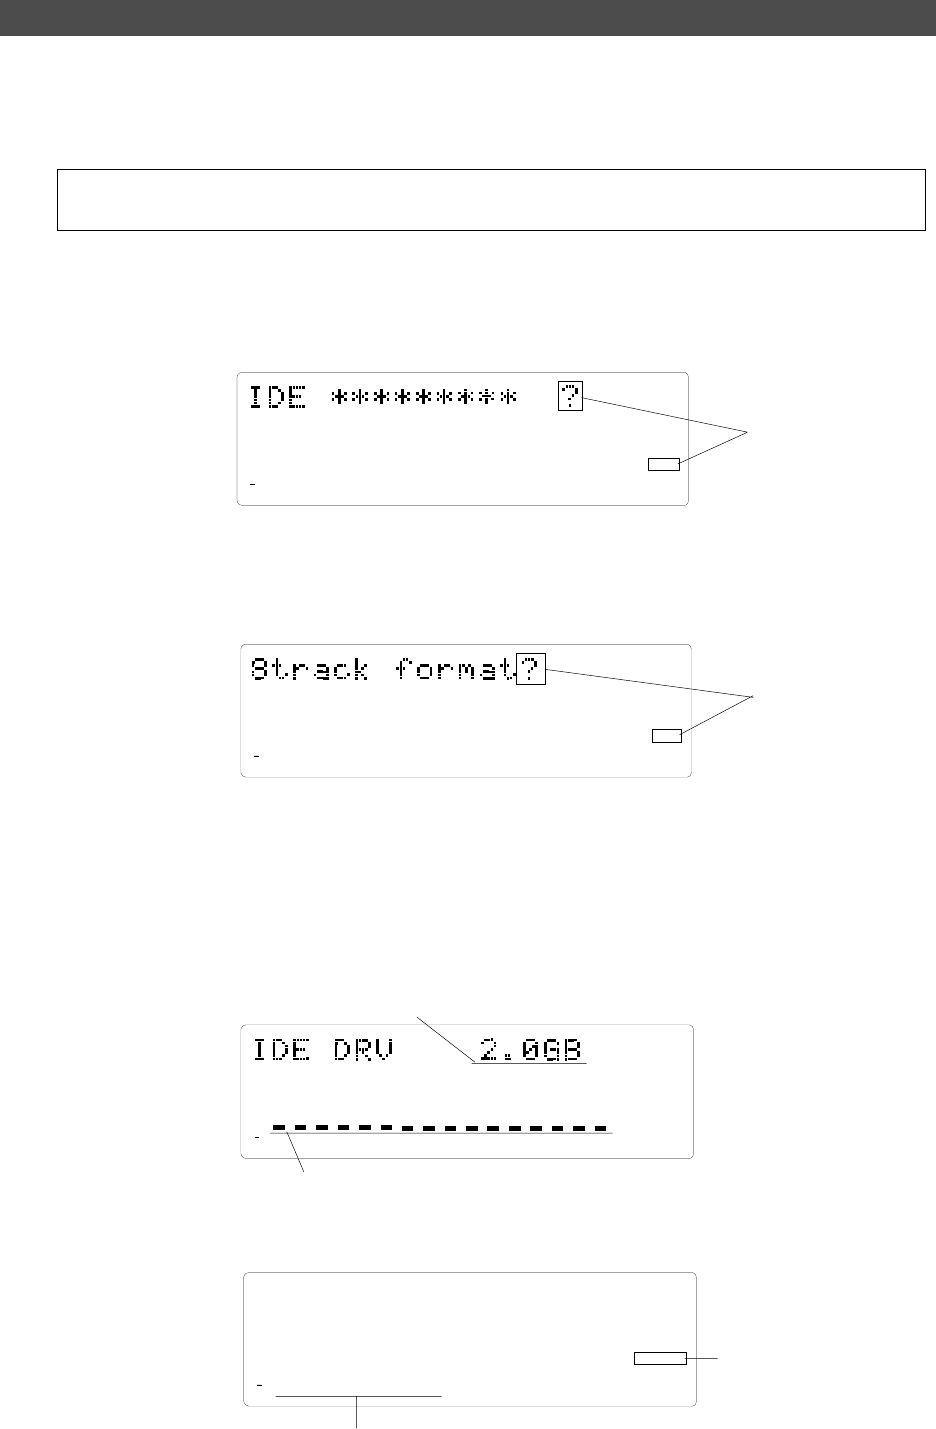
The display indicates the ROM version and date, messages [Initializing...], [Current IDE Drv], [model name],
then [Unformat!], and finally indicates the Disk format menu. (“****” represents the name of the hard disk
model.)
Press the EXECUTE/YES key.
The Record mode selection appears and the [?] mark and [SURE?] flash on the display. This means that the
D-108 is ready to format the installed E-IDE hard disk in [8track format] Record mode.
Press the EXECUTE/YES while holding down the RECORD button.
The size of unformatted area on the hard disk appears on the display, and counts down as the formatting
progresses. (The following example shows a disk with 2.0GB of unformatted space.)
Also, the segments in the “∞” column of the level meters light up, and they turn off one by one starting from
the right end. It will take a while to complete formatting, especially if you are formatting a large-capacity
disk.
This indicates the size of the unformatted area on the hard disk.
The segments turn off one by one from the right end as the formatting
progresses.
When the format operation is complete, the screen changes as follows and disk operation stops.
Track indicators 1-8 light up.
When the format operation is
complete, [COMPLETED!]
appears and the disk stops.


