fi-5530C Image Scanner Getting Started 3
Chapter2
INSTALLATION OF THE SCANNER
2.1 Installing the Scanner
1. Place the scanner at its installation site.
For details on the scanner's dimensions and
required installation space, refer to the fi-5530C
Operator’s Guide "7.2 Installation Specifications"
on the Setup CD-ROM.
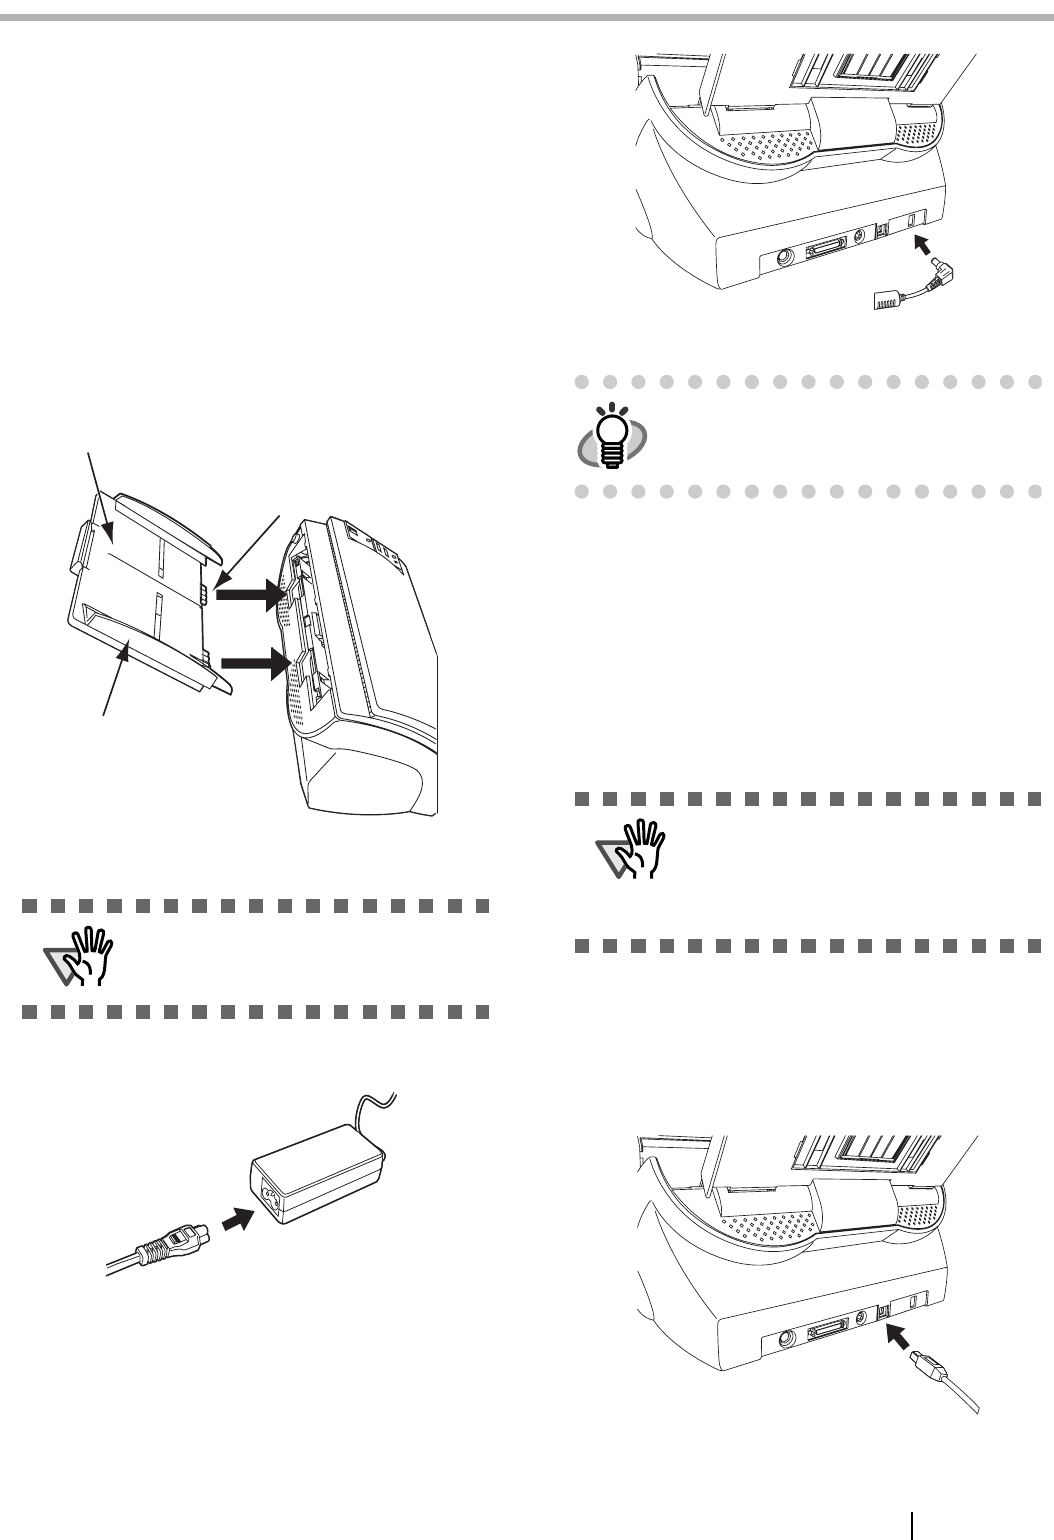
2. Attach the ADF paper chute.
Hold the ADF paper chute and insert its tabs into
the corresponding slots in the scanner as shown in
the figure below.
The Side guides of the ADF paper chute have to
face up.
3. Connect the AC adapter.
1) Connect the AC cable to the AC adapter.
2) Connect the AC adapter connector to the scan-
ner’s DC inlet.
3) Plug the AC cable into the outlet.
2.2 Connecting the Scanner to
Your PC
When running Windows 95 or Windows NT 4.0, con-
nect the scanner with the SCSI interface cable.
When running Windows 98, Windows Me, Windows
2000, or Windows XP, connect either with the USB
interface cable or the SCSI interface cable.
■ Connecting with the USB
Interface Cable
1. Connect the USB interface cable to the USB
interface connector.
ATTENTION
Use only the AC adapter provided by the
manufacturer.
ADF paper chute
Tab
Side guide
HINT
The Function Number Display and the LED
may flash for an instant when plugging the
AC cable into the outlet.
ATTENTION
This scanner is provided with two inter-
faces: Ultra SCSI and USB 2.0 /1.1. Con-
nect only one of the USB or SCSI interface
cable. Windows 95 and Windows NT 4.0
do not support USB interface.


