Connecting and Installing the TV (continued)
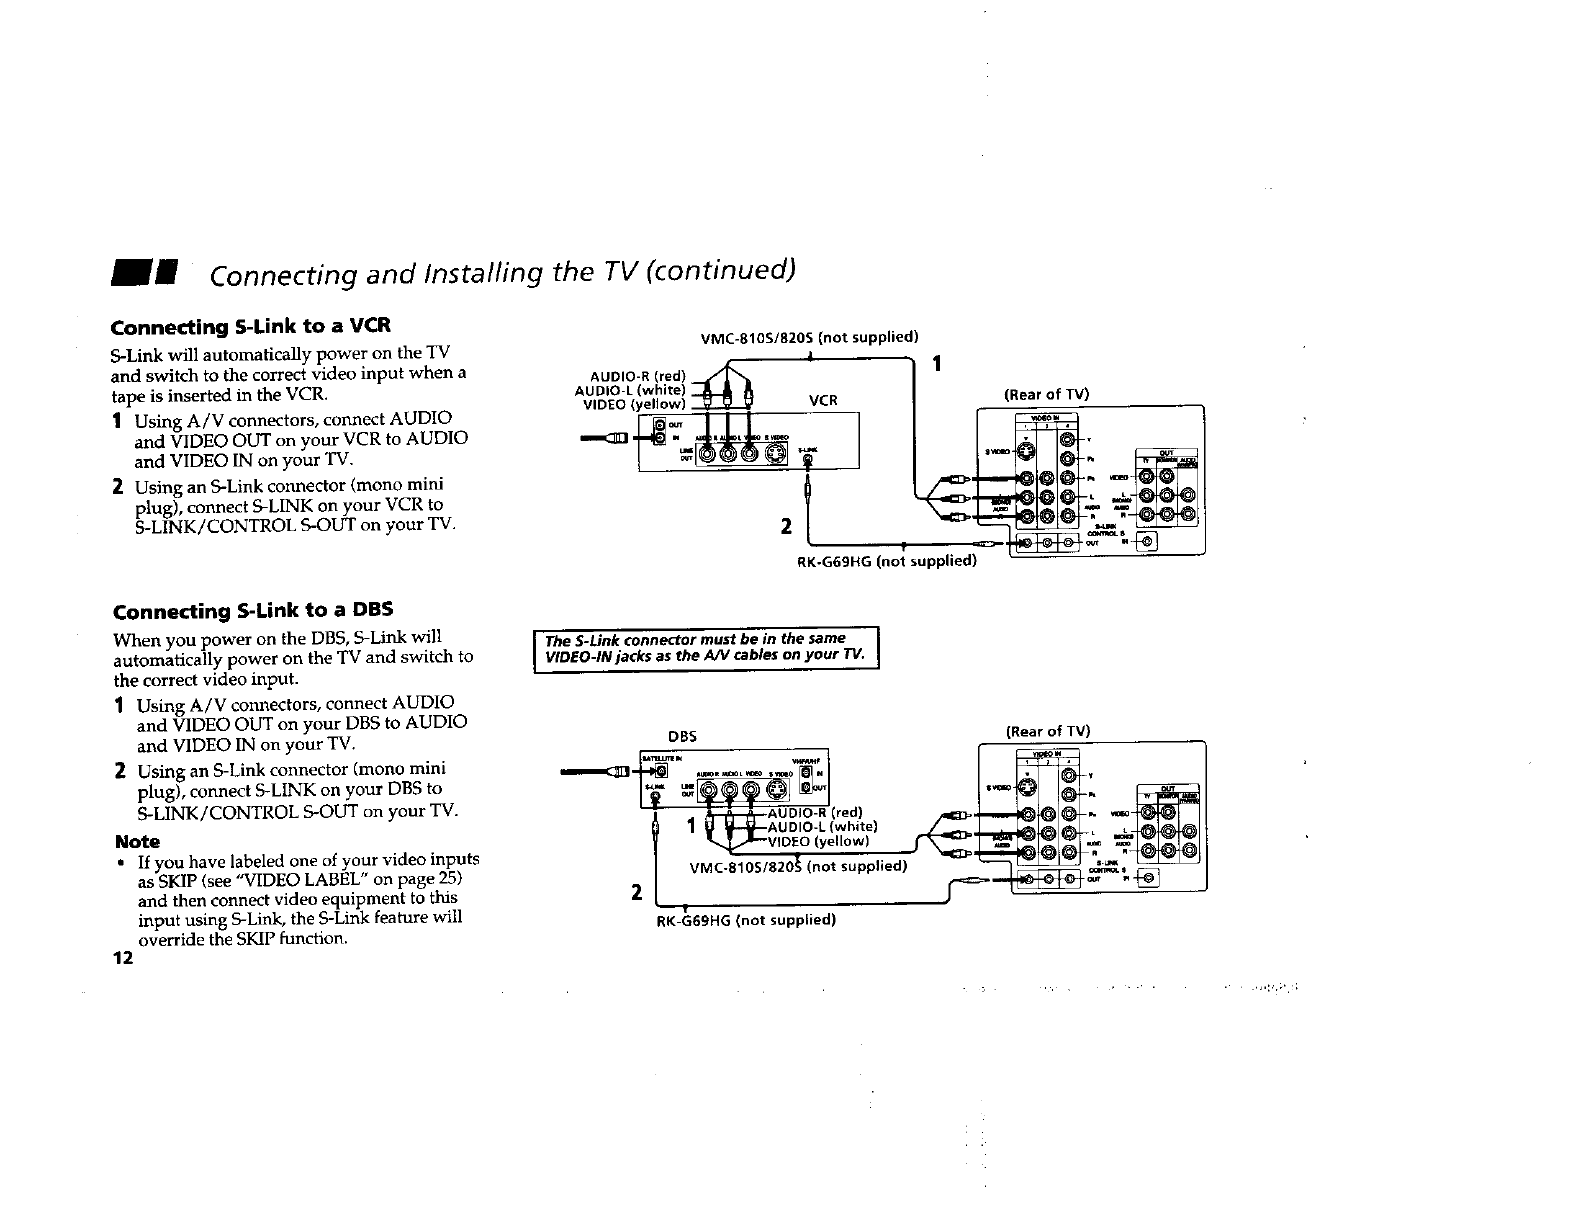
Connecting S-Link to a VCR
S-Link will automatically power on the TV
and switch to the correct video input when a
tape is inserted in the VCR.
1 Using A/V connectors, connect AUDIO
and VIDEO OUT on your VCR to AUDIO
and VIDEO IN on your TV.
2 Using an S-Link connector (mono mini
plug), connect S-LINK on your VCR to
S-LINK/CONTROL S-OUT on your TV.
VMC-810S/820S (not supplied)
i
AUDIO-R (red) _
AUDIO-L (white)
VIDEO (yellow) VCR
1
(Rearof TV)
RK-G69HG (not supplied)
Connecting S-Link to a DBS
When you power on the DBS, S-Link will
automatically power on the TV and switch to
the correct video input.
1 Using A/V connectors, connect AUDIO
and VIDEO OUT on your DBS to AUDIO
and VIDEO IN on your TV.
2 Using an S-Link connector (mono mini
plug), connect S-LINK on your DBS to
S-LINK/CONTROL S-OUT on your TV.
Note
• If you have labeled one of your video inputs
as SKIP (see "VIDEO LABEL" on page 25)
and then connect video equipment to this
input using S-Link, the S-Link feature will
override the SKIP function.
12
I The S-Link connector must be in the same
WDEO-IN jacks as the A/V cables on your TV. J
DBS (Rear of TV)
' i a_--a_,_AUDIO-R (red) ,-
I_ 1 _ _tI--AUD'O-L(white)
| "NJ,._--WOEO(ye,low) ,,_
VMC-8105/820_ (not supplied) "=_6,_._
2
- !
RK-G69HG (not supplied)


