145
Others
Function setup
Library
Editing
Playback
Recording
Introduction
Network Navi
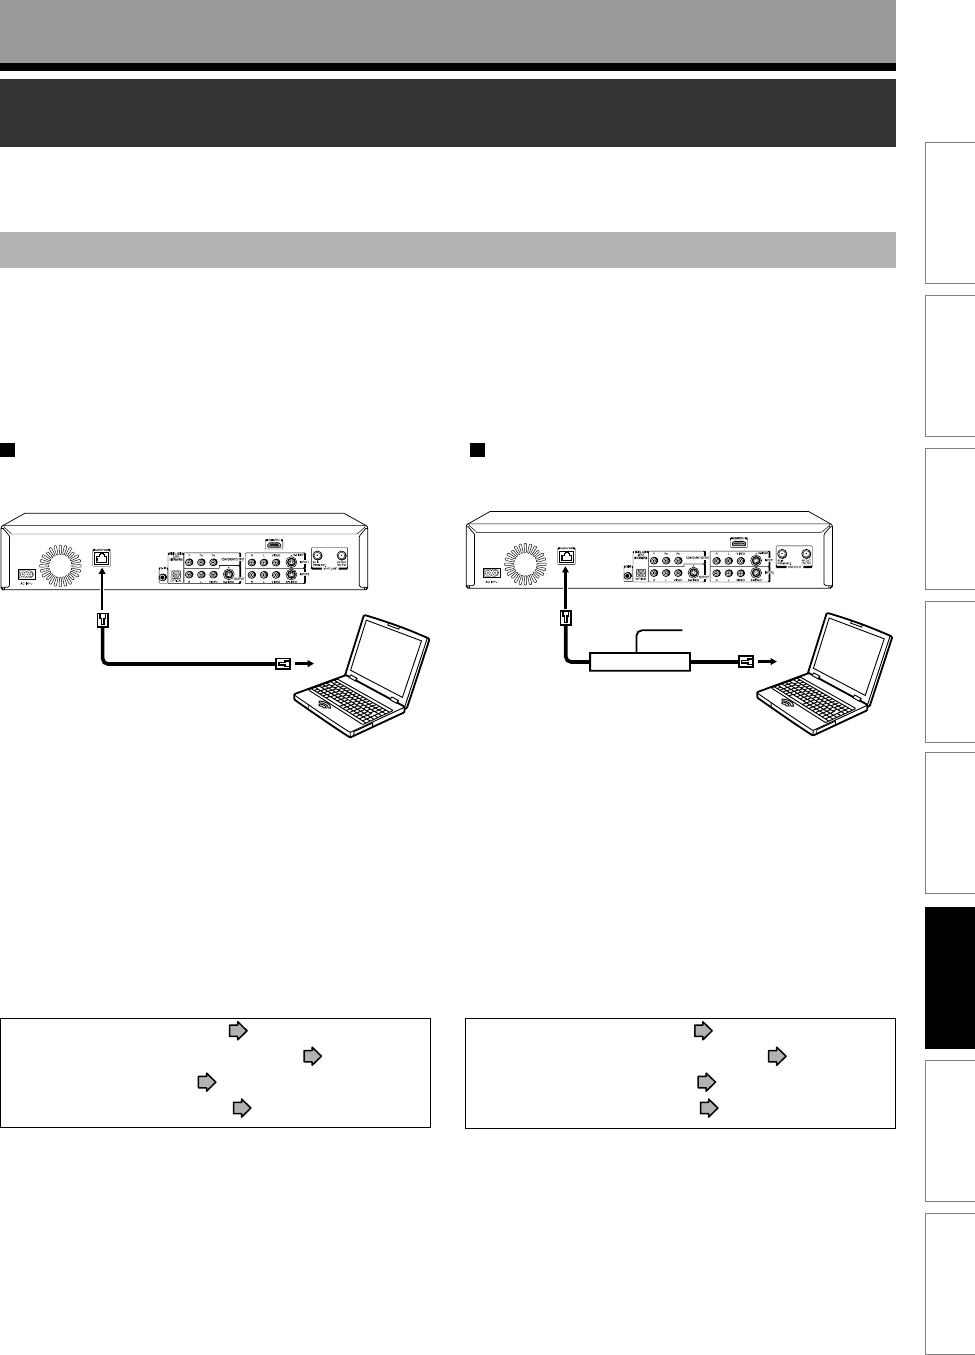
1: Connection to a PC
A PC with a LAN connection is required.
The main method for PC connection is either a direct connection or through a constant and continuous (“always-on”)
internet connection. Usable features differ depending on the connection method.
The features of “Network Navi” can be utilized fully only if the recorder is connected using a PC with an always-on
internet connection and router.
Direct connection to a PC
The following can be done from the PC
• Editing the title information (Title Thumbnail
List)
• Checking the Library (Library)
• Setting the theme for menu screen (DVD-Video
Tool)
• Operating the recorder (Virtual Remote Control)
• Streaming content to the PC (Net Monitor)
The following settings are required.
• Connecting to the PC ( page 146)
• Setting up the Network Setting (
page 147)
• Setting up the PC (
page 151)
• Starting Network Navi (
page 152)
Always-on internet connection with a PC
Phone line
The following can be done from the PC
• Editing the title information (Title Thumbnail
List)
• Checking the Library (Library)
• Setting the theme for menu screen (DVD-Video
Tool)
• Operating the recorder (Virtual Remote Control)
• Streaming content to the PC (Net Monitor)
The following settings are required.
• Connecting to the PC ( page 146)
• Setting up the Network Setting (
page 147)
• Starting Network Navi (
page 152)
• Network Navi Settings (
page 153)
Preparation for Network Navi
Follow the procedures 1 to 4 to use Network Navi.
(Continued)
Network Navi
Broadband modem
RD-XS55SU_Ope_E_p141-170 06.3.20, 4:16 PM145


