E
10
INSTALLATION
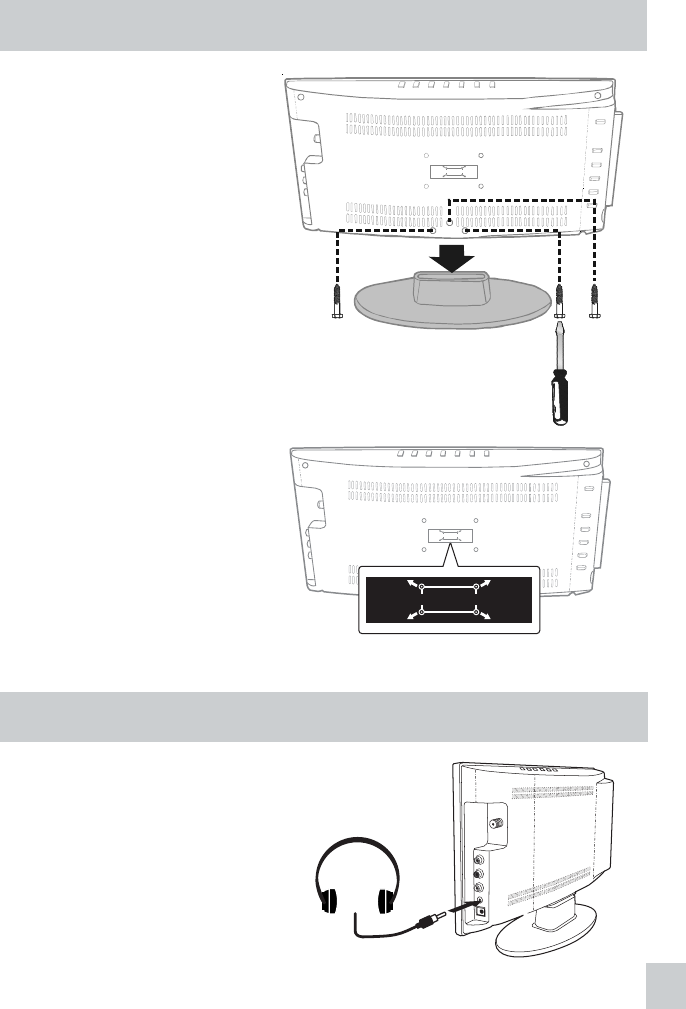
REMOVING THE BASE STAND
WARNING: The LCD display is very
fragile, and must be protected at all
times when removing the base stand.
Be sure that no hard or sharp objects,
or anything that could scratch or
damage the LCD display, come in
contact with it. Do NOT place pressure
on the rear of the unit at anytime
because the screen could crack.
MOUNTING ON THE WALL
This unit is VESA-compliant, and is
designed to be wall-mounted with a
VESA-compliant 1.375” x 2.9375”
(35mm x 75mm) mounting kit designed
for flat-panel TVs (sold separately).
Mount this unit according to the
directions included with the mounting
kit.
NOTE
Remove the base stand before
mounting the unit on the wall.
1. Disconnect any cables or cords
connected to the unit.
2. Lay the unit down on a flat surface,
so the back side is facing up, making
sure to place a soft cushioned material
(such as a pillow or thick piece of
foam) beneath the screen.
3. Remove the 3 screws and then
remove the BASE STAND from the
unit.
WALL MOUNTING HOLES :35 X 75 MM
WALL MOUNTING HOLES :35 X 75 MM
WALL MOUNTING HOLES : 35 X 75 MM
USING HEADPHONES
• Turn down the volume before
connecting headphones to the unit,
then adjust the volume to your
desired level.
• When headphones are connected, no
sound will come from the front
speakers.
NOTE
Avoid listening to sound at high levels
for prolonged periods of time. This may
be harmful to you and may cause
hearing loss.
Headphones
(1/8” [3.5mm]
diameter plug)


