


AXIS Video Motion Detection 3
Configure Application
Configure Application
Once installed, the application is available from Setup > Applications > Motion Detection 3 in the Axis product’s webpages. Go to
Settings and then click AXISAXIS
AXIS
VideoVideo
Video
MotionMotion
Motion
DetectionDetection
Detection
settingssettings
settings
to open the application’s webpage.
To congure AXIS Video Motion Detection 3, follow these steps:
1. Modify the size and position of the include area. This is the area in which moving objects will be detected. See Include
Area on page 6 .
2. Optionally, add one or more exclude areas. Objects in an exclude area will be ignored. See Exclude Area on page 7 .
3. Click Save to apply the changes.
4. Use visual conrmation to verify the settings. See Visual Conrmation on page 7 .
5. If too many unwanted objects are detected, enable and congure one or more of the ignore lters. See Ignore Filters
on page 7 .
After modifying a setting, click Save to apply the changes. The video stream will be restarted and it may take a few seconds
before the change is applied.
Multichannel Products
For multichannel products, the application can be used on all channels simultaneously. Each video channel has its own include
area, exclude areas and ignore rules.
To use the application on multiple channels, the application must be enabled and congured for each channel.
• To switch between channels, click on the tabs below the video image.
• To enable the application on a channel, switch to that channel and click Enable.
It is recommended to only enable visual conrmation for one channel at a time. Make sure to disable visual conrmation before
starting conguring another channel.
Clicking Save will save changes on all channels.
Include Area
The include area is the area in which moving objects will be detected. Objects moving outside the include area will be ignored.
The object will be detected also if only a part of the object is inside the include area.
Note
To modify the include area, Internet Explorer and AXIS Media Control (AMC) must be used.
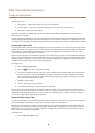
The default include area is a square that covers the whole image. Click on the icon to highlight the area.
Use the mouse to reshape and resize the area so that it only covers the part of the image in which moving objects should be detected.
The default square can be changed to a polygon with up to 20 points (corners).
• To add a new point, click on the include area border. Drag the point to the desired position.
• To remove a point, right-click on the point.
• To move a point, drag the point to the new position.
• To move the entire include area, place the mouse pointer inside the area. When the pointer becomes a cross, drag the
area to the new position.
6