


English
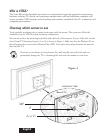
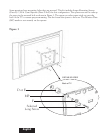
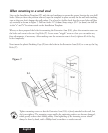
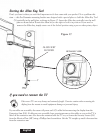
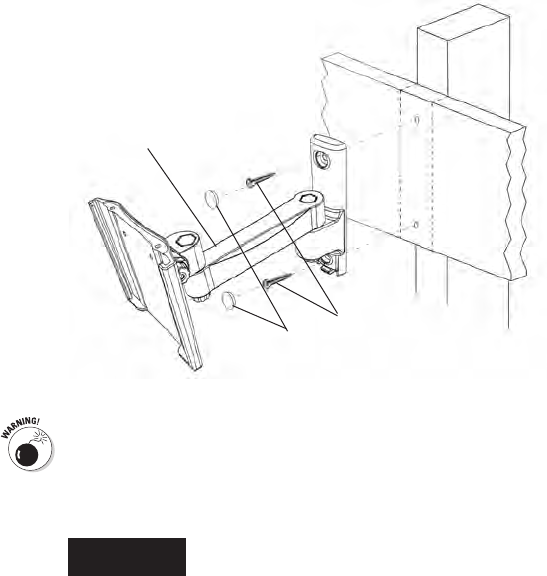
Next insert the plastic Finishing Caps (Z) into the holes in the
Extension Arm (EA)
to cover up the
Lag
Bolts (T).
When you have prepared the holes for mounting the Extension Arm (EA), place the extension arm over
the holes and screw in the two Lag Bolts (T).
Leave some “wiggle” room so that you can make any
fine adjustments, if necessary. After making sure the extension arm is level, tighten all of the lag
bolts completely.
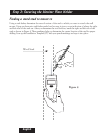
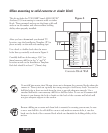
Tighten mounting screws so that the Extension Arm (EA) is firmly attached to the wall, but
don’t over-tighten! The mounting screws and/or the supporting surface can become damaged,
which greatly reduces their holding ability. Final tightening of the mounting screws should
always be done by hand, with a Phillips-head screwdriver or ratchet wrench.
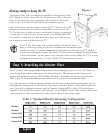
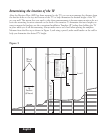
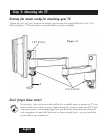
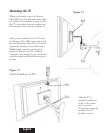
When mounting to a wood stud
Line up the Installation Template (IT) with the stud markings to ensure the proper location for your drill
holes. After you have the position selected, tape the template in place securely on the wall with masking
tape so that you don’t damage the wall surface. Use a level to double check that the screw holes will line
up vertically as shown in Figure 7. Drill two holes 2.5" (64mm) deep using a 5/32" (or 4mm) size drill bit
in the “a” and “b” locations noted on the Installation Template.
Figure 7
Supporting
Stud
Wall
T
Z
EA