


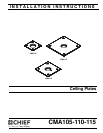

CMA105-110-115 Installation Instructions
6
INSTALLATION AND ASSEMBLY
WARNING: Do NOT attach to vertical mounting surfaces
such as walls or angled ceilings!
WARNING: IMPROPER INSTALLATION CAN LEAD TO
LIFT FALLING CAUSING SEVERE PERSONAL INJURY OR
DAMAGE TO EQUIPMENT! It is the installer’s responsibility
to make certain the structure to which the mount is being
attached is capable of supporting five times the weight of the
CMA mount and all attached equipment. Reinforce the
structure as required before installing the mount.
NOTE: The following instructions assume a suitable mounting
structure and surface exists prior to installation.
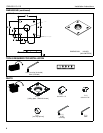
Installing to a Wood Framework (Joists)
NOTE: These CMA mounts are designed to be mounted to a
2" x 6" wood framework ceiling covered with 5/8"
drywall.
1. Use 5/16-18" x 2-1/2" (minimum) Grade 2 lag screws (not
included) to secure CMA mount to the joists or wood
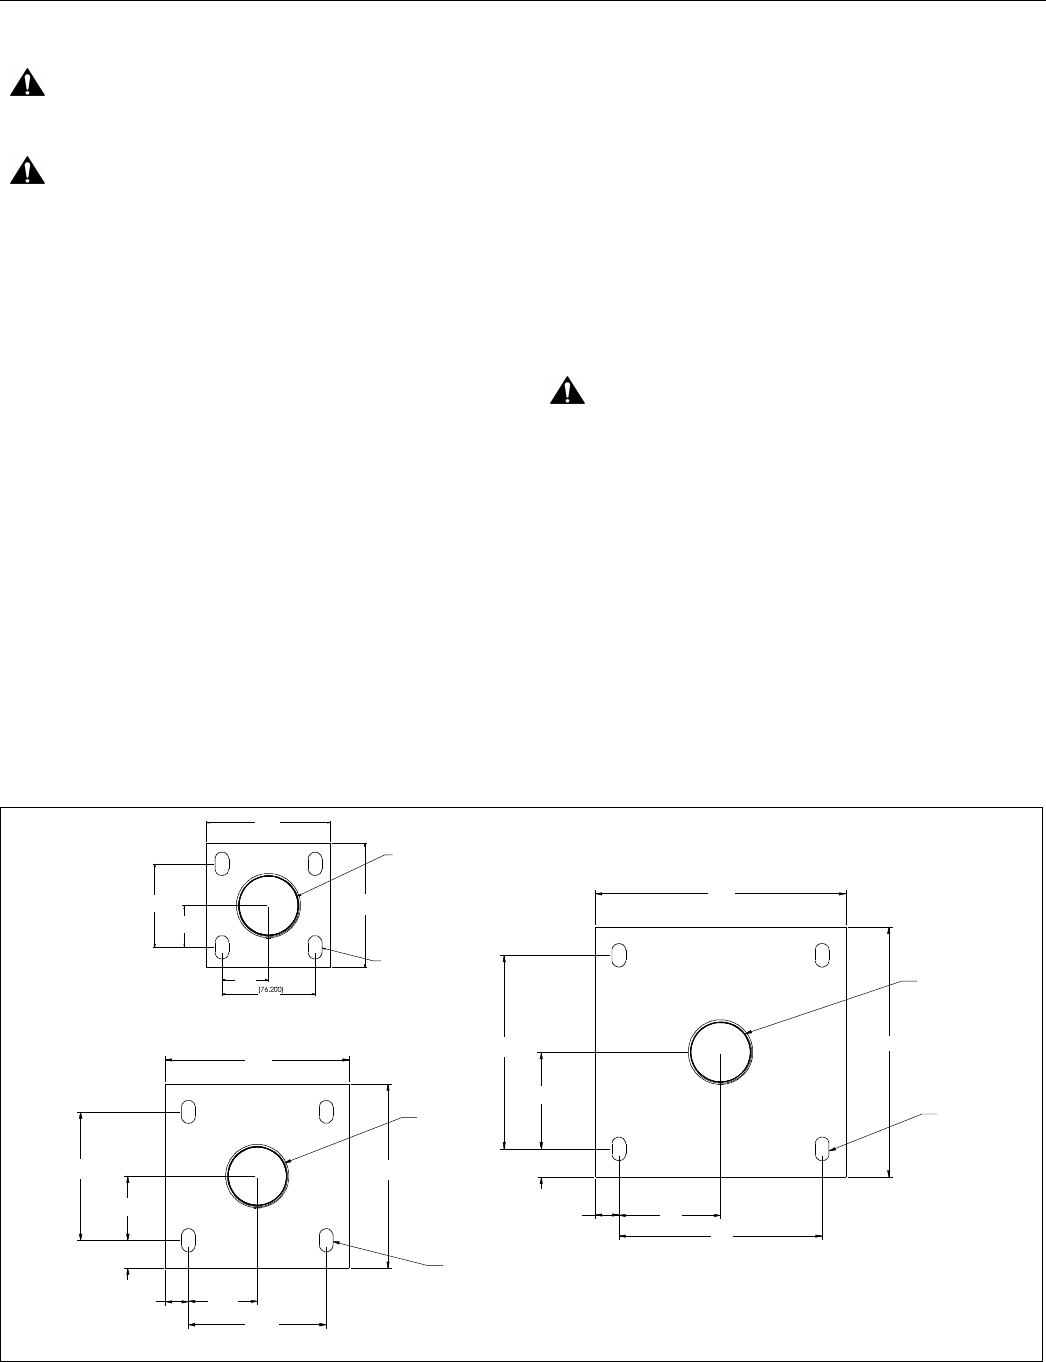
framework, using the bolt holes noted. (See Figure 1)
NOTE: If using only two bolt holes for mounting, two opposing
holes must be used.
Installing to a Suspended Ceiling
NOTE: These CMA mounts may be suspended from four 3/8"
diameter (minimum) Grade 2 or better threaded rods
with 16 threads per inch (not included) which are
secured to a framing channel (spanning a maximum of
5 feet--not included) by Grade 2 or better 3/8" channel
nuts (not included).
1. Insert the rods into the four bolt holes in the CMA mount.
(See Figure 1)
2. Secure the threaded rods to the CMA mount with Grade 2
or better 3/8" jam nuts (not included) and washers (one of
each on inside and one of each on outside--not provided).
Installing to a Solid Concrete Ceiling Structure
NOTE: These CMA mounts may be mounted to an 8" concrete
ceiling using either 1/4" x 2-1/2" lag bolts for Toggler
AF8 anchors (not included), or 5/16" x 2-1/2" lag bolts
for Fischer UX10 concrete anchors (not included)
WARNING: Anchors (not included) must be installed into
structurally sound solid concrete. Installation into hollow
concrete block, mortar, or concrete that exhibits cracking,
spalling, or other defects may result in failure of anchor and
serious personal injury or damage to equipment.
1. Use
either 1/4" x 2-1/2" lag bolts for Toggler AF8 anchors
(not included), or 5/16" x 2-1/2" lag bolts for Fischer UX10
concrete anchors (not included)
to secure CMA mount into
solid concrete ceiling. (See Figure 1)
2. Place CMA mount over anchors, placing bolt holes in CMA
mount over anchors.
3. Secure CMA mount to ceiling using four Grade 2 flat
washers (not included) and four Grade 2 nuts (not included)
tightened over anchors.
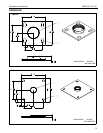
Figure 1
1.50
[38.100]
3.00
4.00
[101.600]
4.00
[101.600]
1.35
[34.163]
2.690
[68.326]
4X .44 X .75 SLOT
[11.2 X 19.0]
1 1/2 NPT
4.50
[114.300]
2.25
[57.150]
6.00
[152.400]
6.00
[152.400]
.75
[19.050]
2.10
[53.213]
4.19
[106.426]
.91
[22.987]
1 1/2 NPT
4X .44 X .75 SLOT
[11.2 X 19.0]
3.25
[82.550]
6.50
[165.100]
8.00
203.200
8.00
[203.200]
.75
[19.050]
3.09
[78.457]
6.19
[157.226]
.91
[22.987]
4X .44 X .75 SLOT
[11.2 X 19.0]
1 1/2 NPT
CMA105
CMA110
CMA115