


Installation Instructions PSMH2485
5
ASSEMBLY AND INSTALLATION
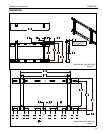
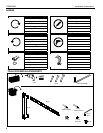
Mount Assembly
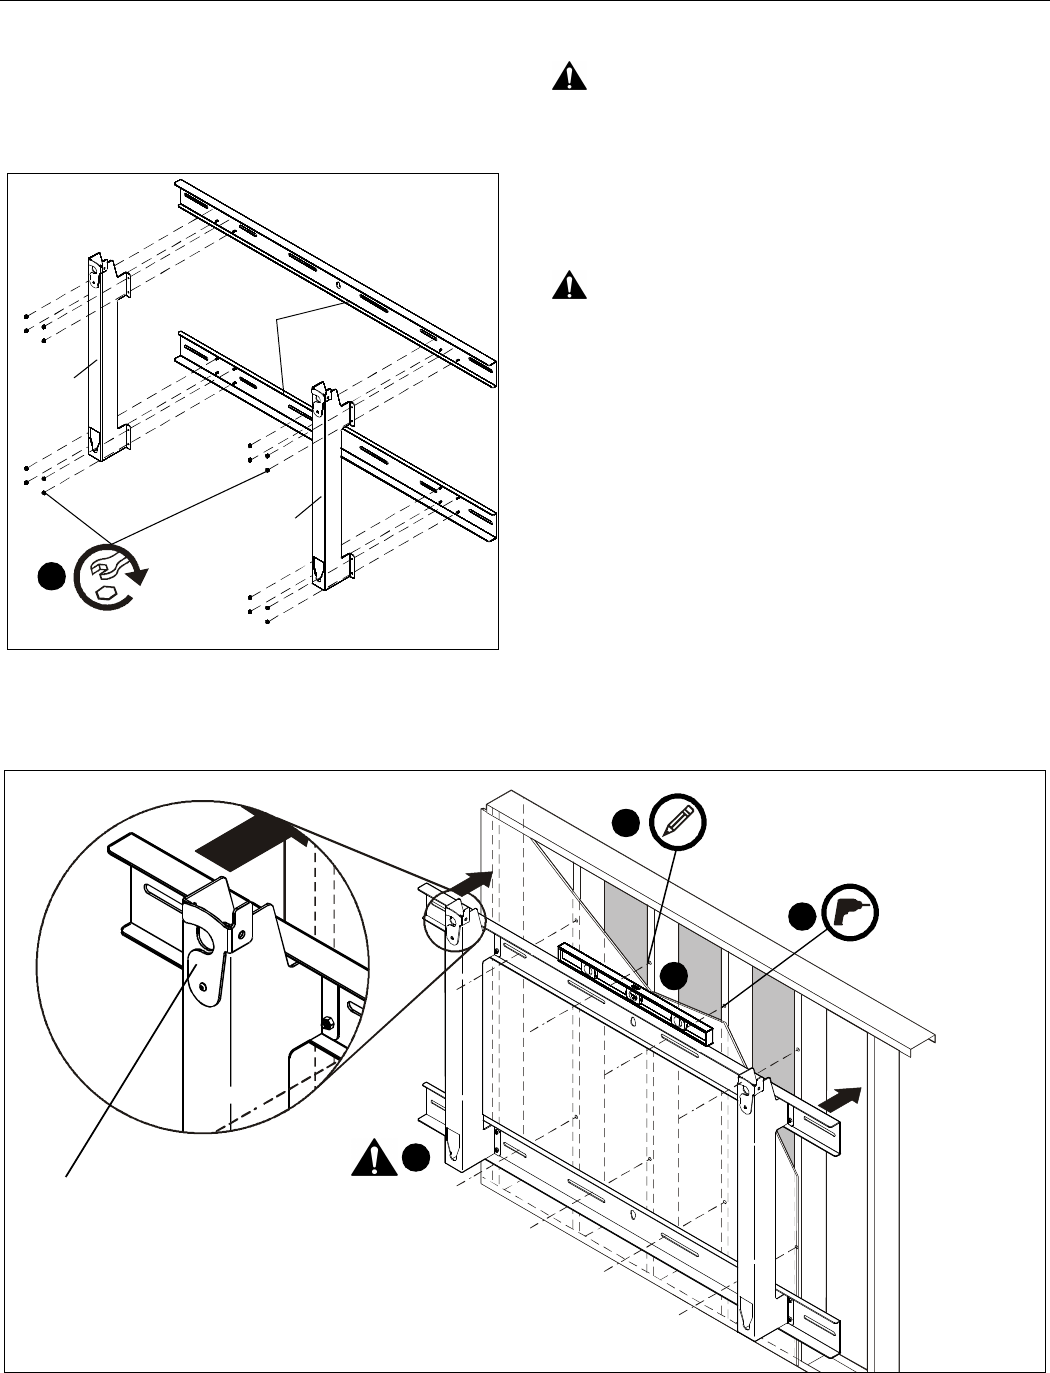
1. Attach two vertical brackets (A) to two horizontal brackets
(B) using sixteen 5/16-18 nylon lock nuts (F). (See Figure 1)
NOTE:
Lock nuts should be tightened to no more than 120 in. lbs.
Figure 1
Mount Installation
WARNING: IMPROPER INSTALLATION CAN LEAD TO
MOUNT FALLING CAUSING SERIOUS PERSONAL
INJURY OR DAMAGE TO EQUIPMENT! The mount weighs
in excess of 100 lbs (45.36kg). ALWAYS use appropriate
lifting device and follow all safety practices when moving and
installing this mount.
WARNING: IMPROPER INSTALLATION CAN LEAD TO
DISPLAY FALLING CAUSING SERIOUS PERSONAL
INJURY OR DAMAGE TO EQUIPMENT! It is the installer’s
responsibility to make sure the structure to which this mount
is being attached can support a minimum of 2,000 lbs
(907.18kg). Reinforce the structure as required before
installing this mount.
1. Using appropriate lifting device, raise assembled mount
and place mount against wall in desired installation
location. (See Figure 2)
2. Level and adjust horizontal position making certain slots in
upper and lower horizontal brackets on mount are properly
positioned over studs.
3. Using a pencil, or similar marking tool, mark the location of
mounting holes in base onto surface. (See Figure 2)
4. Drill eight or twelve 7/32" pilot holes (8 if 24" center studs
and 12 if 16" center studs), at marked locations.
1
(F) x 16
(B)
(A)
(A)
Figure 2
Q-Latch
3
(8 places when 24" centers on studs)
(12 places when 16" centers on studs)
1
2
4
7/32" pilot holes