


infiNET EX
™
LCD Handheld Remote Crestron MLX-2
Setup
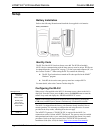
Battery Installation
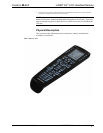
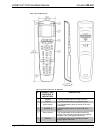
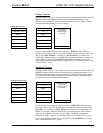
Refer to the following illustration and install the four supplied AAA batteries.
Battery Installation
Identity Code
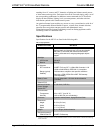
The RF ID of the MLX-2 has been factory set to 03. The RF IDs of multiple
MLX-2 devices communicating with the same gateway must be unique. RF IDs can
be changed from the “Setup mode” on page 7, or from a personal computer (PC) via
the Crestron Toolbox
™
. When setting the RF ID, consider the following:
•
•
The RF ID of each unit must match an ID code specified in the SIMPL
™
Windows
®
program.
Each RF device on the same gateway must have a unique RF ID.
For more details, refer to the Crestron Toolbox help file.
Configuring the MLX-2
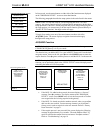
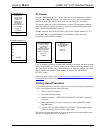
Startup Screen
Welcome to
Crestron’s
MLX-2 remote.
Please press
the > key to
enter the remote
setup mode.
PAGE 1/1
When power is first applied to the MLX-2, the startup screen, shown to the left, is
displayed. From this screen, press the h key next to the HOME button to enter the
remote Setup mode and display the “PROGRAM DEVICE” screen.
NOTE: If the unit has already been acquired, enter Setup mode by pressing the
CLR (clear) and ENT (enter) buttons simultaneously for about three seconds.
The MLX-2 is shipped from the factory with firmware already installed. Prior to
normal operation, it is necessary to configure the unit using the series of screens
provided in the Setup mode, which begins on the next page.
The infiNET EX gateway, CEN-RFGW-EX, is required for the MLX-2 to
communicate with a Crestron infiNET EX network. The gateway must be installed
and operational and in the Acquire mode before beginning the remote Setup mode
procedures. Refer to the latest version of the CEN-RFGW-EX Operations &
Installation Guide (Doc. 6706) for details (http://www.crestron.com/manuals).
6 • infiNET EX
™
LCD Handheld Remote: MLX-2 Operations Guide – DOC. 6739B