13
Time Lapse Video Cassette Recorder
✔
• The items for which “YES”
is set are recorded. The
items for which “NO” is
set at step 6 above are
not recorded.
12
Time Lapse Video Cassette Recorder
Changing the On-Screen Display
Selecting the On-screen Display
You can select whether or not to display the time, date,
frame counter, alarm counter, counter title.
1 Turn the power on to all devices used.
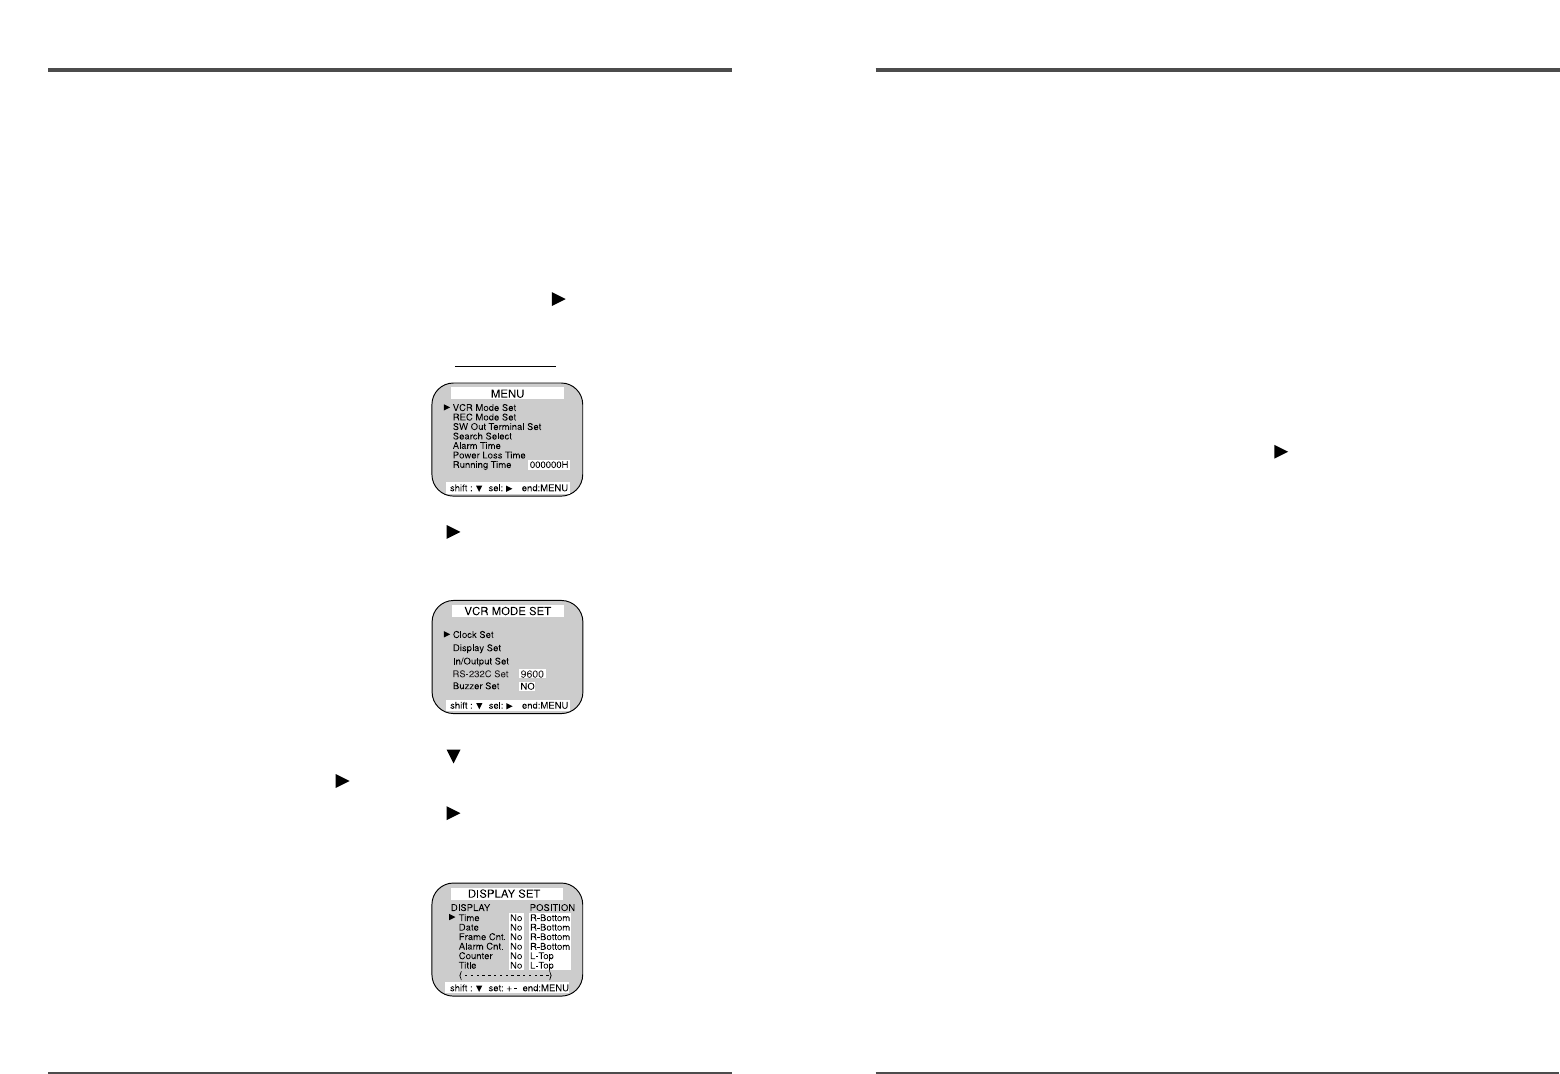
2 Press the MENU button. The initial MENU is
displayed. The arrow mark ( ) is located in “VCR
Mode Set”.
Initial MENU
3 Press the SHIFT button to select the VCR Mode
Set, then the VCR MODE SET menu is displayed.
4 Press the SHIFT button, until the arrow mark
( ) points “Display set”.
5 Press the SHIFT button to select Display Set, then
the DISPLAY SET menu is displayed.
6 Press the SET - (or +) button to set “YES” for the
functions described below.
Time................The time is displayed.
Date ................The Month-Day-Year is displayed.
Frame Cnt .......The number of frames is displayed.
Alarm Cnt........The number of alarms is displayed.
Counter...........The counter is displayed.
Title.................The title is displayed.
• A maximum of 20 characters can be used. (letters,
numbers or spaces)
7 Press the SHIFT button to set the display position.
8 Press the SET - (or +) button to set the position of
the time, date, frame cnt. alarm cnt. to “L-Bottom
(or R-Bottom)”.
• If any of 4 items is set, the position of 4 items is
changed identically.
9 Press the SET - (or +) button to set the position of
the counter and title to “C-Top” (or “R-Top” or “L-
Top”).
If one of 2 items is set, the position of 2 items is
changed identically.
L-Top / C-Top / R-Top
: Left Top / Center Top / Right Top
L-Bottom / R-Bottom
: Left Bottom / Right Bottom
10 Press the MENU button three times, the normal
screen is displayed.
The setting procedure is now complete.


