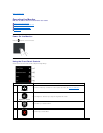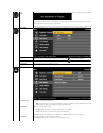
Auto
Adjust
Use
this key to activate automatic setup and adjust menu. The following dialog appears on a black screen as the monitor self
Auto Adjustment allows the monitor to self-
adjust to the incoming video signal. After using Auto Adjustment, you can further tune your monitor by using the Pixel Clock
(Coarse) and Phase (Fine) controls under Image Settings.
NOTE:
Auto Adjust does not occur if you press the button while there are no active video input signals or attached cables.
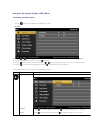
INPUT SOURCE
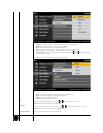
Use the INPUT SOURCE menu to select between different video signals that may be connected to your monitor.
VGA
Select VGA input when you are using the analog (VGA) connector. Push to select the VGA input source.
DVI-D
Select DVI-D input when you are using the Digital (DVI) connector. Push to select the DVI input source.
Scan for Sources
Select Auto Select to scan for available input signals.
COLOR SETTINGS
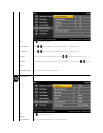
Use the Color Settingmenutoadjustthemonitor'scolorsettings.
Input Color Format
Allows you to set the video input mode to:
l RGB
: Select this option if your monitor is connected to a computer or DVD player using the HDMI cable or the HDMI to DVI adapter
l YPbPr: Select this option if your DVD player supports only YPbPr output.
Mode Selection
Allows you to set the display mode to:
l Graphics: Select this mode if your monitor is connected to your computer.
l Video: Select this mode if your monitor is connected to a DVD player.
NOTE: Depending upon the Display Mode you select the Preset Modes available for your monitor change.
Preset Mode
Allows you to choose from a list of preset color modes.
In the Graphics mode, you can set the color to the following preset values:


