


Accessing the Camera Help File
To access the camera’s help file, right-click the Dell Webcam Central icon in the notification area and click. Click Help from the menu and select Contents.
Manually Adjusting the Camera Settings
If you do not want the camera to use automatic settings, you can manually adjust the camera settings.
Setting the Contrast, Brightness, and Volume
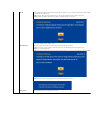
To set the contrast, brightness and volume:
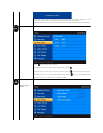
1.Right-click the Webcam Central icon in the system tray located in the lower right corner of the screen. Click Open Webcam Central.
2.In the Webcam Console window:
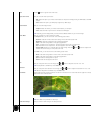
·Click the Settings icon and navigate to Settings - Picture Control. Adjust video settings, such as contrast and brightness.
·Click the Effects icon and navigate to Effects - Avatars. Adjust audio settings, such as volume level.
For more information about camera settings and other camera-related topics, see the camera’s Help file (see Accessing the Camera’s Help File).
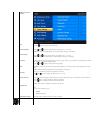
Setting the Resolution
To set the camera resolution using the Dell Webcam Central:
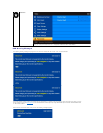
Resetting the Camera Defaults
ToresettheCamera settings using the Dell Webcam Central:
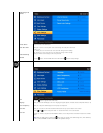
1. Right-click the Dell Webcam Central icon in the system tray located in the lower right corner of the screen. Click Open Webcam Central.
2. In the Webcam Central window:
- Click the Settings icon and navigate to Settings - Picture Control. Click Restore Default.
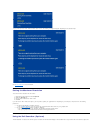
Installing and Using the Facial Recognition Software (FastAccess)
Installing the Facial Recognition Software (FastAccess) (Windows Vista®Operating
Systems Only)
To install the Facial Recognition Software (FastAccess):
1.
Right-click the Dell Webcam Central icon in the system tray located in the lower right corner of the screen. Click Launch Webcam Center.
The Dell Webcam Center window appears.
2.
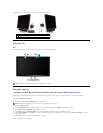
Click the Record Video tab.
3.
Configure settings by clicking the More Options
button located at the bottom center of the preview window. Click the Video Size box and select the size that you
want.
4.
Click the Snap Photo tab.
5.
Configure settings by clicking the More Options
button located at the bottom center of the preview window. Click the Photo Size box and select the size that you
want.
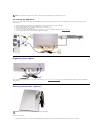
1.
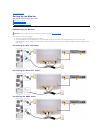
Insert the Dell "Drivers and Documentation" CD into the drive.
NOTE: Ensure that the USB cable is connected between the monitor and the computer.
2.
Choose "Facial Recognition Software".
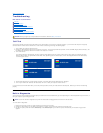
3.
The Install Shield Wizard automatically launches the setup application. Select the Language and click Next to continue.
4.
Read Software License Agreement and click Yes to continue.
5.
Click Browse to change Destination Folder where the software will be installed to and then click Next to continue.
6.
Choose Full Installation than click Next and follow the instructions to complete the installation. Alternatively, choose Custom Installation to select the