


Q-See Q25DVR4ES User's Manual
Q-See Q25DVR4ES User's Manual
Chapter 3: Installation - 3.2 Connecting Cameras and TV Monitor
Chapter 3: Installation - 3.3 Connecting Power Supply
Chapter 4: System Boot -4.1 Detecting Installed Hard Drive
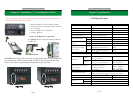
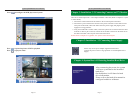
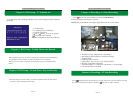
After connecting the power, the system
will boot-up and detect the installed
hard drive.
On the Monitor it will show the hard
drive information.
Please refer to the hard drive manual to
configure hard drive as Master.
Page 6
Page 21
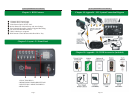
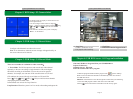
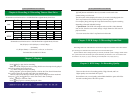
There are 4 camera inputs and 1 video output with BNC connectors (Refer to Chapter 2: Layout
-2.2 Rear Panel).
1. Connect the camera cables from the camera to the 4 Video Inputs on the DVR.
2. Connect the 4 power feeds for the cameras to the power connectors on the cable near the
video ports of the DVR, connect the other end to the power supply and plug the power
supply into a surge protector.
3. Using the included RCA to BNC cable, connect the yellow RCA connector from the cable
to the RCA video in port on the TV, connect the silver BNC connector on the other end of
the cable to the BNC video out port on the back of the DVR.
NOTE: Refer to Chapter 10: Appendix-10.1 System Connection Diagram
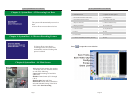
Please only use the power adapter supplied with the DVR.
Connect the power cord to a surge protector or Uninterruptible Power
Supply.
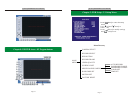
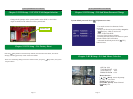
Press to configure the DVR play/record system.
Press to print the picture of DVR's playback
Press to play the video .