7
1. Introduction
Top Features
PC CARD
SOURCE
AUTO ADJUST
3D REFORM
LAMP
STATUS
POWERON/STAND BY
E
N
T
E
R
E
X
I
T
M
E
N
U
SELECT
2
11
3
6
8
4
109
5
12 1
7
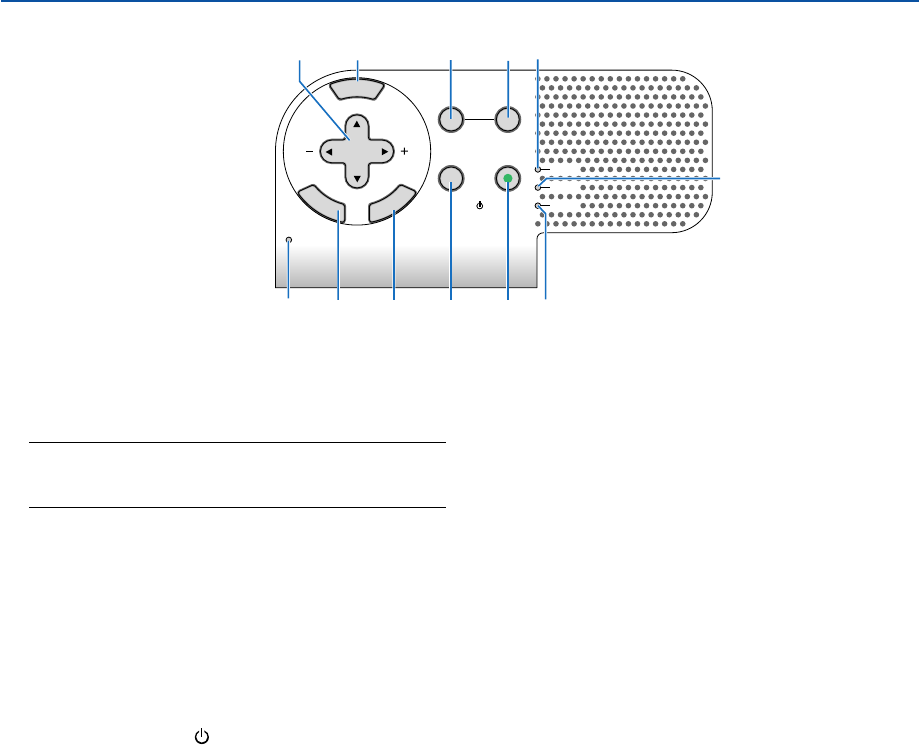
1. POWER Button (ON / STAND BY)
Use this button to turn the power on and off when the
main power is supplied and the projector is in standby
mode.
NOTE: To turn on the projector, press and hold this button
for a minimum of two seconds. To turn off the projector,
press this button twice.
2. STATUS Indicator
If this light blinks red rapidly, it indicates that an error
has occurred, the lamp cover is not attached properly
or the projector has overheated. If this light remains
orange, it indicates that you have pressed a cabinet
key while the Cabinet Button Lock is enabled. See the
Status Indicator section on page 123 for more details.
3. POWER Indicator (
)
When this indicator is green, the projector is on; when
this indicator is orange, it is in standby mode. See the
Power Indicator section on page 123 for more details.
4. SOURCE Button
Use this button to select a video source such as a PC,
VCR, DVD player or Viewer (PC card).
Press and release this button quickly to display the
Source List.
Each time this button is pressed for a minimum of ONE
second, the input source will change as follows:
Computer1 → Computer2 → Video → S-Video →
Viewer → Computer1 → ...
If no input signal is present, the input will be skipped.
5. AUTO ADJUST Button
Use this button to adjust an RGB source for an opti-
mal picture (See page
35).
6. PC CARD Access Indicator
Lights while accessing a PC card.
7. ENTER Button
Executes your menu selection and activates items
selected from the menu.
8. EXIT Button
Pressing this button will return to the previous menu
with saving changes.
While you are in the main menu, pressing this button
will close the menu.
9. SELECT ̆̄̇̈ (+) (–) / Volume Buttons
̆̄ : Use these buttons to select the menu of the
item you wish to adjust.
̇̈ : Use these buttons to change the level of a
selected menu item. When no menus appear,
these buttons work as a volume control.
When the pointer is displayed, these ̆̄̇̈ buttons
move the pointer.
10. MENU Button
Displays the menu.
11. LAMP Indicator
If this light blinks red rapidly, it's warning you that the
projection lamp has exceeded 2000 hours (up to 4000
hours in Eco mode) of service. After this light appears,
replace the lamp as soon as possible. (See page
119).
If this is lit green continually, it indicates that the lamp
mode is set to Eco. See the Lamp Indicator section
on page 123 for more details.
12. 3D REFORM Button
Press this button to enter 3D Reform mode to correct
the keystone (trapezoidal) distortion, and make the
image square.
