16
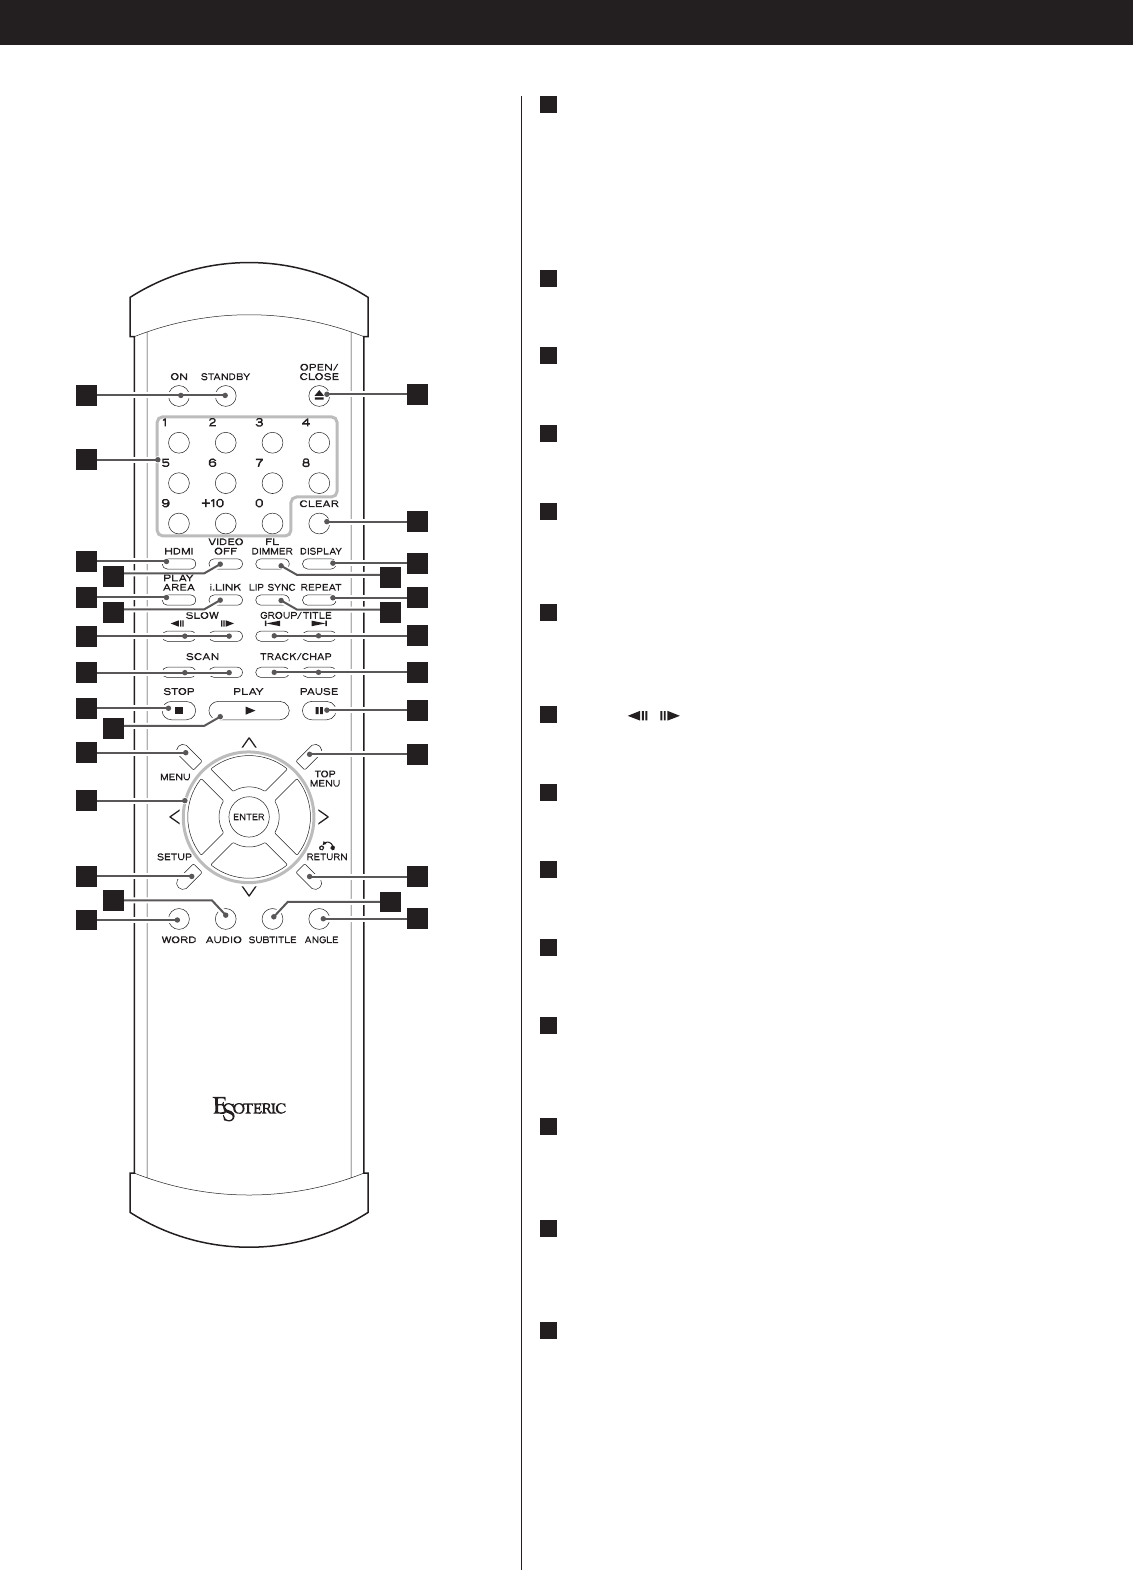
Understanding the remote control unit
ON/STANDBY
Use the ON button to turn the unit on. Use the STANDBY
button to turn it standby.
When you press the ON button, white buttons on the remote
control unit light for several seconds.
Number buttons
Use these for selecting tracks by number, etc.
HDMI
Use this to turn HDMI output on and off.
VIDEO OFF
Use this to turn all video on and off.
PLAY AREA
Use this with DVD audio and Super Audio CD discs to select
the playback area.
i.LINK
This button is used for controlling i.LINK output and will
become available after a future upgrade.
SLOW ( / )
Use these for slow motion video playback.
SCAN (m/,)
Use these for fast scanning during playback.
STOP
Use this to stop playback.
PLAY
Use this to start playback.
MENU
Use this button with menu-enabled DVD discs to bring up the
DVD menu.
Cursor buttons and ENTER
Use these cursor buttons for navigation of on-screen menus
and the ENTER button to confirm selections.
SETUP
Use this button to enter the main menu where you can set up
the parameters of the unit.
AUDIO
Use this to select the audio for playback.
N
M
L
K
J
I
H
G
F
E
D
C
B
A
B
C
D
E
F
I
K
M
L
G
H
A
J
O
R
X
Y
Z
b
P
Q
S
T
V
W
U
a
N


