


49
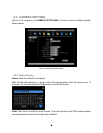
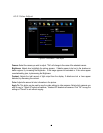
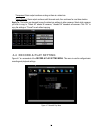
4.3.4 Video Loss
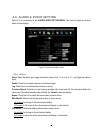
Figure 4-6 Camera Menu – Video Loss
Camera: Select the camera you wish to configure, “Title” will change to the title name of the selected
camera.
Enable: Check box to enable Video Loss detection.
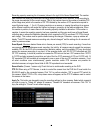
Log: Check box to record video loss events in the log.
Pre-alarm Record: Check box to start copying recorded video to the hard disk from 5 seconds before the
video loss. (Pre-alarm recording rate will follow the “Normal” frame rate setting)
Buzzer: Check box to enable the buzzer when a video loss event occurs.
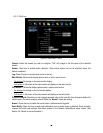
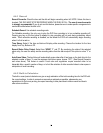
Email Notify: Check box to enable email notification when a video loss event occurs. Email operation
requires that valid email settings have been entered in the Network Setting/Email setup screen. (See
Section 4.6.2 Email for more information.)
Network Alarm: Check this box to send out a network alarm to a client PC when motion occurs. (This
feature requires PowerCon software on the client PC and proper settings for the Alarm Server in the
Network Setup menu; see Section 4.6.4 Alarm Server for more information.)
Alarm Output: This will transmit a signal through the alarm output relay. It can be set to either “NONE” (not
active), “1” or “2” (indicating which alarm relay is active).
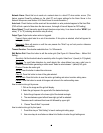
Output Type: Output action when alarm is triggered.
Timeout: Alarm output lasts for a set time duration. If this option is selected, a field will appear for
setting the duration. Time duration selectable from 1 to 150 seconds.
Permanent: Alarm will remain active until the user presses “Enter” key on front panel.