


6564
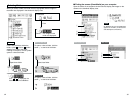
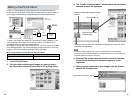
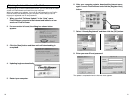
5. The Outlook Express or Outlook
mail transmission window opens
and the images are automatically
attached to your e-mail message.
Type in the address, title and your
message and then send the
message in the usual way.
Do not exit FinePixViewer until mail transmission is complete, as this will prevent the e-
mail with the images attached from being sent.
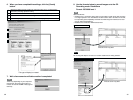
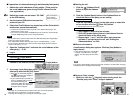
■ Setting the file size for attached images
When FinePixViewer attaches an image file to an e-mail message, it adjusts
the size of the image file in accordance with the “Mail Transmission Settings”.
✽
When an image is resized, the original image is not affected.
1. Click “Mail Transmission Settings” in the “Settings” menu.
2. Place a tick in the “Resize” checkbox and specify the number
of pixels (height and width) for resized images.
If you do not want to resize the image, deselect the “Resize” checkbox.
TIP
NOTE
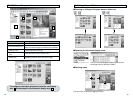
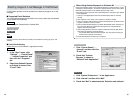
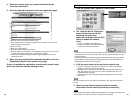
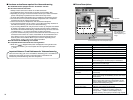
■ Attaching Images
1. Launch FinePixViewer.
In the “Start” menu, select “Programs” / “FinePixViewer” /
“FinePixViewer”.
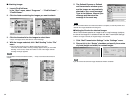
2. Click the folder containing the images you want to attach.
3. Click the thumbnails for the images to select them.
✽
Up to 10 images can be sent with one e-mail message.
4. With the images selected, click “Mail Sending” in the “File”
menu.
✽
You can send a total of up to 1 MB of image data at one time.
If the total exceeds 1 MB, a warning message appears when you click “Mail
Sending”. If this occurs, reduce the number or size of the images until the
message no longer appears.
Use the Batch Format Conversion function ( / P.56) to convert the file format for
movies.
TIP