–
14
–
EN
VCR Functions
Warning: Unauthorized recordings of copyrighted video tapes may be an infringement of copyright laws.
DIGITAL
AUDIO OUT
COAXIAL
ANT-OUT
ANT-IN
AUDI O
OUT
DVD DVD/VCR VCR
S-VIDEO
OUT
COMPONENT
VIDEO OUT
AUDIO OUT
VIDEO OUT
AUDIO IN
VIDEO IN
L
Y
C
B
C
R
L
R
ANT-OUT
ANT-IN
VCRDVD/VCR
COMPONENT
VIDEO OUT
AUDIO IN
VIDEO IN
AUDIO OUT
VIDEO OUT
Y
C
B
C
R
L
R
R
AUDIO OUT
VIDEO OUT
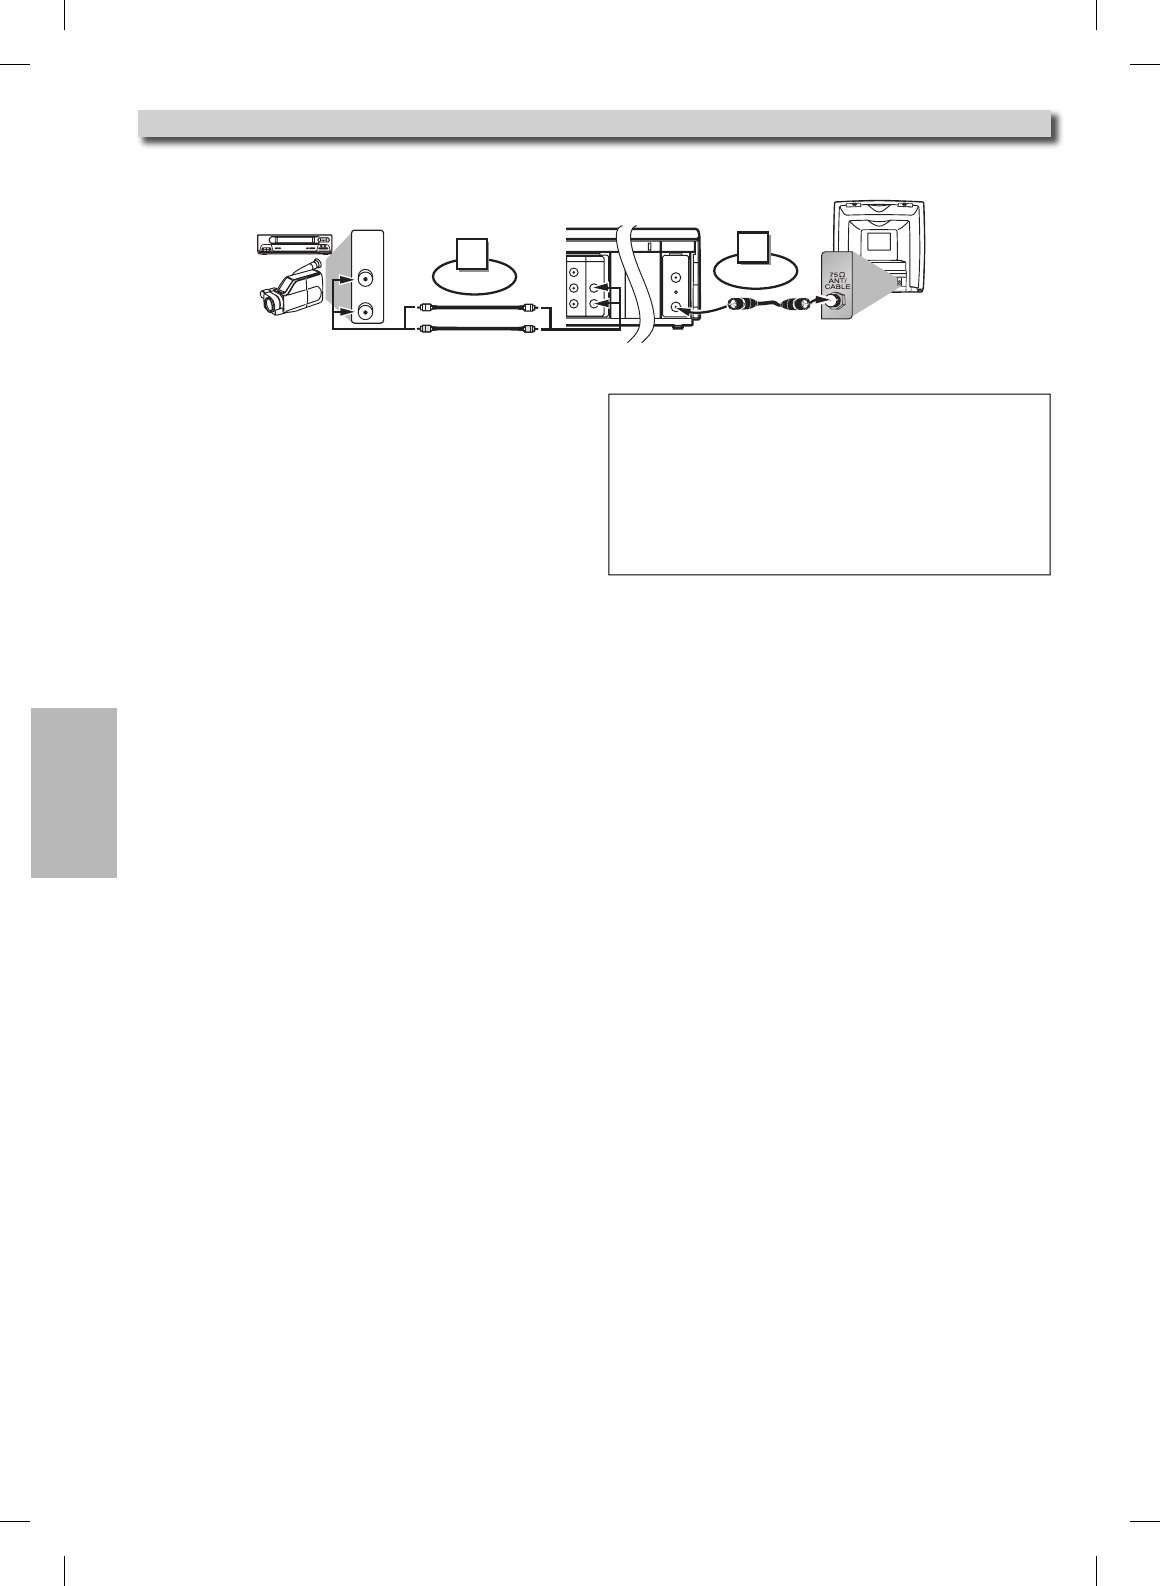
Connect
1
Audio/Video cables
(commercially available)
RF cable
(supplied)
(Back of TV)
(Back of DVD/VCR*)
(Back of another source)
or
2
Connect
*Front input jacks are also available
1) Insert a pre-recorded tape into another VCR for playing.
2) Insert a tape with its record tab into this unit for recording.
3) Press [SPEED] on the remote control of the recording unit to
select the desired recording speed (SP/SLP).
4) Select the “L1” or “L2” position on the recording unit.
• To use the input jacks on the back of this unit, select “L1”
position by pressing [0], [0], [1] on the remote
control or [CHANNEL K/L] on this unit.
• To use the input jacks on the front of this unit, select “L2”
position by pressing [0], [0], [2] on the remote
control or [CHANNEL K/L] on this unit.
5) Press [RECORD] on the recording unit.
6) Begin playback of the tape in another source.
7) To stop recording, press [STOP/EJECT C A] on the record-
ing unit, then stop playback of the tape in another source.
Hint
• For best results during dubbing, use the front panel controls whenever
possible. The remote control might affect another source’s operation.
• Always use video-quality shielded cables with RCA-type connectors.
Standard audio cables are not recommended.
• You can use a video disc player, satellite receiver or other audio/video
component with Audio / Video outputs.
• “L1” or “L2” is found below the lowest memorized channel.
(Example: CH02)
• “L2” input jacks are on the front of this unit.
Copying a Video Tape
E8C1UCD_EN.indd 14E8C1UCD_EN.indd 14 2007/04/03 9:49:112007/04/03 9:49:11


