


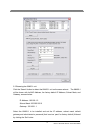
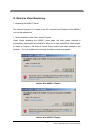

2.3. Confirm communications
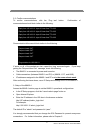
To confirm communications, click the ‘Ping test’ button. Confirmation of
communications should look similar to the following:
Reply from 192.168.1.2: byte=32 time=2ms TTL=225
Reply from 192.168.1.2: byte=32 time=2ms TTL=225
Reply from 192.168.1.2: byte=32 time=2ms TTL=225
Reply from 192.168.1.2: byte=32 time=2ms TTL=225
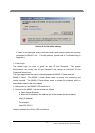
Communication failure would look similar to the following:
Request timed ‘OUT’
Request timed ‘OUT’
Request timed ‘OUT’
Request timed ‘OUT’
Pin
g
statistics for 192.168.1.2:
If some, or all, of the packets are lost, repeat the ‘ping’ command again. If you keep
getting the ‘Request timed Out’’ message, check the following:
• The 68A00-1 is connected to power and turned on.
• Cable connections (between 68A00-1 and PC) or (68A00-1, PC, and HUB).
• IP addresses assigned to the 68A00-1 and PC are in the same subnet mask.
After confirming the items above, rerun IP Setup and reassign the IP to the 68A00-1.
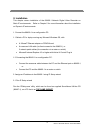
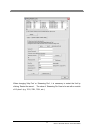
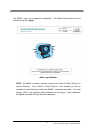
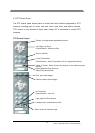
3. Setup of the 68A00-1
Access the 68A00-1 admin page to set the 68A00-1 operational configurations.
• In the IP Setup program, click the ‘Launch admin page’ button or
• Open Internet Explorer.
• Enter the IP address in the URL box in the browser as below:
http://(IP address)/admin_login.html
For example:
http://192.168.1.2/ admin_login.html
The default ID is “admin” and password is “pass”.
It is strongly recommended that you change the ID & Password to prevent anonymous
connections. For further information, please refer to Chapter 5.
21
68A00-1 NETWORK DIGITAL VIDEO RECORDER