


-7-
Learning about your new TV
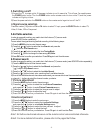
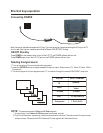
Selecting a location for the TV
1)Place the TV on the floor or on a sturdy platform in a location where light does not directly hit the screen.
2)Place the TV far enough from the walls to allow proper ventilation. Inadequate ventilation may cause
overheating, which may damage the TV.
Wall Mounting your TV
Caution: Do not plug the TV in until you have finished connecting all of your equipment.
Connecting your TV
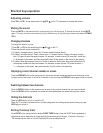
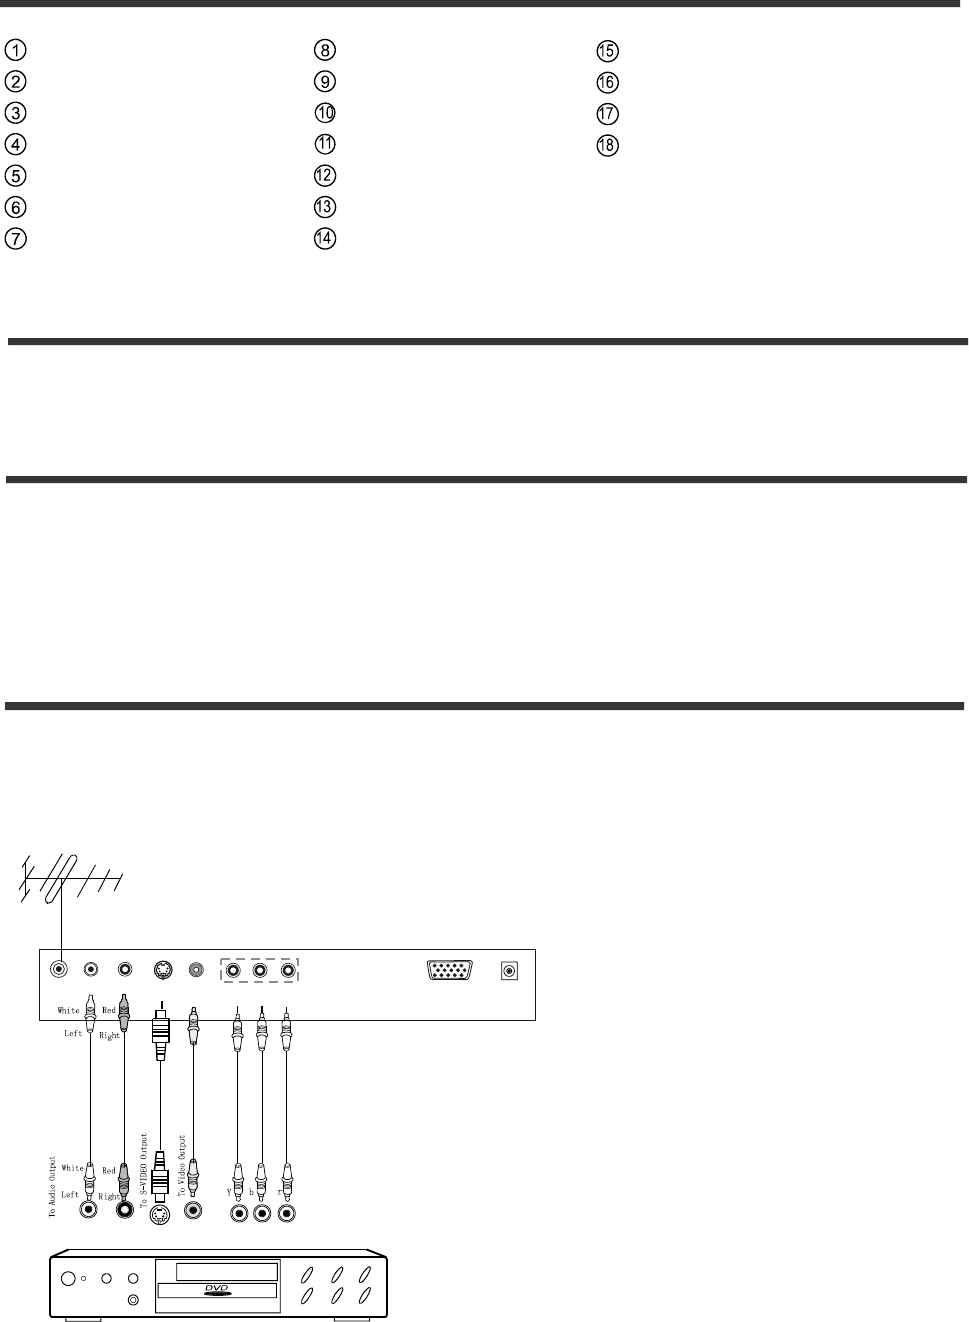
Follow the instructions below to hookup a VCR, DVD, satellite receiver, camcorder, audio amplifier, etc.(cables not included)..
Use the SOURCE button on your remote control to select signal sources.
Connecting audio/visual equipment
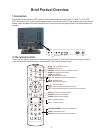
Remote control sensor
POWER button (standby)
POWER indicator
Channel up / cursor up
Channel down / cursor down
Volume up / cursor right
Volume down / cursor left
TV / AV / PC input select
MENU button
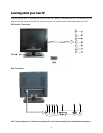
AV audio input L
CATV antenna input
AV Video input
S-Video input
Y PB/C
B PR/CR input (Component)
PC VGA input
DC POWER input
AV audio input R
Headphone jack
POWER
VGA
ANT.IN
L R
AUDIO
S-VIDEO
VIDEO
Y
P
B
P
R
C
C
VCD, DVD, STB
Pb
Pr
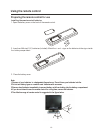
The LCD1504US is a VESA compliant LCD TV which means that it can be wall mounted using a standard VESA
compliant mounting bracket. VESA compliant mounting brackets are available at your local electronics store.
The sizing of the bracket should be 100mm x 100mm. Please consult the store you are purchasing the bracket
from for details. Note that the base of the TV needs to be removed before attaching the wall mounting bracket.
Simply place the LCD screen, face down, on a soft, cushioned, non slip, non abrasive surface, making sure
that it cannot slip or slide. Now remove the screws that are holding the base in place.
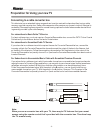
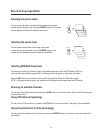
Connection Details:
Connect using AV inputs (RCA Composite)
- Use 1, 2, 4
Connect using S-Video inputs
- Use 1, 2, 3
Connect using Y Pb/Cb Pr/Cr inputs (Component)
- Use 1, 2, 5, 6, 7
1
2
34
5
6
7