


58
On-Screen Display
TV Guide On Screen
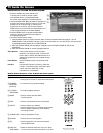
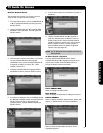
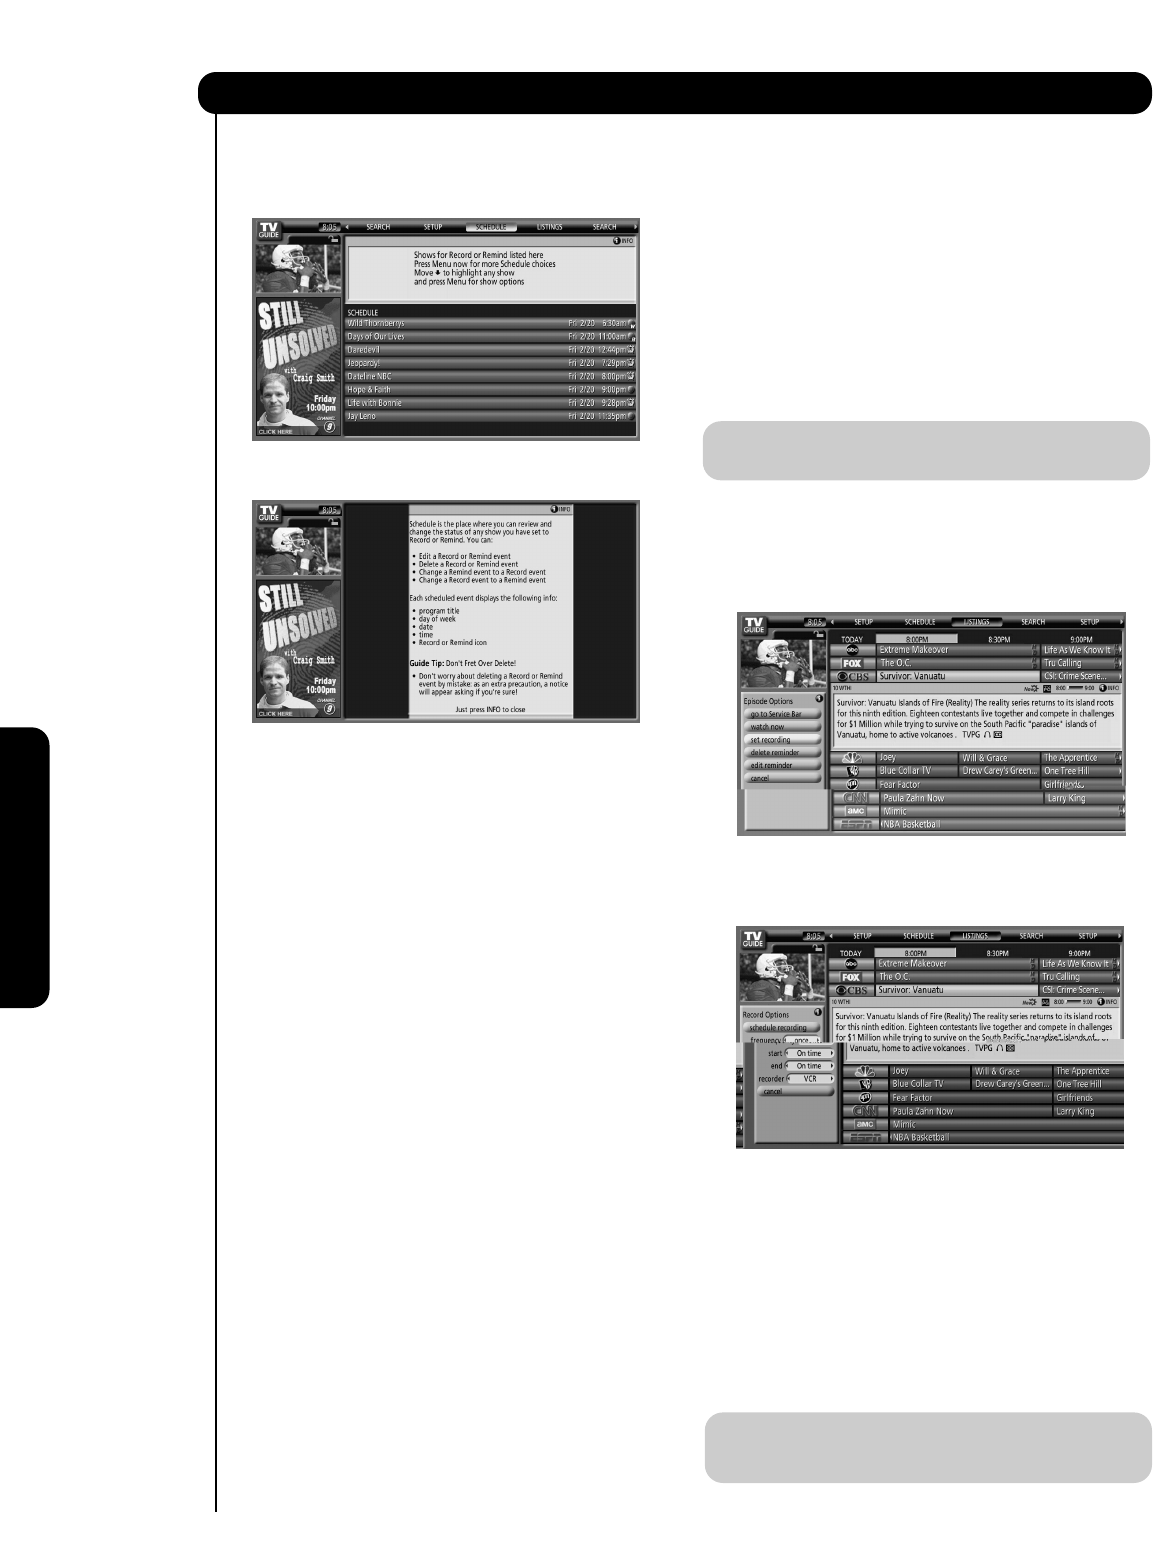
SCHEDULE:
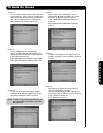
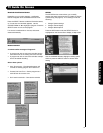
The SCHEDULE Service screen allows you to review,
edit and delete Record and Remind events.
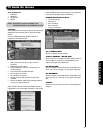
Press the INFO button while the SCHEDULE Service is
highlighted on the Service Bar to display a Help screen.
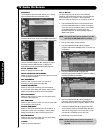
Use the CURSOR PAD ̆ or ̄ to highlight an event,
and then press the MENU button to display the
applicable Schedule Options Panel Menu options.
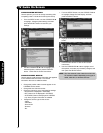
GO TO SERVICE BAR:
Select to highlight the Service Bar.
WATCH NOW/TUNE TO CHANNEL:
Select to exit the TV Guide On Screen system and tune
to the highlighted program.
SET RECORDING:
Select to open a menu in which you can set a
recording for the program (see page 58).
DELETE RECORDING:
Select to remove the recording from the schedule.
A confirmation Panel Menu will display. Select YES to
delete the recording or NO to exit the Panel Menu.
EDIT RECORDING:
Select to open a menu in which you can edit existing
information (see page 58).
SET REMINDER:
Select to open a menu in which you can set a reminder
for the program (see page 60).
DELETE REMINDER:
Select to remove the reminder from the schedule. A
confirmation panel menu will display. Select YES to
delete the reminder or NO to exit the panel menu.
EDIT REMINDER:
Select to open a menu in which you can edit existing
reminder information (see page 60).
CANCEL:
Select to exit the Panel Menu.
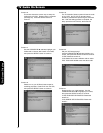
How to Record:
The Record options can be set in the LISTINGS,
SEARCH, and SCHEDULE Services. You can also edit
record settings for a program in the SCHEDULE
Services. There are 3 ways to set a program to record.
• Use the RECORD button on the Remote Control.
Press the RECORD button to record the program
Once with the current default setting. Each press
of the RECORD button cycles through the
RECORD frequency of Once (default), Regularly,
Weekly and Cancel.
NOTE: The specific Record Icon appears on the tile
each time the RECORD button is pressed.
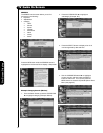
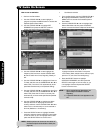
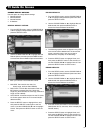
• Use the Panel Menu record features.
1. Use the CURSOR PAD ̆ or ̄ to highlight a
program and press the MENU button to access the
Panel Menu.
2. Use the CURSOR PAD ̄ to highlight Set
Recording and press the SELECT button to display
the Record Options Panel Menu.
3. Use the CURSOR PAD ̆ or ̄ to highlight the
Frequency field and press the CURSOR PAD ̇ or
̈ to select among Once, Regularly, Weekly or Off.
4. Press the CURSOR PAD ̄ to highlight the Start
field, and then press the CURSOR PAD ̇ or ̈ to
select in the range from 120 minutes early to 120
minutes late. The default time is ON Time.
5. Repeat step 4 for the End Field.
NOTE: Default options can be set for the values in
the Record Options Panel menu fields (see
page 63).