


FIRST TIME USE
13
TV Setup Wizard
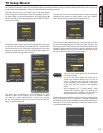
The fth step will start the scanning feature to nd the channels
available on the antenna or cable system. Press the SELECT
button on the remote control to start the channel scan.
The sixth step is the scanning process of the channels, it will rst
the scan the analog channels and then the digital channels. The
scanning process will show how many channels have been found.
Please be patient while the scanning process searches for the
available channels in your area. If you wish to cancel the process,
press the SELECT button on the remote control.
Once the user cancels the wizard, the wizard will •
not be shown again.
If you see the screen above and if you did not •
connect your Antenna cables to your TV, turn off
your TV, unplug the power cord and connect your
cables according to the applicable connections
in the “First Time Use” section of this Operating
Guide.
After completing the TV Setup Wizard, these •
screens will not appear again. For updating and
adding the channels available in your area refer to
the Add Channels to List feature on page 39.
The last step is the completion of process, it shows a brief message
and you are ready to view TV programing. This nal message will
be shown for a few seconds and then the rst detected channel will
be tuned in. You may also press EXIT on the remote control to tune
to the rst detected channel.
Your Hitachi LCD television has a TV Setup Wizard feature which has the ability to help you easily setup the rst time you turn on your TV
and nd the channels available in your area. Please follow the instructions below.
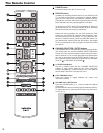
The First time you turn on your Hitachi LCD TV the setup wizard
screen will appear. The rst step is to set the language of your TV
On Screen Menu. Select the language that you prefer. Use the p
and q CURSOR to select language and press the SELECT button
on the remote control.
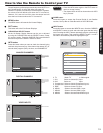
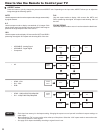
The second and third steps are to set the date and time. There are
two options; one for automatic time setting in which you will select
only the time zone in your area and the second option is a manual
setup for the date and time. Use the CURSOR pad to select and
change the options with the remote control.
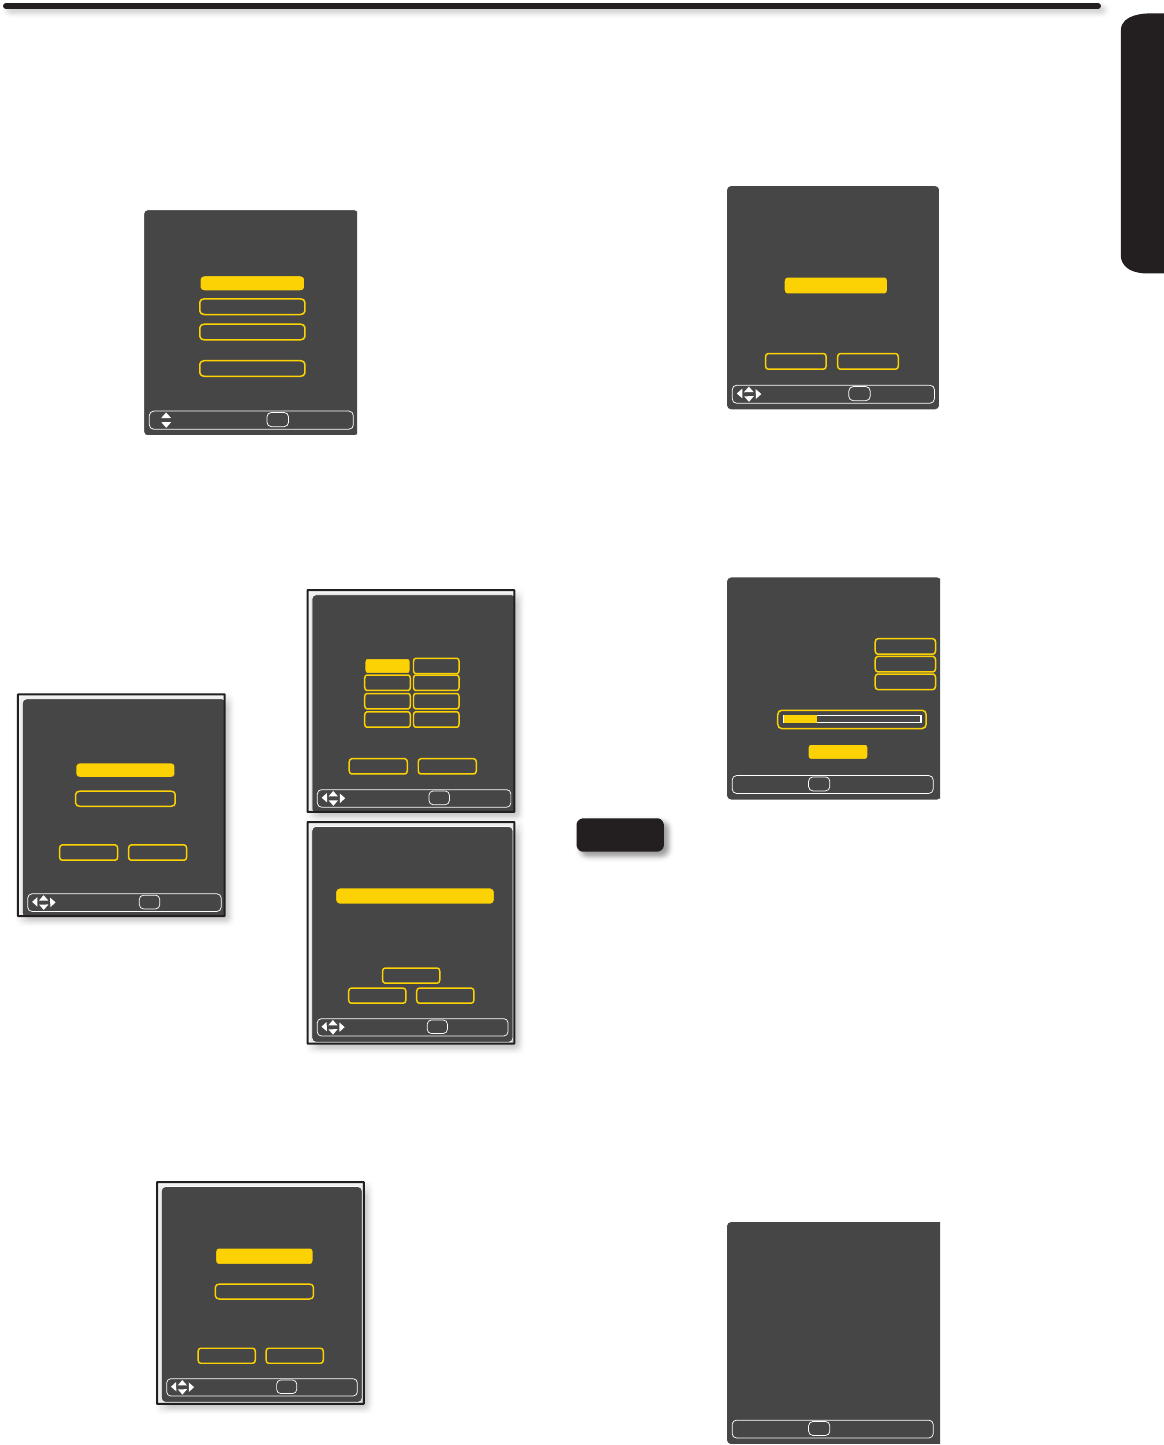
The fourth step is designed to nd broadcasting or cable
channels. There are two options, Air for an external antenna
and Cable for a cable system provider in your home. Use the
p
and q CURSOR to select a source and press the SELECT
button on the remote control.
NOTES
Setup Wizard (1/7)
Please select language ...
English
French
Spanish
Cancel
SelectNavigate
SEL
Setup Wizard (2/7)
Please set time mode ...
Auto
Previous
Manual
Cancel
SelectNavigate
SEL
Setup Wizard (3/7)
Please select Time Zone ...
NST
Previous
AST
Cancel
SelectNavigate
SEL
CST
EST
PST
HST
AKST
MST
Setup Wizard (3/7)
Please enter the date and time ...
Year
Previous
Month
Cancel
SelectNavigate
SEL
Time
Date
Jan
12:00 AM
1
2009
OK
Setup Wizard (4/7)
Please select TV RF tuning band ...
Air
Previous Cancel
SelectNavigate
SEL
Cable
Setup Wizard (5/7)
Please check that the RF cable is
connected properly.
Start
Previous Cancel
SelectNavigate
SEL
Setup Wizard (6/7)
Searching, please wait ...
Searching Analog CH
Channel 3
Cancel
SEL
Analog Channels Found
Digital Channels Found
Cancel
15
10
10%
Setup Wizard (7/7)
Exit
EXIT
Congratulations. TV setup is done.