


13
EN
INTRODUCTION
CONNECTION
INITIAL SETTING
WATCHING TV
I
NTIAL SETTING
OPTIONAL SETTING OPERATING DVD
SETTING DVD
TROUBLESHOOTING INFORMATION
Initial Setup
This section will guide you through the unit’s initial setting which includes
selecting a language for your on-screen menu and auto channel scan,
which automatically scans and memorizes viewable channels.
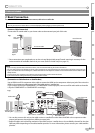
Before you begin:
Make sure if the unit is connected to antenna or cable. When you plug the
AC power cord into the wall outlet, or after a power failure, the unit will
not accept discs nor will it respond to any key commands about 10 seconds.
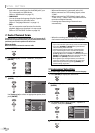
1
After making all the necessary connections, press
[POWER] to turn on the unit.
Starting up the unit take a few moments. Meanwhile,
any key input is invalid.
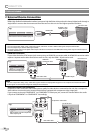
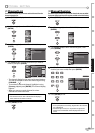
2
Use [Cursor
K
/
L
] to select the on-screen language
from the choices on the right side of the TV screen.
(English / Español / Français)
Initial Setup
Initial Setup
Select the language for setup display.
Elija el idioma de ajuste.
Sélectionner langue écran config.
Select Enter Exit
SETUP
Español
Français
ENTER
English
“Initial Setup” menu on step 3 will be displayed in the
selected language after you press [ENTER].
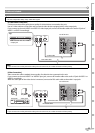
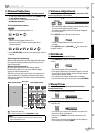
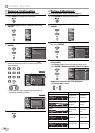
3
Use [Cursor
K
/
L
] to select “Air” for TV channels or
“Cable” for CATV channels, then press [ENTER].
Initial Setup
Initial Setup
Air
Cable
Select Enter Exit
SETUP
Back
BACK
ENTER
Make sure the antenna is connected to "ANT.IN" jack.
Select the destination of "ANT.IN" jack.
Air
Cable
Or
ANT.IN
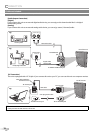
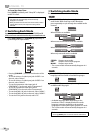
Scanning and memorizing of channels start
automatically.
Initial Setup
Initial Setup
Now the system is scanning for channels,please wait.
Exit
SETUP
5%
Analog channels 1ch
Digital channels 0ch
When the scanning and memorizing are completed,
the lowest memorized channel in the broadcasting
will be displayed.
5
•
•
•
•
Note:
• If you connect the cable system directly, contact the CATV
installer.
• If you press [POWER] or [SETUP] during auto channel
scan, this setting will be canceled.
• The initial auto channel scan function can be executed
for either “Air” or “Cable” only once. When you change the
connection (Air/Cable), set auto channel scan again. (Refer
to page 14.)
• You can cancel or exit the initial auto channel scan menu
by pressing [SETUP].
• If there is no signal input from the antenna terminal and
no operation for several seconds after you turn on the unit,
“Helpful Hints” appears. Follow the instructions listed on
the TV screen.
No channel is registered.
Press and hold "ENTER" key on the remote control for 3 seconds.
Contact support hotline provided on manual or back of unit.
Sin canal registrado.
Pulse durante 3 segundos la tecla "ENTER" en el control remoto.
Llame teléfono de apoyo en manual o atrás de TV.
Pas de chaîne consign.
Enfoncez "ENTER" 3 secondes sur la télécommande.
Contacter numero d'urgence dans manuel ou arrière appareil.
2-2
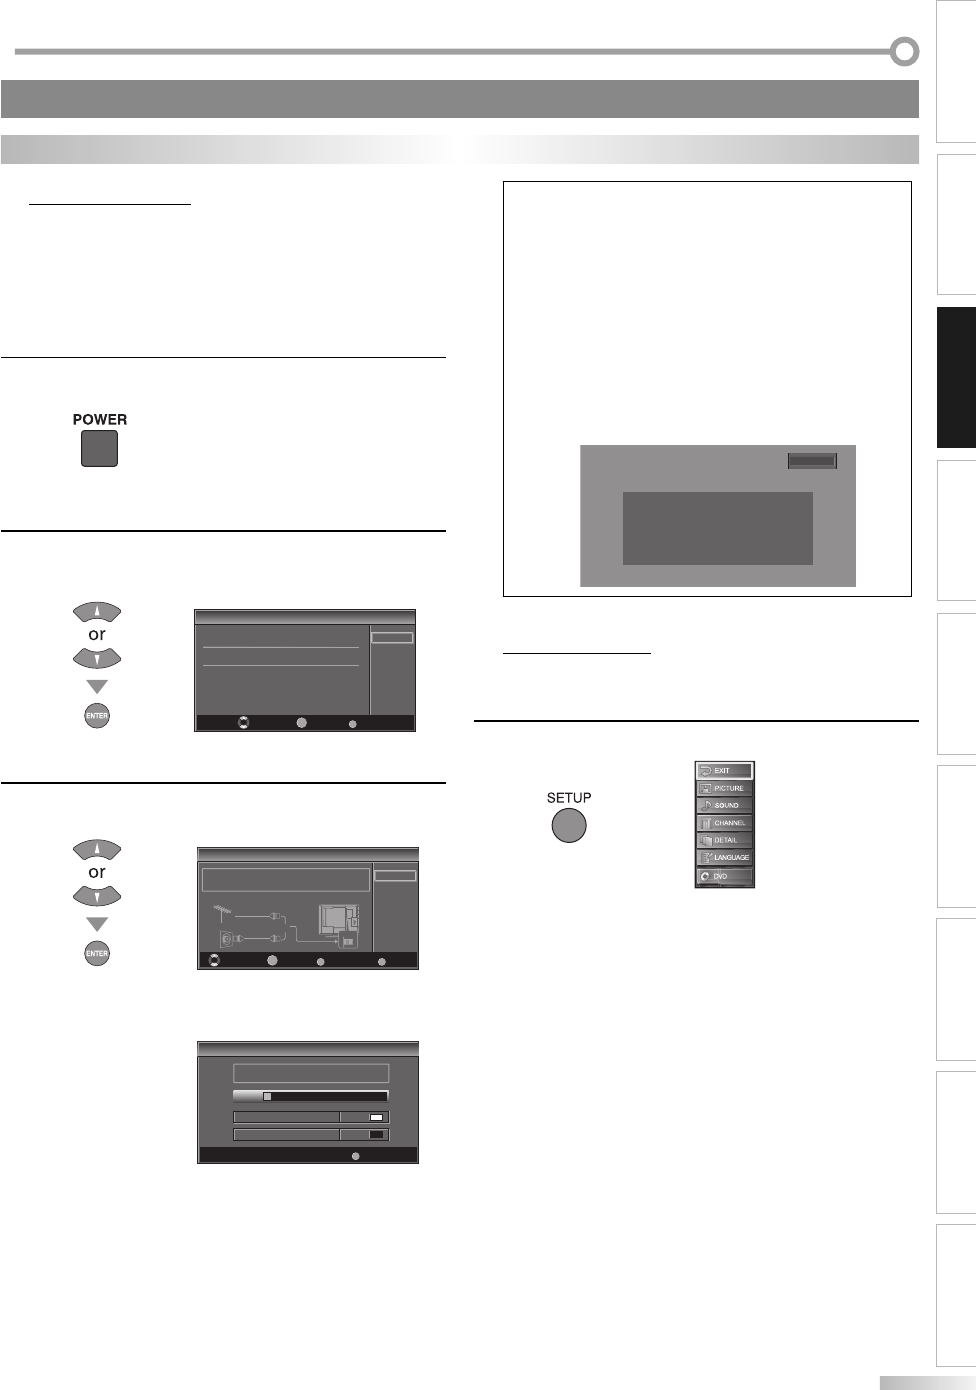
Main Menu
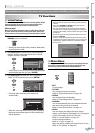
This section describes the overview of the main menu displayed when you
press [SETUP]. For more details, see the reference page for each item.
The main menu consists of the function setting items below.
Press [SETUP].
EXIT
To exit settings.
PICTURE
You can adjust the picture quality.
(Refer to “Picture Adjustment” on page 20.)
SOUND
You can adjust the sound quality.
(Refer to “Sound Adjustment” on page 21.)
CHANNEL
You can automatically scan the viewable channels
and remove those that are undesired.
(Refer to “Auto Channel Scan” on page 14.)
DETAIL
You can change the display format for closed
caption, which displays the dialogue of a TV program
or other information across the TV screen.
(Refer to “Closed Caption” on page 22.)
Set the viewing limitations.
(Refer to “V-chip” on page 24.)
Adjust the position, stability and clarity of the PC screen.
(Refer to “PC Settings” on page 26.)
5
•
•
•
•
•
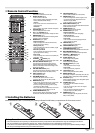
These operations are accessible by remote control. Some may also be accessible by controls on the main unit.
TV Functions