24 EN
RETURN TO NORMAL
DISPLAY
6
Press CH SET.
● To input the station name, see page 25.
● To change positions, see “Change Station Channel
Position”.
To A637EH Owners:
When Receiving A Scrambled Broadcast
Make sure that the AV2 SELECT switch is set to “DECODER”
(੬ pg. 4).
1– Perform steps 1 and 2 in the left column.
2– Press PUSH JOG%
fi
to select the position of the channel
broadcasting the scrambled programmes, then press OK
three times.
3– Press PUSH JOG until “OFF” (decoder setting) begins
blinking, and set it to “ON” by pressing PUSH JOG%
fi
.
4– Press OK to access the Confirmation display.
● Repeat steps 2 – 4 for each additional channel.
5– Press CH SET.
Storing Channels Manually
Store channels that were not stored during Auto Channel Set.
USING THE CONFIRMATION DISPLAY
ACCESS CH. SET DISPLAY
1
Press and hold CH SET for more than 2 seconds.
“AUTO” appears on the front display panel.
ACCESS CONFIRMATION
DISPLAY
2
Press PUSH JOG
%
fi to select “MANU”(AL), then press
OK. The Confirmation display appears.
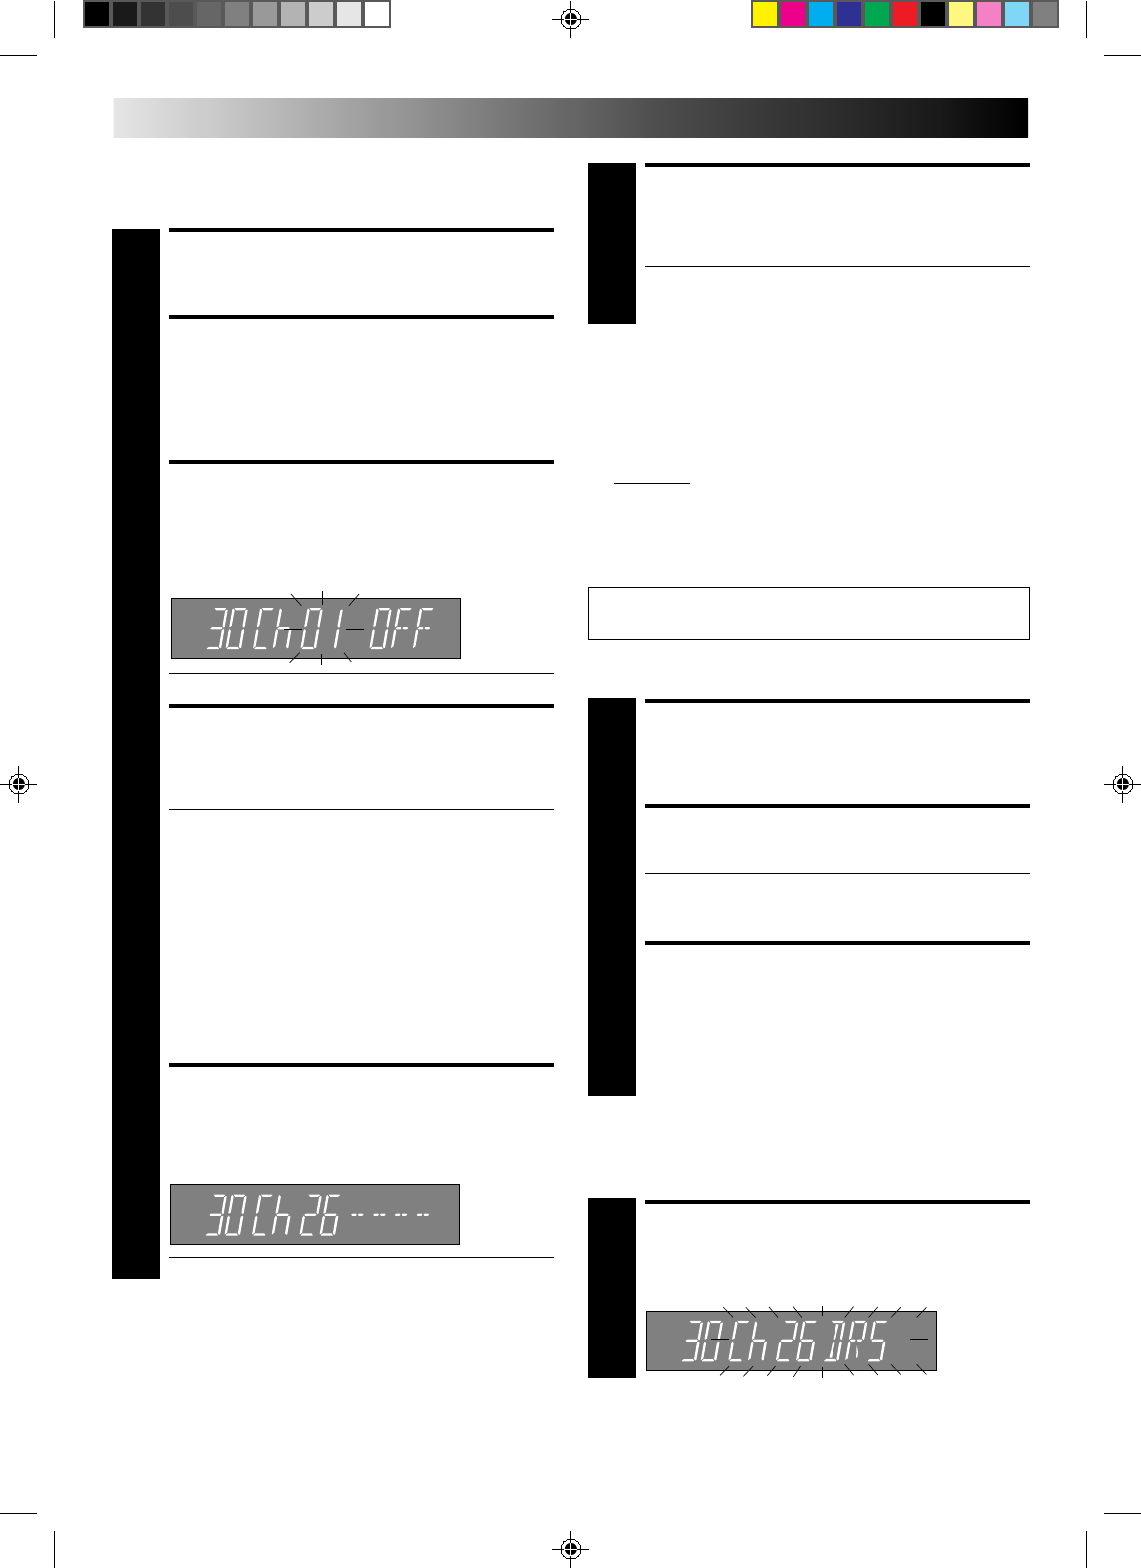
SELECT POSITION
3
Press PUSH JOG%
fi
is until an open position in which
you want to store a channel is displayed, then press
OK. The Manual Ch. Set display appears.
● Decoder setting appears only with A637EH.
INPUT CHANNEL
4
The channel number “01” appears blinking.
Press the NUMBER keys to input the channel number
you want to store.
● For fine tuning adjustment, press PUSH JOG
until the channel number blinks, then press PUSH
JOG%
fi
. While tuning, “
–
”, “–” or “
–
” appears.
● If necessary, to change the band between Ch(regular)
and CC(cable), press PUSH JOG until Ch or CC is
blinking, then press PUSH JOG %fi to select the
band.
● (For A637EH) When storing a channel that sends
scrambled broadcasts, press PUSH JOG until “OFF”
(decoder setting) blinks, then press PUSH JOG
%
fi to
set to “ON” (“OFF” is the default setting).
Make sure that the AV2 SELECT switch is set to “DE-
CODER” (੬ pg. 4).
ENTER NEW CHANNEL
INFORMATION
5
Press OK or STORE, and the Confirmation display
appears.
● Repeat steps 3 through 5 as necessary.
Channel Position
≠
Decoder setting
≠
Channel
≠
fi
%
%
fi
%
%
fi
SELECT STATION
1
Press PUSH JOG%
fi
until the station you want to
delete is displayed.
DELETE STATION
2
Press CANCEL.
● The stations following the cancelled station all move
up one position.
● Repeat steps 1 and 2 as necessary.
RETURN TO NORMAL
DISPLAY
3
Press CH SET.
Delete A Channel
Change Station Channel
Position
SELECT ITEM
1
Press PUSH JOG
%
fi until the item you want to move is
displayed. Then press OK and the station name (or “– –”)
and its channel number begin blinking.
Perform steps 1 and 2 of the previous procedure to access
the Confirmation display before continuing.


