33
?
– –:– –
12
3
4
65
7
8
9
0
2
4
1
Edit From
A Camcorder
AUX
PR
You can use a camcorder as the source player and your video
recorder as the recorder.
MAKE CONNECTIONS
1
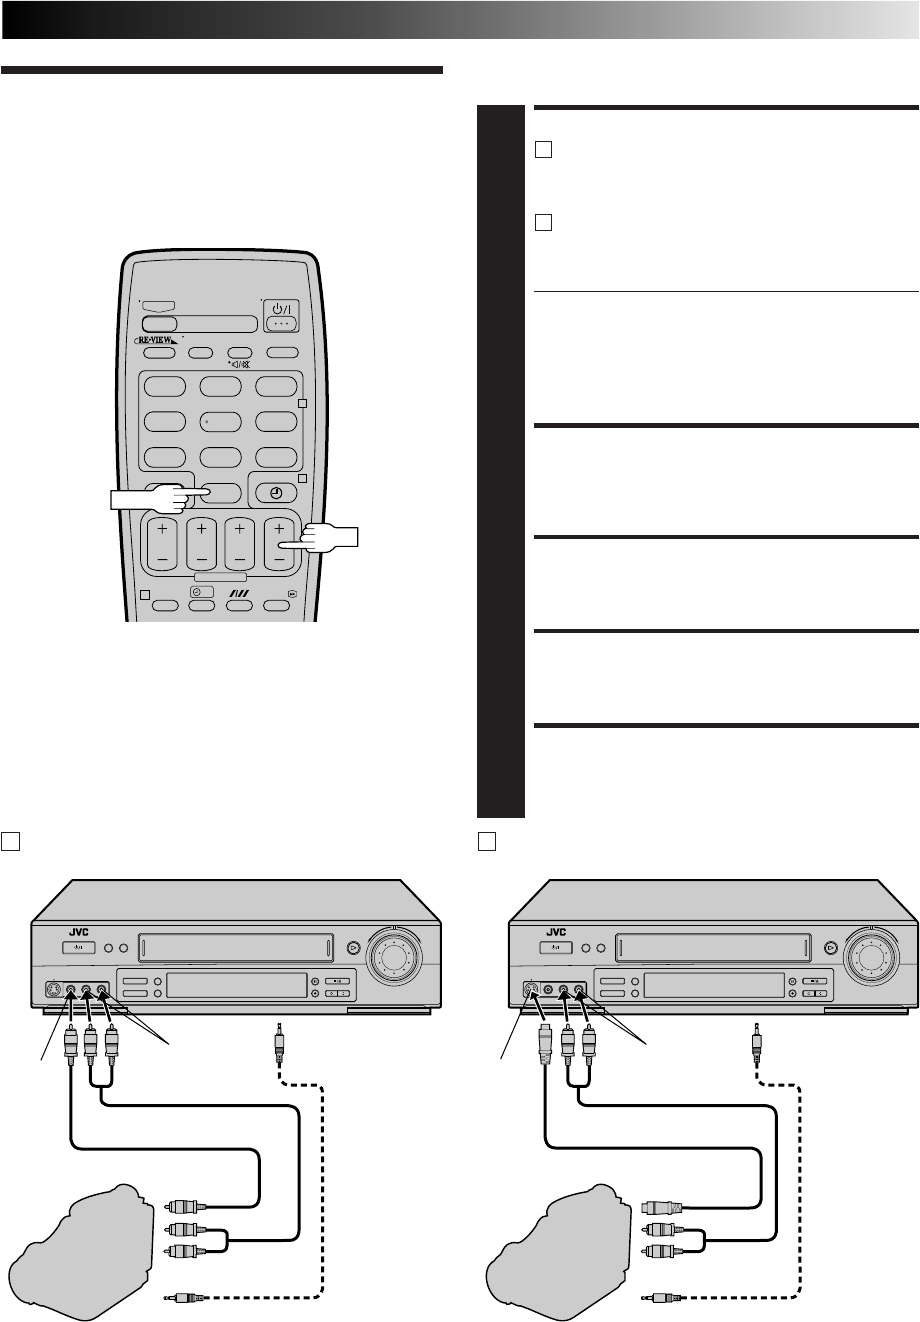
A
If the camcorder has no S-VIDEO output connector...
... connect the camcorder’s AUDIO/VIDEO OUT
connectors to the recorder’s front panel AUDIO/
VIDEO input connectors.
B
If the camcorder has an S-VIDEO output connector...
... connect the camcorder’s S-VIDEO OUT and
AUDIO OUT connectors to the recorder’s front
panel S-VIDEO and AUDIO input connectors.
● When using a monaural camcorder, connect its
AUDIO OUT connector to the AUDIO L input
connector on your recorder.
● When a Master Edit Control-equipped JVC camcorder
is used, the camcorder is capable of controlling the
recorder. Refer to the camcorder’s instruction manual
for operating procedure.
SET RECORDER’S INPUT MODE
2
Press AUX and/or PR to select "F-1" for the AUDIO/
VIDEO input connectors, or "S-1" for the AUDIO/
S-VIDEO input connectors, depending on the connec-
tors being used.
SET EDIT MODE
3
See "Picture Control" on page 32.
START CAMCORDER
4
Engage its Play mode.
START RECORDER
5
Engage its Record mode.
Mini-Plug Cable
(not provided)
(JVC camcorder
only)
VIDEO OUT
EDIT
Camcorder
VIDEO
input
Recorder
To rear panel PAUSE
connector
AUDIO OUT
Video Cable (not provided)
Player
AUDIO input
A If the camcorder has no S-VIDEO output connector...
Mini-Plug Cable
(not provided)
(JVC camcorder
only)
S-VIDEO OUT
EDIT
Camcorder
S-VIDEO
input
Recorder
To rear panel PAUSE
connector
AUDIO OUT
Audio Cable (not provided)
Player
B If the camcorder has an S-VIDEO output connector...
AUDIO input
S-Video Cable (not provided)
Audio Cable (not provided)
NOTES:
●
All necessary cables can be obtained from your dealer.
●
You can also use another video recorder as the player instead
of a camcorder.
●
When you select "EDIT" to dub tapes in step 3, be sure to
select "AUTO" (or "NORM" when "B.E.S.T." is set to "OFF")
after you finish dubbing the tapes.


