20
Manual Timer Programming
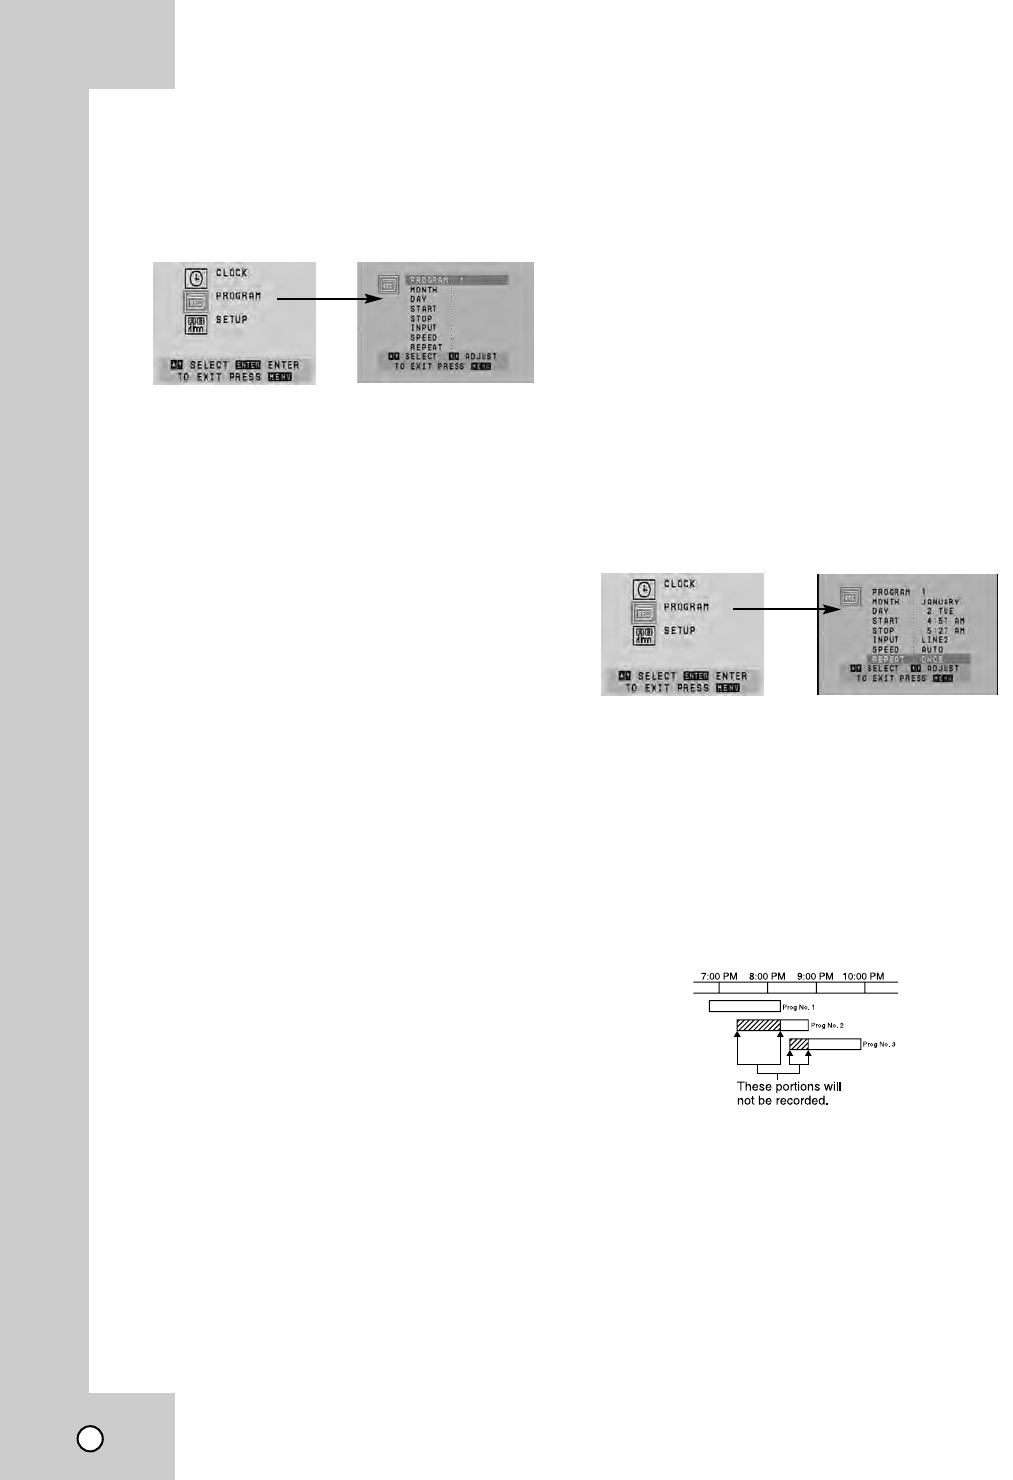
1. Press SETUP MENU and the main menu
appears.
2. Use v / V to choose the PROGRAM option and
press ENTER (OK).
If eight programs are already entered, the FULLY
PROGRAMMED message appears for a moment
and then PROGRAM 1 appears on the TV
screen.
3. Use the v / V buttons to switch between the
program options, and the b / B buttons to input
the program information:
Input the MONTH, DAY, START and STOP times
of the program you want to record.
INPUT: Select a LINE1 or LINE2.
SPEED: AUTO mode determines how much tape
is left and switches the speed from SP to SLP if it
is necessary to complete recording the program.
If this occurs there could be some picture and
sound distortion at the point where the speed
changes.
REPEAT: To record up to 8 programs on a certain
day of every week select WEEKLY. To record up
to 8 programs at the same time Monday through
Friday select DAILY. Otherwise select ONCE.
4. Press SETUP MENU and the program is
memorized by the unit.
5. Additional programs may be entered by repeating
steps 1-4.
Notes:
• Ensure you insert a tape with the record safety
tab intact before the first programmed time.
• Press x (STOP) to end timer recording.
• If you make a mistake or want to change a set-
ting, use v to select the option and correct it
using b / B.
• If the program preset time is past, the “PAST
TIME PROGRAMMED” message appears on the
TV screen. Return to the incorrect program and
program it with the correct time.
•If you enter a past date, the timer recording will
be performed on that date of the next year.
• If the power fails or the unit is unplugged the
clock and timer settings are kept in memory for
only 3 seconds. Otherwise you must reset the
clock and timer.
• If the tape indicator is blinking, no tape is loaded.
• When you are playing DVD at programmed
Recording time, the unit automatically change to
VCR mode and start recording.
• The unit will automatically power off when Timer
Recording ends.
Checking or Erasing the Timer Program
Programming can be checked whenever the unit is
turned on.
1.
Press SETUP MENU and the main menu appears.
2. Use v / V to choose the PROGRAM menu and
press ENTER (OK).
3.
Use b / B to select a program you want to check or
erase. To erase the program, press CLEAR (0000).
4. Press SETUP MENU to return to the TV screen.
Program Priority
If the recording start and end times of preset pro-
grams overlap on the same day (see the example),
the second program is not recorded until the first is
finished.
In this example, the first part of program numbers 2
and 3 are not recorded.


