5
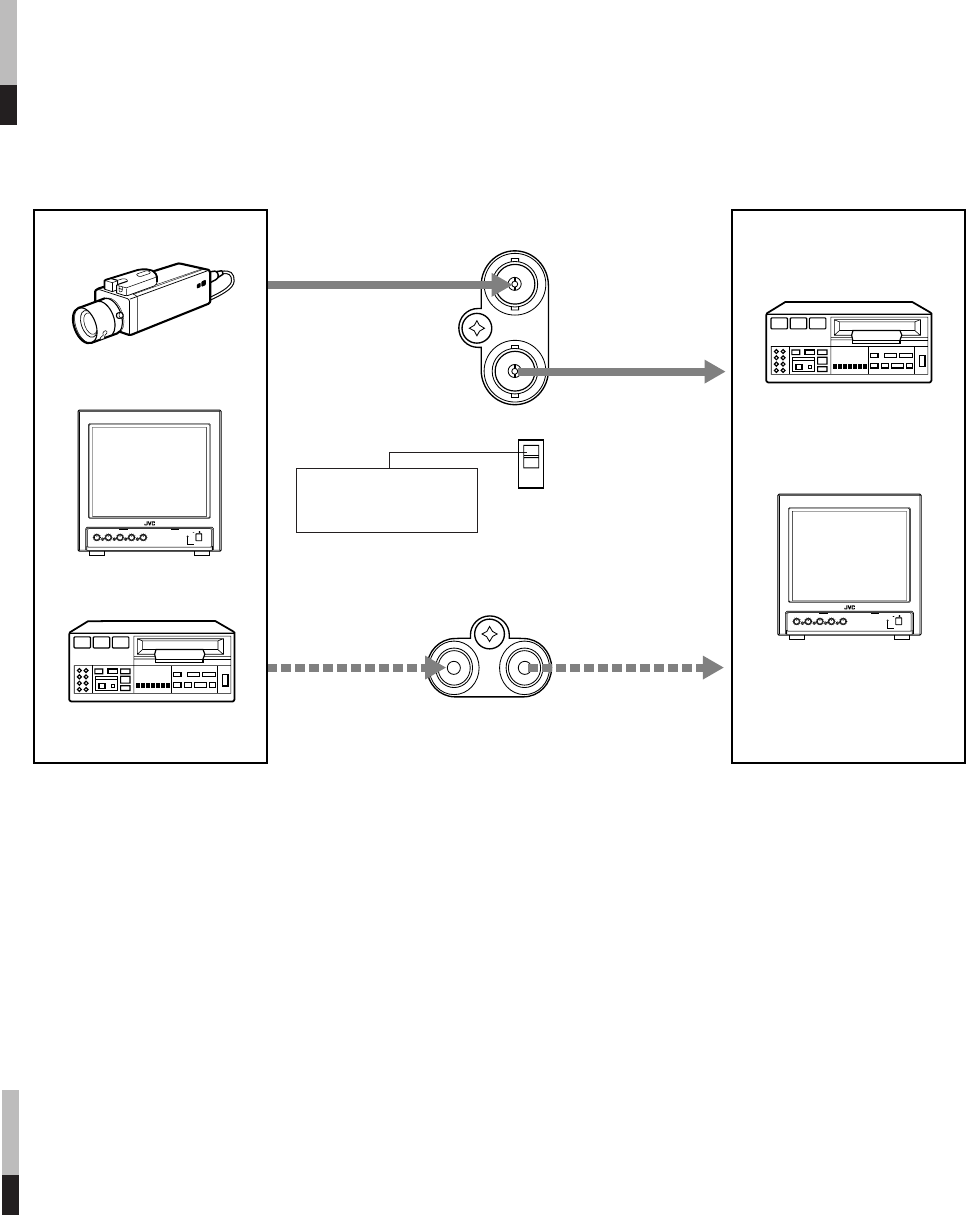
CONNECTION EXAMPLE
From video
output terminal
From audio
output terminal
BASIC OPERATION
1.To turn the power on:
Push the POWER switch.
The power indicator glows green. To turn off power, push the POWER switch
again, and the power indicator goes off.
2.To adjust the audio level: (TM-A9U only)
Turn the VOLUME control to the right to increase the level, or to the left to
decrease the level.
Note:
● The audio function can only be used with the TM-A9U.
It is not available with the TM-A9UCV.
Notes:
● The illustration above only shows some possible connection examples, for reference. Terminal types and/or connections
may differ according to the component connected. Also refer to the Instruction Manual of the component to be connected.
● Before connecting, be sure to turn off the power of all the components.
● For video signal connection, use only a 75 Ω coaxial cable.
● Input and output terminals for video or audio (The TM-A9UCV is not equipped with audio terminals.) are bridge-connected.
Do not apply two input signals to both (input and output) terminals at the same time.
● For a bridge (loop) connection, connect each of input and output terminals on the monitor to separate video components.
For example, if both of them are connected to a video recorder, the picture will shake abnormally except when in the
recorder’s play mode. This phenomenon occurs due to a signal circulating around inside a certain component, and is not a
malfunction.
Video camera
Video recorder
To video
input terminal
To audio
input terminal
Video recorder
Termination switch
Set to OPEN for bridge
connection.
V I D E O
IN
O U T
O P E N
7 5 Ω
O U T
A U D I O
I N
POWER
CONTRASTBRIGHTCHROMAPHASEVOLUME
ON OFF
POWER
CONTRASTBRIGHTCHROMAPHASEVOLUME
ON OFF
Monitor
Monitor
Equipment which outputs
video/audio signals
Equipment which inputs
video/audio signals
(The TM-A9UCV is not
equipped with audio
terminals.)


