9
Introduction
a
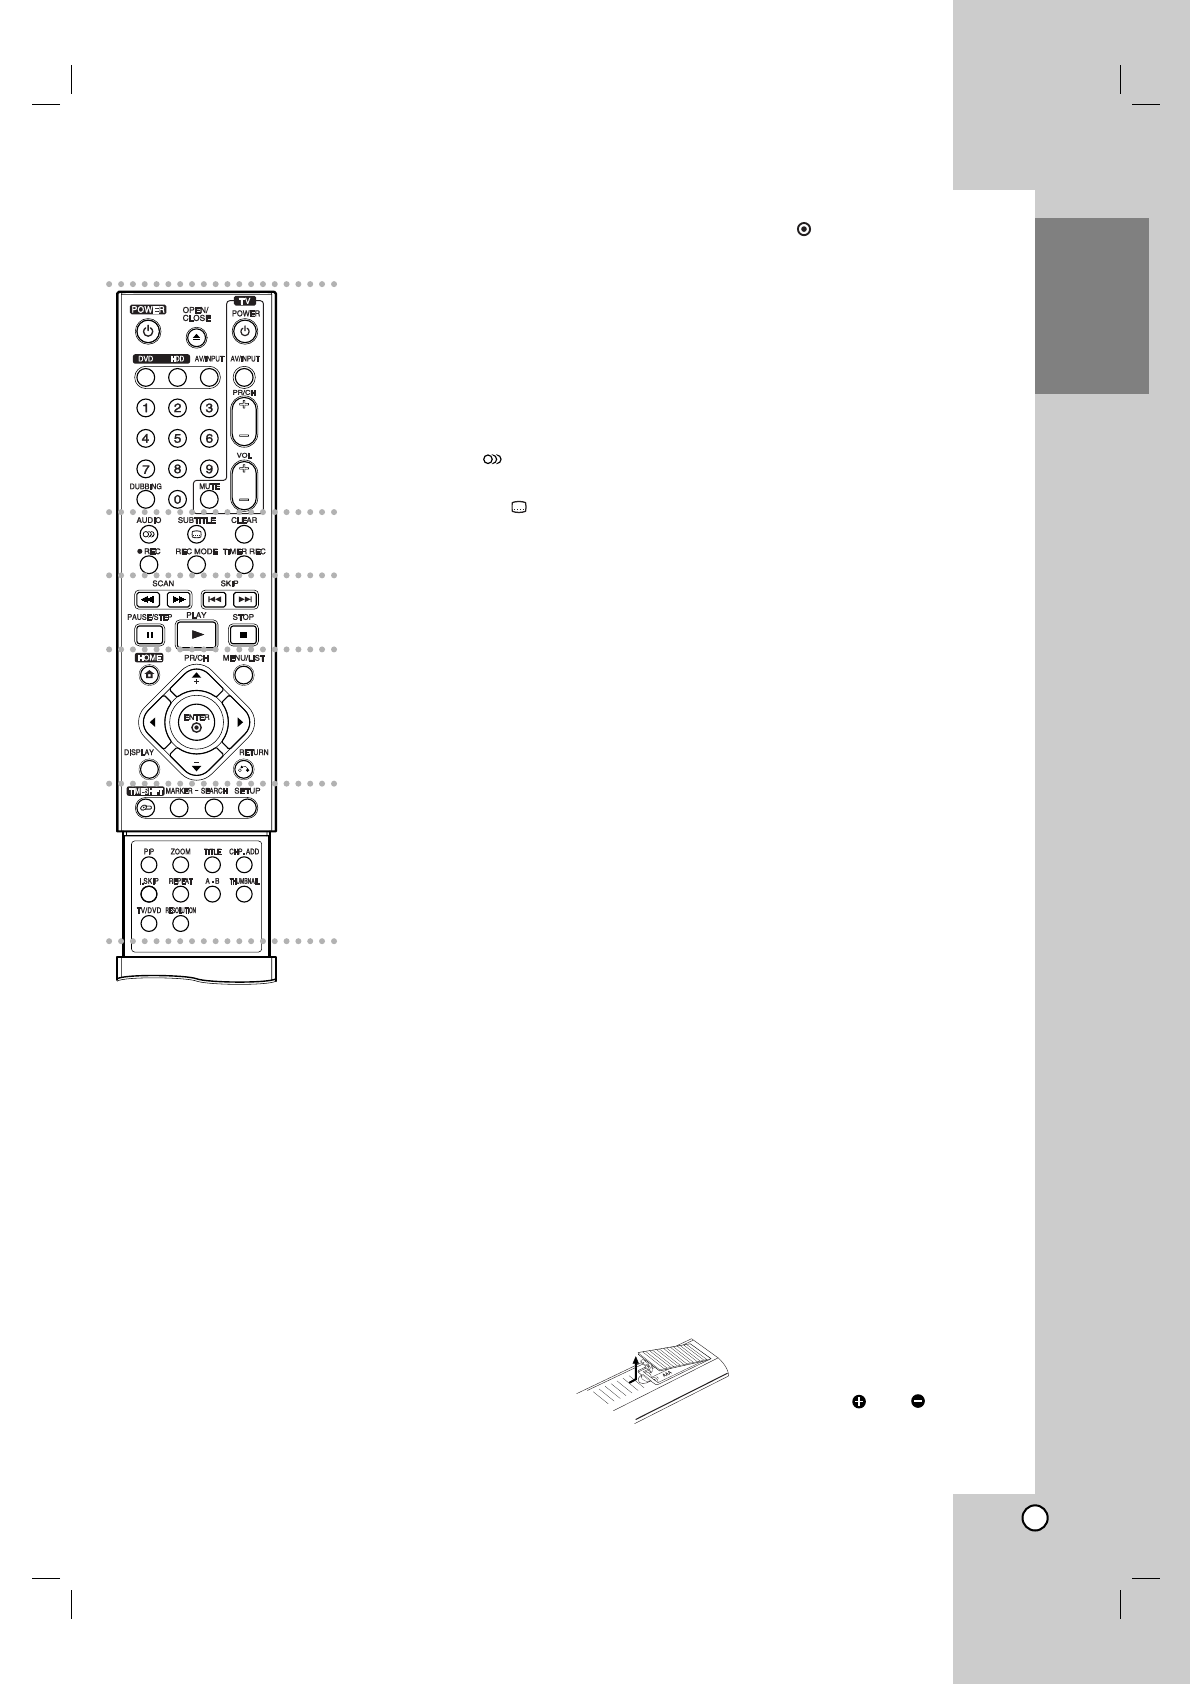
POWER: Switches the recorder
ON or OFF.
OPEN/CLOSE (Z): Opens and
closes the disc tray.
DVD: Selects the unit’s function
mode to DVD.
HDD: Selects the unit’s function
mode to HDD.
AV/INPUT: Changes the input to
use for recording (Tuner, AV1-4,
or DV IN).
0-9 numerical buttons: Selects
numbered options in a menu.
DUBBING: Copies DVD to HDD
(or HDD to DVD).
TV Control Buttons: See page
55.
b
AUDIO ( ): Selects an audio
language or audio channel.
SUBTITLE ( ): Selects a subtitle
language.
CLEAR: Removes a track number
on the Program List or a mark on
the Marker Search menu.
REC (z): Starts recording.
REC MODE: Selects the recording
mode.
TIMER REC: Displays Timer
Record menu.
c
SCAN (m / M): Search
backward or forward.
SKIP (. / >): Go to next or
previous chapter or track.
PAUSE/STEP (X) : Pause
playback or recording temporarily.
PLAY (N): Starts playback.
STOP (x): Stops playback or
recording.
d
HOME: Accesses or removes the
HOME menu.
MENU/LIST: Accesses menu on a
DVD disc. Switches between Title
List-Original and Title List-Playlist
menu.
b / B / v / V (left/right/up/down):
Selects an option in the menu.
ENTER ( )
- Acknowledges menu selection.
- Displays information while
viewing a TV program.
PR/CH (+/-): Scans up or down
through memorized channels.
DISPLAY: Accesses On-Screen
Display.
RETURN (O)
Removes the menu.
e
TIMESHIFT: Activates pause live
TV/playback (timeshift) for a live
TV program.
MARKER: Marks any point during
playback.
SEARCH: Displays Marker Search
menu.
SETUP: Accesses or removes the
Setup menu.
PIP: Selects PIP function on or off.
ZOOM: Enlarges video image.
TITLE: Displays the disc’s Title
menu, if available.
CHP. ADD: Inserts a chapter
marker when playing/recording.
I.SKIP (INSTANT SKIP): Skips 15
seconds forward during playback.
REPEAT: Repeat chapter, track,
title, all.
A-B: Repeat sequence.
THUMBNAIL: Selects a thumbnail
picture.
TV/DVD: To view channels
selected by the recorder tuner or
by the TV tuner.
RESOLUTION (RH188HS,
RH199HS, RH200MHS only):
Sets the output resolution for
HDMI.
Remote Control
a
b
c
d
e
Remote Control Operation
Point the Remote Control at the remote sensor and
press the buttons.
Caution
Do not mix old and new batteries. Never mix different
types of batteries (standard, alkaline, etc.).
Remote Control Battery Installation
Remove the battery cover on the
rear of the Remote Control, and
insert two R03 (size AAA)
batteries with and matched
correctly.


