


button will turn on/off the unit being monitored and the MR1.
With DIP switch #2 in the OFF position, pressing the ON/OFF
button will turn toggle the on/off operation of the MR1 only.
Setpoint Control
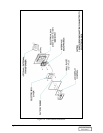
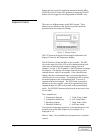
There are two hidden buttons on the MR1 keypad. These
buttons are not labeled on the display to prevent untrained
personnel from accessing unit settings.
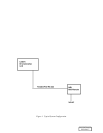
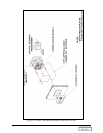
Figure 5. Display Panel
The F/C button will toggle between degrees Fahrenheit and
degrees Celsius for the temperature display.
The SET button will put the MR1 in the set mode. The SET
icon in the upper left of the LCD will be displayed along with
other icons to indicate which setpoint is being viewed or
changed. Use the ò/SCAN and the ñ/HOLD buttons to change
the setpoint. The display will change with each key press to
indicate the new value of the setpoint. If the value does not
change, then the environmental unit is not accepting the new
value because it is out of range. The displayed value is always
the actual setpoint in the environmental unit. There are 8
setpoints that can be changed. The SET button is pressed to
advance to the next setpoint. After all 8 setpoints have been
stepped through, the MR1 will go back to the normal display
mode. The SILENCE button can be pressed at any time to exit
the set mode.
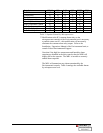
The 8 setpoints are:
1. Temperature Setpoint 5. High Temp Alarm
2. Temperature Sensitivity 6. Low Temp Alarm
3. Humidity Setpoint 7. High Hum Alarm
4. Humidity Sensitivity 8. Low Hum Alarm
Note that the temperature sensitivity is in tenths but there is no
decimal point on the MR1 display so, for example 1.4 is
displayed as 14.
Refer to Table 3 for availability by microprocessor of setpoint
control:
10 • User Manual
DISCONTINUED
PRODUCT