Liebert MR1 • 3
Section 2: INSTALLATION
Mounting
The MR1 Mini-Remote is completely tested, then shipped from
the factory disassembled for your convenience during
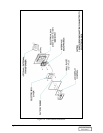
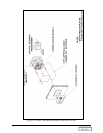
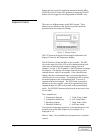
installation. To begin flush-mount installation, please refer to
Figure 2A. An optional 30-foot control cable can be supplied to
allow the display to be located remotely from the electrical box.
Refer to Figure 2b.
The electric box containing the power supply is designed for
flush-mounting into a finished interior wall. A wall plate is
supplied to cover the drywall opening, with the display mounted
directly in front of the wall plate/electric box.
1. Mount the electric box (Item 5) in the wall at a convenient
location.
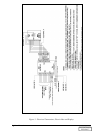
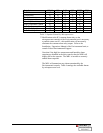
2. Make each power and unit connection (to Item 4) by
inserting bare wire end into compression terminal and
tightening screw. Refer to Electrical Connections section.
If 30-foot cable is used, disconnect factory wire harness and
attach cable to screw terminals per Figure 2.
NOTE: Use minimum
18 gauge wire for all
customer interface wiring.
3. Route control cable through wall plate and electric box
cover, then connect to electrical box at TB1 (on Item 4).
4. Attach electric box cover (Item 3) with two (2) screws.
5. Remove the front cover from the MR1 display panel (Item
1) by gently prying open at the slots on the top and bottom
of the display. Attach the control panel rear plastic and the
wall plate (Item 2) to the electric box with two (2) screws.
6. Snap display panel front onto the rear plastic part.
7. Apply power to the MR1. Operate the system to test status
and alarm monitoring, and customer selected options
including on/off control. Also test optional customer
interface (4 inputs and 1 output), if applicable.
Call Liebert Environmental Support at 1-800-543-2778 if
assistance is required for the installation or operation of the
Mini-Remote.
DISCONTINUED
PRODUCT


