PREPARATION
11
Connections (Continued)
Connecting to Optional Equipment
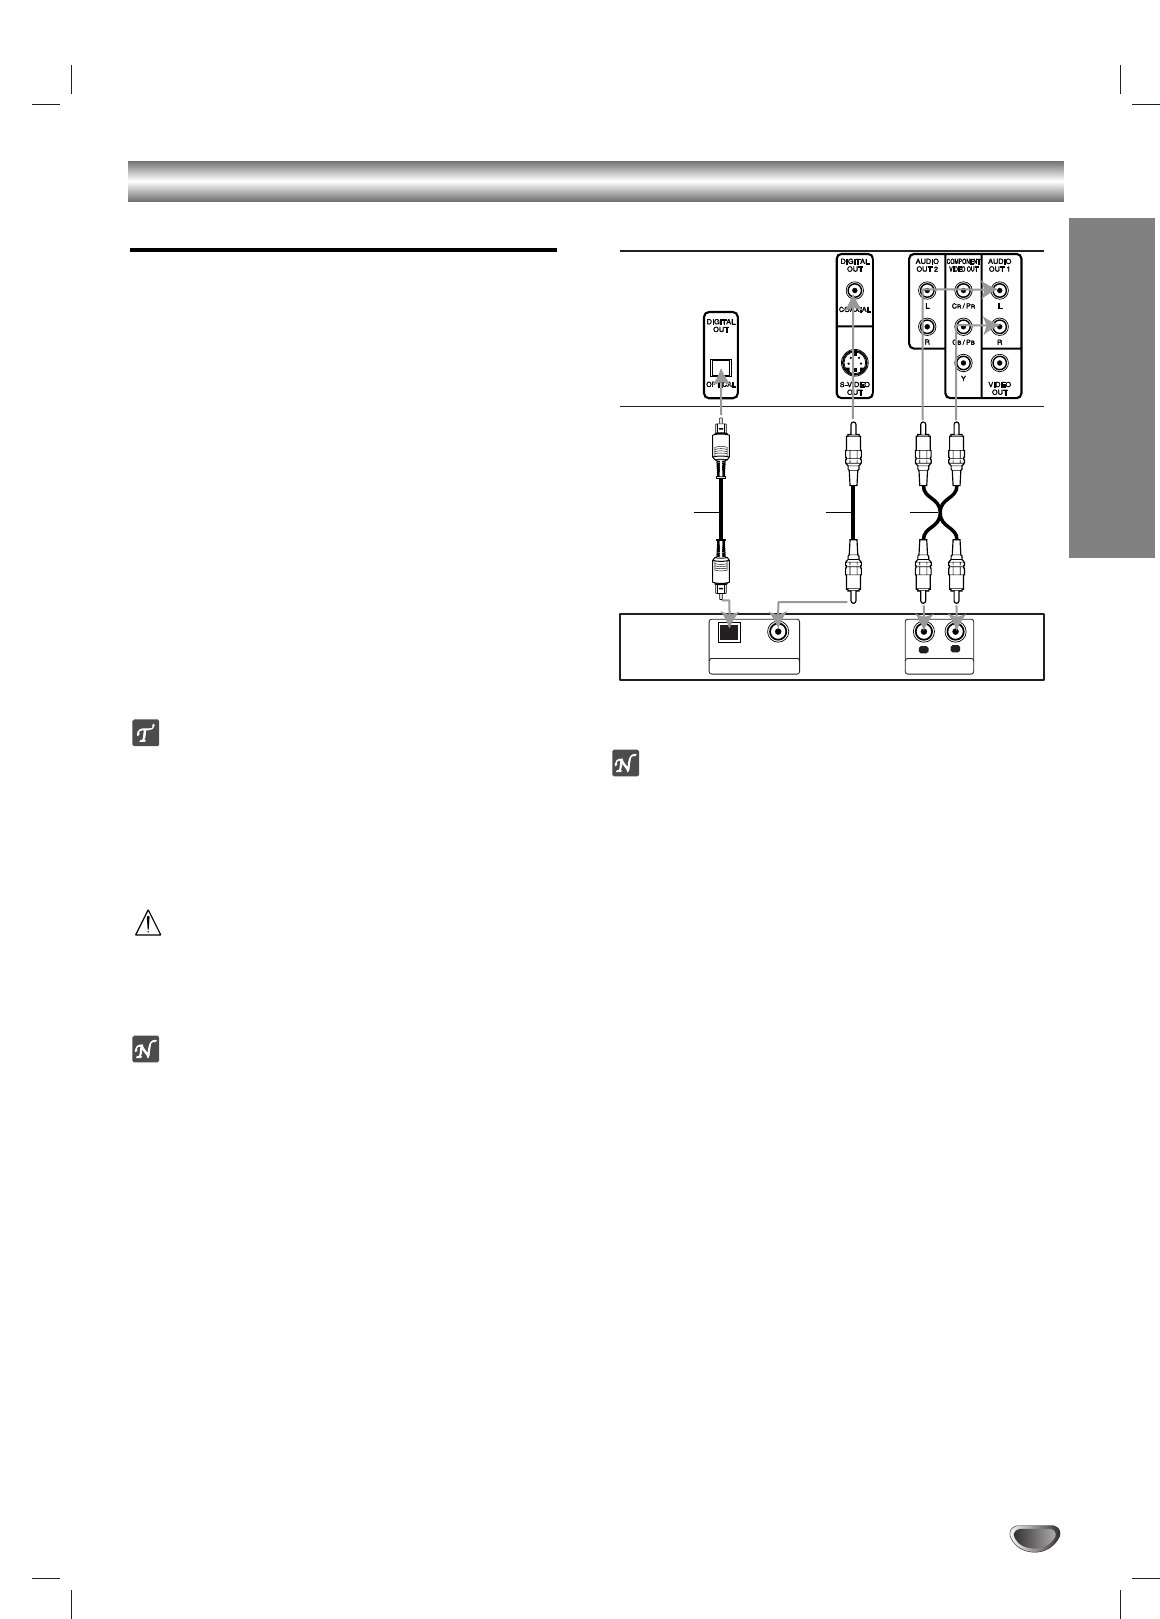
Connecting to an amplifier equipped with two
channel analog stereo or Dolby Pro Logic ll/
Pro Logic
Connect the Left and Right AUDIO OUT jacks on the
DVD Player to the audio left and right in jacks on your
amplifier, receiver, or stereo system, using the audio
cables (A).
Connecting to an amplifier equipped with two
channel digital stereo (PCM) or to an Audio/
Video receiver equipped with a multi-channel
decoder (Dolby Digital™, MPEG 2, or DTS)
11
Connect one of the DVD Player’s DIGITAL AUDIO
OUT jacks (OPTICAL O or COAXIAL X) to the cor-
responding in jack on your amplifier. Use an option-
al digital (optical O or coaxial X) audio cable.
22
You will need to activate the player’s digital output.
(See “Digital Audio Output” on page 14).
Digital Multi-channel sound
A digital multi-channel connection provides the best
sound quality. For this you need a multi-channel
Audio/Video receiver that supports one or more of the
audio formats supported by your DVD Player (MPEG 2,
Dolby Digital and DTS). Check the receiver manual and
the logos on the front of the receiver.
Caution:
Due to the DTS Licensing agreement, the digital output
will be in DTS digital out when DTS audio stream is
selected.
Notes
–
If the audio format of the digital output does not match
the capabilities of your receiver, the receiver will
produce a strong, distorted sound or no sound at all.
– Six Channel Digital Surround Sound via digital con-
nection can only be obtained if your receiver is
equipped with a Digital Multi-channel decoder.
– To see the audio format of the current DVD in the on-
screen display, press AUDIO.
Notes
– Refer to the owner’s manual of your audio system as
well.
– Before you connect the DVD player to other equip-
ment, be sure to turn off the power and unplug all of
the equipment from the wall outlet before making any
connections.
– If you place the DVD player near a tuner or radio, the
radio broadcast sound might be distorted. In this
case, move the DVD player away from the tuner and
radio.
– The output sound of the DVD player has a wide
dynamic range. Be sure to adjust the receiver’s vol-
ume to a moderate listening level. Otherwise, the
speakers may be damaged by a sudden high volume
sound.
– Turn off the receiver before you connect or disconnect
the DVD player’s power cord. If you leave the receiv-
er power on, the speakers may be damaged.
Amplifier (Receiver)
Rear of DVD player
AX
L
R
AUDIO INPUTDIGITAL INPUT
OPTICAL COAXIAL
O


