


13
ENGLISH
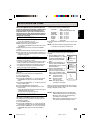
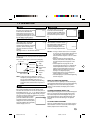
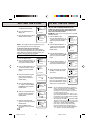
1 Press the MENU button. Press
the SET/TRACKING + or – button
to select the SYSTEM SET-UP
option, then press the ENTER
button.
2 Press the SET/TRACKING + or –
button to select the DAYLIGHT
SAVING TIME option, then press
the ENTER button.
3 Press the SET/TRACKING + or –
button to select one of the
options, then press the ENTER
button. Press the MENU button
until the MENU screen is cleared.
ON: for manual setting
(forward one hour)
OFF: for manual setting
(back one hour)
AUTO: for automatic setting
(read XDS in the signal)
NOTES: • When shipped from factory, the DAYLIGHT
SAVING TIME option is set to AUTO position.
• When the clock is not set, Daylight Saving
Time setting is not available.
• When there is no Daylight Saving Time in your
area, always select OFF position in step 3.
When you want to set the Daylight Saving Time manually,
on the first Sunday in April you set to “ON”, and on the last
Sunday in October you set to “OFF”.
M E N U
TIMER REC SET
TV SET-UP
CH SET-UP
AUTO REPEAT ON OFF
SYSTEM SET-UP
〈
+/–/ENTER/MENU
〉
SYSTEM SET-UP
CLOCK SET
LANGUAGE/IDIOMA/LANGUE
AUTO CLOCK ON OFF
STANDARD TIME
DAYLIGHT SAVING TIME
〈
+/–/ENTER/MENU
〉
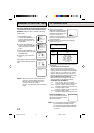
You can set the Daylight saving time automatically or
manually.
ON
OFF
AUTO
〈
+/–/ENTER/MENU
〉
DAYLIGHT SAVING TIME
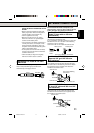
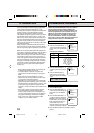
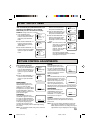
The Auto Clock function will automatically set the
built-in clock (Month, Day, Year and Time) when the
TV/VCR is connected to an Antenna or Cable system
and it is turned off. As the TV/VCR searches for a
receivable station in your area, it will also receive a
broadcast signal for Auto Clock which will automati-
cally set the clock and date.The Auto Clock needs sev-
eral minutes to set itself.
The Auto Clock Adjustment will be performed at 12:00 PM
everyday if you turn off the TV/VCR.
• If you use a cable box and you want Auto Clock adjust-
ment to be performed, the cable box must be left on.
• The Auto Clock Adjustment is not effective when there
is a difference of more than 5 minutes between the
built-in clock time and the actual time.
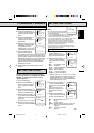
4 Press the SET/TRACKING + or – button to select your
time zone, then press the ENTER button.
ATLANTIC : GMT – 4 hours
(GMT: Greenwich Mean Time)
EASTERN : GMT – 5 hours
CENTRAL : GMT – 6 hours
MOUNTAIN : GMT – 7 hours
PACIFIC : GMT – 8 hours
ALASKA : GMT – 9 hours
HAWAII : GMT – 10 hours
AUTO : AUTO SET
5 Press the MENU button twice to return to the normal
screen.
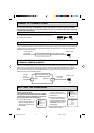
When shipped from factory the AUTO CLOCK option is
set to ON.
But if you do not want Auto Clock set (Adjustment):
1 Turn on the TV/VCR.
2 Press the MENU button.
3 Press the SET/TRACKING + or – button to select the
SYSTEM SET-UP option, then press the ENTER
button.
4 Press the SET/TRACKING + or – button to select the
AUTO CLOCK option.
5 Press the ENTER button to select OFF.
6 Press the MENU button repeatedly to return to the
normal screen.
• When the AUTO CLOCK is set to OFF, the Auto Clock
adjustment does not function.
• Set the clock manually (see page 14).
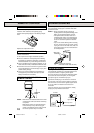
1 Connect the Antenna or Cable system.
• If you use a cable box, turn it on.
2 Plug the AC Power cord to the AC outlet.
3 Make sure the TV/VCR is turned off.
• If you press the POWER button, the Auto Clock set is
not effective.
4 Wait at least three minutes and press the POWER
button.
5 Press the CALL button to check the clock on the screen.
6 If the clock is not set, check the Antenna condition. The
Auto Clock may not function properly if the reception
condition is not good.
NOTE: To be able to select the standard time, the clock
must first be set by “AUTO CLOCK” once.
In the rare event that you live within broadcast range of
two stations in two different time zones, the TV/VCR
may recognize the wrong station for the Auto Clock set.
To correct the situation:
1 Press the MENU button.
2 Press the SET/TRACKING + or – button to select the
SYSTEM SET-UP option, then press the ENTER button.
3 Press the SET/TRACKING + or – button to select the
STANDARD TIME option, then Press the ENTER
button.
AUTO CLOCK SETTING
AUTO CLOCK SETTING
AUTO CLOCK ADJUSTMENT
TO SET AUTO CLOCK TO OFF
TO SET STANDARD TIME
DAYLIGHT SAVING TIME SETTING
5A3A901A E P12-19 3/18/02, 10:07 PM13