


10
INSTALLATION (CONTINUED)
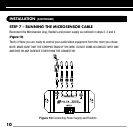
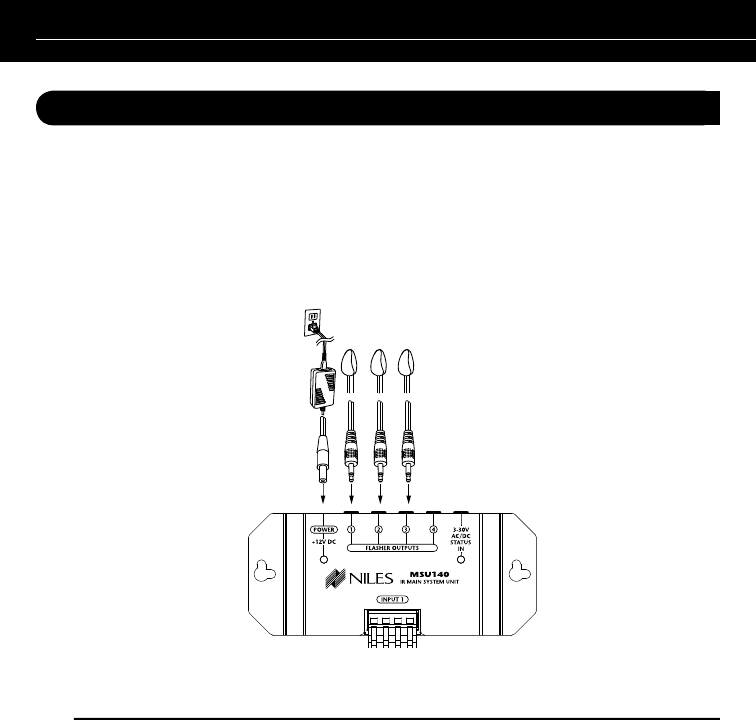
STEP 7 – RUNNING THE MICROSENSOR CABLE
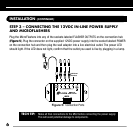
Reconnect the Microsensor plug, flashers and power supply as outlined in steps 2, 3 and 4
(Figure 10).
That’s it! Now you are ready to control your audio/video equipment from the room you chose.
NOTE: MAKE SURE THAT THE STRIPPED ENDS OF THE WIRE DO NOT COME IN CONTACT WITH ONE
ANOTHER OR ANY SURFACE OTHER THAN THE CONNECTOR.
Figure 10: Connecting Power Supply and Flashers