


7
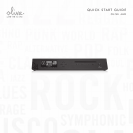
O LI VE 4 HD Q UI CK S TA RT G UI DE
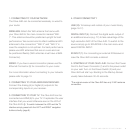
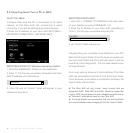
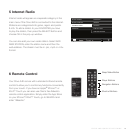
1. CONNECTING TO YOUR NETWORK
The Olive 4HD can be connected wirelessly or wired to
your router.
WIRELESS: Attach the WiFi antenna that came with
your Olive 4HD to the main connector marked “WiFi
1”. This antenna should be positioned upright for best
performance. We recommend to attach additional WiFi
antennas to the connectors* “WiFi 2” and “WiFi 3” in
case the reception is not optimal. For best performance
please use WiFi antennas that are on a wire and can
be positioned exibly (WiFi antennas must have a SMA
Connector).
WIRED: If you have a wired connection please use the
Ethernet Connector (8) for connection to your router.
For more information about connecting to your network
please refer to page 10.
2. CONNECTING TO YOUR AMPLIFIER/RECEIVER:
Connect the Analog (6) or Digital (5) outputs to the
corresponding inputs on your receiver.
3. CONNECTING TO YOUR TV: The Olive 4HD can be
connected via HDMI (9) to your TV. It replicates the user
interface that you would otherwise see on the LCD of
the Olive 4HD. i To switch between the LCD and the TV
interface simply press both the LEFT and RIGHT navigation
buttons shortly (page 8).
4. OTHER CONNECTIVITY
USB (10): To backup and restore of your music library
(page 16-17).
DIGITAL INPUT (4): Connect the digital audio output of
an additional source (e.g. TV) to take advantage of the
high-resolution DAC of the Olive 4HD. To switch to the
source simply go to SOURCES in the main menu and
select DIGITAL INPUT.
IR INPUT (7): For connecting an external IR Receiver in
case the Olive 4HD is inside a cabinet.
5. STARTING UP YOUR OLIVE 4HD: Connect the Power
Cord to the Power Connector (1) and to the power outlet
on your wall. Turn on the Power Switch (2) and your
Olive 4HD will start up. Booting to the Startup Screen
usually takes between 30-45 seconds.
*The original version of the Olive 4HD has only 2 WiFi-antenna
connectors.