EN
–
27
–
1
Turn on the TV and set it to channel 3.
• If channel 3 has been already occupied for broadcasting,
see “RF Output Channel” section.
2
Select your language in the first time you turn on this unit.
Then press
[B]
to go to next step.
or
Quick Use Guide
Please refer to “Basic TV Connection” on the front page
before you use this unit.
RF Output Channel
If channel 3 has been already occupied for broadcasting,
1) Set your TV to channel 4.
2) Insert a pre-recorded tape into this unit.
3) Press [OUTPUT] on the unit so that the VCR OUTPUT
light is lit.
•
If noise appears on the TV screen, press [VCR/TV] on the
remote control.
4) Press [PLAY B] once.
5) After a few seconds, press and hold
[PLAY B] on the
unit for 3 seconds.
• The RF output channel will change to channel 4 from
channel 3 and you will see a playback picture.
• When a picture does not appear on the TV screen,
repeat step 4.
6) Press [STOP C] to stop playback.
1
Connections
Clock Set Up
5
Turn On the Unit for the First Time
VCR/DVD Switching
4
3
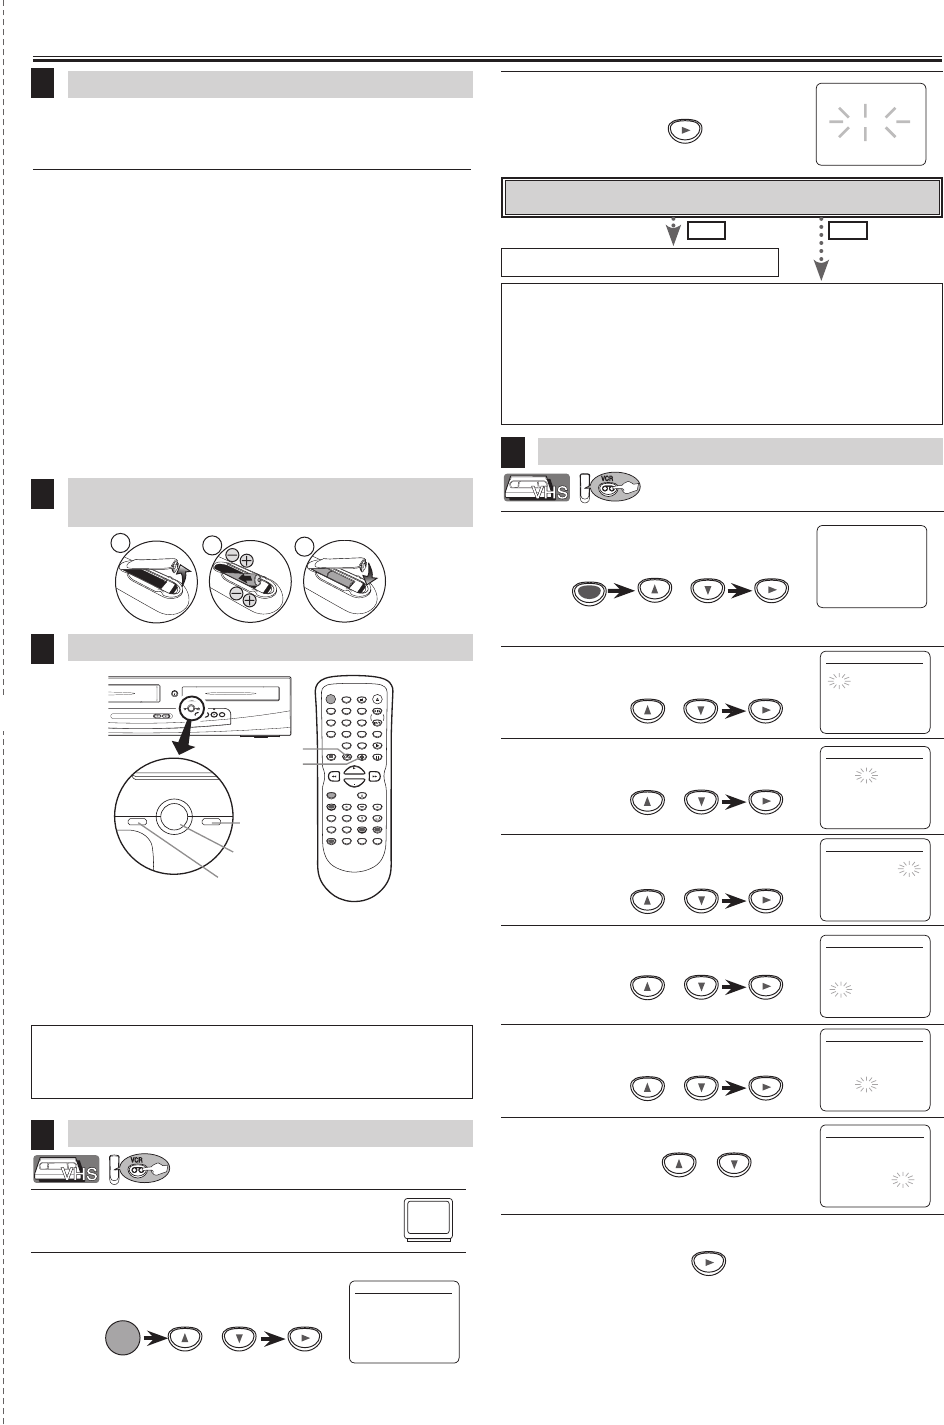
Installing the Batteries for the Remote
Control
2
CHANNEL
OPEN/CLOSE
VCR DVD
PROGRESSIVE SCAN
SKIPH
STOP PLAY
SKIPG
REV FWD
OUTPUT
OUTPUT
DVDVCR
OUTPUT button
DVD OUTPUT
light
VCR OUTPUT light
DVD button
VCR button
POWER
DISPLAY VCR DVD PAUSE
SLOW
VCR/TV
SKIP/CH.
PLAY
STOP
REC/OTR
MENU
SETUP TOP MENU
MODE ZOOM
SUBTITLE
T-SET
ANGLE
ENTER
RETURN
SEARCH
MODE
REPEAT A-B
OPEN/CLOSE
/EJECT
SPEED AUDIO
CLEAR/
C. RESET
1 2 3
4 5 6
7 8 9
0
+10
VCR MODE
Press [VCR] on the remote control.(Verify that the VCR OUTPUT
light is lit.)
DVD MODE
Press [DVD] on the remote control.(Verify that the DVD OUTPUT
light is lit.)
No
Please wait for a few minutes.
After scanning...
• The tuner stops on the lowest memorized channel.
• You can select only the channels memorized in this unit by using
[SKIP/CH. G/K, H/L] (or [CHANNEL K/L]).
• If “AUTO SET UP” appears on the TV screen again, check the cable
connections. Then, press [B] once again.
Yes
Press [MENU] to exit.
Do you connect the cable from the cable box or the satellite box to the unit’s
ANT-IN jack?
Hint
• Pressing only [OUTPUT] on the front panel DOES NOT switch the
mode of the remote control. You MUST select the correct mode on
the remote control.
1
Press [MENU] and select “CLOCK SET“.
Then press [B] to go to next step.
2
Select the current month.
Then press [B] to go to next step.
3
Select the current day.
Then press [B] to go to next step.
4
Select the current year.
Then press [B] to go to next step.
5
Select the current hour.
Then press [B] to go to next step.
6
Select the current minute.
Then press [B] to go to next step.
7
Select “AM” or “PM”.
8
To exit the CLOCK SET screen
• If the clock is not set, the CLOCK SET screen appears when you press
[MENU]. In this case, go to step 2.
or
or
or
or
or
or
or
- M E N U -
TIMER PROGRAMMING
AUTO REPEAT [OFF]
CHANNEL SET UP
B CLOCK SET
LANGUAGE SELECT
CLOCK SET
MONTH DAY YEAR
1 0 / – – – – – –
HOUR MINUTE AM/PM
– – : – – – –
CLOCK SET
MONTH DAY YEAR
1 0 / 0 2 – – – –
HOUR MINUTE AM/PM
– – : – – – –
CLOCK SET
MONTH DAY YEAR
1 0 / 0 2 2 0 0 6
HOUR MINUTE AM/PM
– – : – – – –
CLOCK SET
MONTH DAY YEAR
1 0 / 0 2 MON 2 0 0 6
HOUR MINUTE AM/PM
0 5 : – – – –
CLOCK SET
MONTH DAY YEAR
1 0 / 0 2 MON 2 0 0 6
HOUR MINUTE AM/PM
0 5 : 4 0 – –
CLOCK SET
MONTH DAY YEAR
1 0 / 0 2 MON 2 0 0 6
HOUR MINUTE AM/PM
0 5 : 4 0 P M AM
B PM
LANGUAGE SELECT
B ENGLISH [ON]
FRANCAIS
ESPAÑOL
3
Press [B] to start Auto Set Up.
CH 01
AUTO SET UP
NO
YES
✄
2
3
1
DVC840G_E8A02UD.indd 27 2006/01/12 13:08:26


