


6.
PAUSE/STILL button–
Press to temporarily stop
the tape during recording or to view a still picture
during playback.
Frame Advance function–
Press to advance the
picture by one frame at a time during still mode.
7.
POWER button–
Press to turn VCR on and off.
Press to activate timer recording, when the timer pro-
gram has been set.
8.
VCR/TV button–
Press to select TV or VCR mode.
VCR position: to view playback, to monitor video
recordings or watch TV using the VCR tuner.
TV position: to watch TV or to view one program
while recording another.
9.
Remote sensor window–
Receives the infrared
signals from the remote control.
10.
Indicators
POWER indicator–
Indicates that the power is
turned on.
VCR/TV indicator–
Indicates that the VCR is in the
VCR position.
TAPE IN indicator–
Indicates that there is a tape in
the VCR.
TIMER indicator–
Indicates that the timer recording
or OTR has been set.
REC indicator–
Indicates that it is recording.
Flashes when a recording has been paused.
11.
TAPE SPEED button–
Press to choose the desired
recording speed : SP/SLP. (only on the VCR)
12.
CHANNEL Up or Down buttons–
Press to select
the desired channels for viewing or recording.
Tracking function–
Press to minimize video ‘noise’
(lines or dots on screen) during playback (only on the
VCR) or slow mode.
Press to stabilize the picture in the Still mode when
the picture begins to vibrate vertically.
13.
RECORD button–
Press for manual recording.
OTR button–
Press to activate One Touch Record-
ing. (only on the VCR)
14.
MENU button–
Press to display the menu on the TV
screen. Press to exit the menu on the TV screen.
15.
NUMBER buttons–
Press to select desired channels
for viewing or recording. To select channels from 1
to 9, first press "0" button then 1 to 9. (only on the
remote control)
+100 button–
When selecting cable channels which
are higher than 99, press this button first, then press
the last two digits. (To select channel 125, first press
"+100" button then press "2" and "5"). (only on the
remote control)
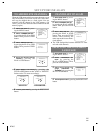
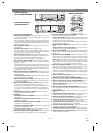
16.
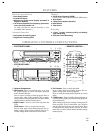
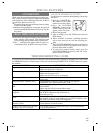
DISPLAY button–
Press to display the current time,
channel number, real time tape counter, and other in-
formation on the TV screen. (only on the remote con-
trol)
Each time you press this button, TV screen will
change as shown. The status display (STOP, PLAY
etc.) and the tape speed display (SP, LP (playback
only), or SLP) will disappear after 5 seconds.
17.
SLOW button–
Press to start slow motion playback.
(only on the remote control)
18.
COUNTER MEMORY button–
Press to set counter
memory on and off. (only on the remote control)
19.
COUNTER RESET button–
Press to reset counter
to 0:00:00. (only on the remote control)
EXIT button–
Press to exit the menu on the TV
screen. (only on the remote control)
20.
SEARCH MODE button–
Press to perform a Time
Search or an Index Search. (only on the remote con-
trol)
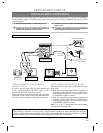
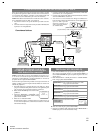
21.
Power cord–
Connect to a standard AC outlet
(120V/60Hz).
22.
AUDIO OUT jacks–
Connect to the audio input
jacks of your audio equipment or another VCR.
23.
AUDIO IN jacks–
Connect to the audio output jacks
of your audio equipment or another VCR.
24.
ANT. IN terminal–
Connect to an antenna, Cable
system or Satellite system.
25.
VIDEO OUT jack–
Connect to the video input jack
of your video camera or another VCR.
26.
VIDEO IN jack–
Connect to the video output jack of
your video camera or another VCR.
27.
CH3/CH4 selector switch–
Use to select a video
output channel (3 or 4) for VCR playback.
28.
ANT. OUT terminal–
Connects to the antenna input
terminal on your TV.
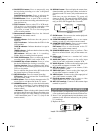
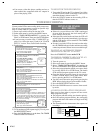
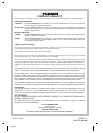
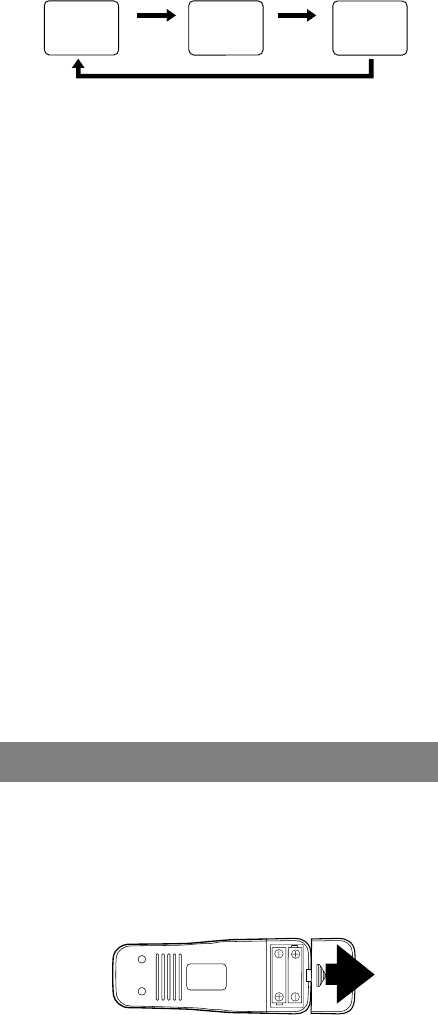
INSTALLING THE BATTERIES
1) Open the battery compartment cover by pressing the
cover on the remote unit in the direction of the arrow.
2) Insert 2 "AA" penlight batteries into the battery com-
partment in the direction indicated by the polarity
(+/-) markings.
3) Replace the cover.
STOP
SP 0:12:34
STOP
SP
5:40PM
CH 02
<COUNT mode> <CLOCK mode>
Press
once
<OFF mode>
Press
once
Press once
Install 2 X AA battery
0J01
H7905
- 5 - EN