


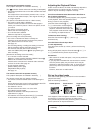


27
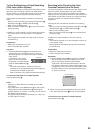
INSERT
INSERT
0:00.00
0:00.00
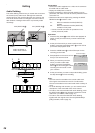
12
34
6
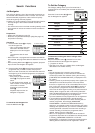
Insert Editing
The Insert Editing function lets you substitute a part of a
previously made recording by inserting one or several new
scenes together with new sound. This editing method lets
you precisely set the end point, and the recording will stop
automatically when this point is reached. This editing method
also ensures smooth, noise-free picture transitions between
old and new recordings.
Preparations
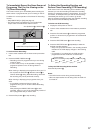
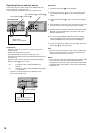
– Connect a movie camera or another VCR to this VCR as
shown in the illustration on page 18.
– Display the VCR picture on the TV.
– Insert the cassette onto which you want to perform insert
editing and make sure that its erasure prevention tab is
intact.
– Set the VCR/TV switch E to [VCR].
– Select the audio source required by pressing the INPUT
SELECT button K to set A1 or A2.
A1: When connected to the AV1(AUDIO IN/VIDEO
IN) sockets.
A2: When connected to the AV2 (AUDIO IN/VIDEO
IN) sockets on front panel.
– Use the L and R connectors for operations in the
normal (monaural) mode.
Operations
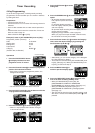
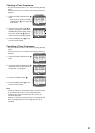
1 Press the PAUSE/STILL button c on this VCR and then
use the Shuttle Ring [ or Jog Dial Z to search for the
tape position at which you want the insert recording to
end.
2 Press the RESET button = to reset the tape counter
displayed on the VCR display to “0:00.00”.
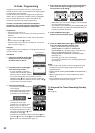
3 Use the Shuttle Ring [ or Jog Dial Z to search for the
tape position at which you want the insert editing to start.
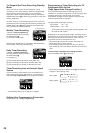
4 Press the INSERT button X to put this VCR in the
recording pause mode.
– The new sound will be recorded on the Hi-Fi sound
tracks.
– In case you also want to record the new sound on the
normal (mono) audio track, press the A.DUB button ^.
The indication on the On Screen Display changes to
[AV INSERT].
5 Start playback on the source unit and search for the
beginning of the scene that you want to dub (copy) onto
this VCR.
6 When you have found that point, press the PAUSE/STILL
button c on this VCR again to start recording the new
part from the playback unit.
– When the tape counter displayed on the On Screen
Display becomes “0:00.00”, recording automatically
stops, and this VCR stops in the recording pause
mode.
– To edit additional scenes, repeat operation steps 1 to 6.
7 Press the Stop button F on this VCR to finish editing.
Note:
– Insert editing cannot be performed on blank sections of a
tape. In such case, perform recording from an external
source. (See page 18.)