7
Setting the Clock of Your VCR
In the event of a power failure, the clock will operate on its
back up system for a minimum of 3 years. After 3 years, clock
back up in the event of a power failure can only be
guaranteed for maximum of 1 hour.
Preparations
• Confirm that the TV is on and the VCR viewing channel is
selected.
• Turn on the VCR.
Operations
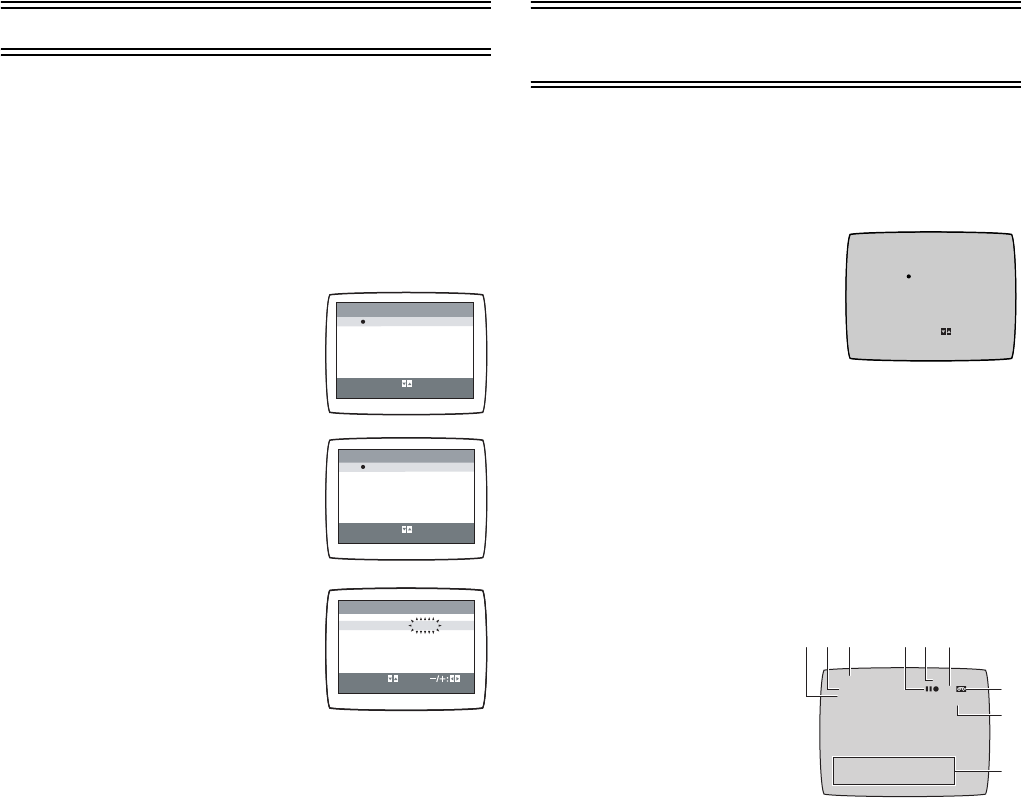
1 Press [MENU] (9) to display the
Main menu on the TV screen.
2 Press [43] (28) to select [CLOCK
SET] then press [ENTER] (26).
3 Set each item by pressing
[214] (28). Press [3] (28) to
return to the previous item.
At the set time (TIME) point:
• When [21] (28) is kept pressed,
the indication changes in 30-minute
steps.
4 Press [MENU] (9).
• The clock starts.
Time Reset Function
If the clock is less than 2 minutes slow or fast, it can easily be
reset to the proper time.
Example:
Resetting the clock to 12:00.00
1 Press [MENU] (9) to display the Main menu on the TV
screen.
2 Press [43] (28) to select [CLOCK SET] then press
[ENTER] (26).
3 When the current clock displays on the VCR is
between 11:58.00 and 12:01.59, press [MENU] (9) as
soon as you see the 12:00.00. This resets the time to
12:00.00.
Settings Using the On Screen
Display
Preparations
• Confirm that the TV is on and the VCR viewing channel is
selected.
• Turn on the VCR.
To Set the Colour TV System
1 Press [MENU] (9) to display the
Main menu on the TV screen.
2 Press [43] (28) to select
[SYSTEM] then press [ENTER]
(26).
3 Press [43] (28) to select
[AUTO].
• The VCR automatically distinguishes between PAL and
NTSC signals. If the picture lacks of colour during AV
external recording or playback, set to [PAL] or [NTSC].
• When you want to record or play back in black and white,
set to [B/W].
4 Press [MENU] (9) twice to exit the On Screen Display.
To Make Various Indicators Appear On
Screen Display
At a press of [STATUS/ NAVI
CHECK] (32), the following
indications appear on the TV
screen.
• Set [OSD] to [AUTO].
(See page 9.)
• The display is released
automatically after 5 seconds.
1 Audio Output Mode Indicators
At each press of [AUDIO] (21), the selected sound mode is
indicated with Left (L) and Right (R).
Stereo: Both the Left (L) and Right (R) Indicators appear.
Left: The Left (L) Indicator appears.
Right: The Right (R) Indicator appears.
Normal: Neither the Left (L) nor Right (R) Indicator appears.
• At every push of this button, the audio output mode
changes as follows.
During playback:
Stereo # L # R # Normal audio track # Stereo
While the broadcast signals are being received:
Stereo # L # R # Normal # Stereo
2 STEREO or BILINGUAL indicator (NV-HV61GL)
When receiving a TV programme, the type of sound
system in which it is broadcast is automatically indicated.
STEREO, M1 and M2 Indicator (NV-HV61GN)
When receiving a TV programme with the Stereo, Bilingual
or NICAM sound system, the type of sound system in
which it is broadcast is automatically indicated.
STEREO:When receiving a Stereo/NICAM stereo
broadcast.
M1/M2: When receiving a Bilingual/NICAM dual-sound
broadcast.
M1: When receiving a NICAM monaural broadcast.
• To hear stereo performance connect as shown on page 4
to a TV or Stereo Amplifier with left and right audio inputs.
3 Programme position
CLOCK SET
START: MENU
SELECT:
MENU
SELECT
END
: , ENTER
: MENU
MENU
SELECT
END
: , ENTER
: MENU
YEAR
MONTH
DATE
TIME
2004
1 [WE]
9
0:00
CLOCK SET
TUNER PRESET
SYSTEM
OPTION
TAPE REFRESH
NAVI MEMORY
0PROG.
CLOCK SET
TUNER PRESET
SYSTEM
OPTION
TAPE REFRESH
NAVI MEMORY
0PROG.
SYSTEM
END : MENU
SELECT:
AUTO
PAL
NTSC
B/W
CH 1 0:00.22
SP
PAL
45 6
7
31
8
L R
STEREO
2
ON 20:13 CH2 DRAMA
12 / 12. [ FR ]
9
NV-HV61GL_GN.book 7 ページ 2004年2月19日 木曜日 午後1時26分
