


AV1
IN
COMPONENT
MONITOR
OUT
VIDEO
MONO
MONO
P
B
Y
P
R
AUDIO
L
R
AV3 IN
Audio Video
RLOUT
OUT
Audio Video
RLIN
IN
Ê
>ÊÊÊ
Ê
iÊÊÕ
*ÊÊVÊÌÊÕÊÀÊiÊ
Ê
Ê
iÊÊÕ
-ÊÊÕÊÊ`
iÕ
-ÊiÊÌÊÕÊ«
iÕ
Ê>ÊÊ}ÊÕÊ>Ê}Êi
!CCESS
OK
-ÊiÊÊiÊVÊÌ
ÊVÊVÊiÊÃÊÃ
ÊÝÊÊÌ
"ÊvÊv
Ê-Ê/ÊÊ8Ê/
ÊÊ}ÊÊÊÃÊ
!CCESS
-ÊiÊÌÊÕÊ«Ê Ê
Ê
iÊÊÕ
7
Ê>ÊÊi ÊÕÊ«ÊÊÌÊÊ
Ê
iÊÀ
Ê>ÊÛÊÊÀÊÊÌÊiÊ ÊÊ
/ÊiÊÊiÊÌÊiÊÝÊÌ
/ÊiÊÝÊÌÊ ÊÃÊiÊÊiÊVÊÌ
/ÊÕÊÊÊÊ}Ê Ê
ÊiÊÊÕ
ÊiÊÊ
Ê>Ê}ÊÊiÊÌÊÊV
ÊÊM
/ÊÕÊÊÊÊ}Ê Ê
Ê
iÊÊÕ
-ÊÞÊÃÊ ÃÊiÊÊiÊVÊÌ
ÊÕÊÌÊÊ ÊÌÊÕÊÊÊÊ}
Ê>ÊÊÕÊ>ÊÊ ÊÌÊÕÊÊÊÊ}
-ÊÊÕÊÊ`Ê ÊÃÊÞÊÃÊÌÊiÊ
ÊÊÊÊÕÊÀÊ ÊÃÊÞÊÃÊÌÊiÊ
ÊÊM
ÊÃÊÊ>ÊÉÊ
°
ÊÊÊ>ÊÃÊÌ
!CCESS
x°
Ê
Êx
Ê
ÊÊâ
ÊÕÊÌÊ
/ÊÕÊÊÊÊ}Ê Ê
Ê
iÊÊÕ
ÊÊÊiÊ ÊÌÊÕÊÊÊÊ}
-ÊÊÊ«Ê
ÊÊÊÊÊÊÊÕÊÀÊ ÊÃÊiÊÌ
ÊÊM
!CCESS
"ÊvÊvÊ
P
B
Y
P
R
LR
AV2 IN
VIDEO L/MONO R
AUDIO
Audio Video
RL
OUT
OUT
2
X
V
5
1
C
D
"
A
A
"
RO
6
R
L
/
U
P6
P
/
P6
R
6
RL
/
6
R
C
E
I
RO
VHS VCR
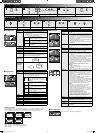
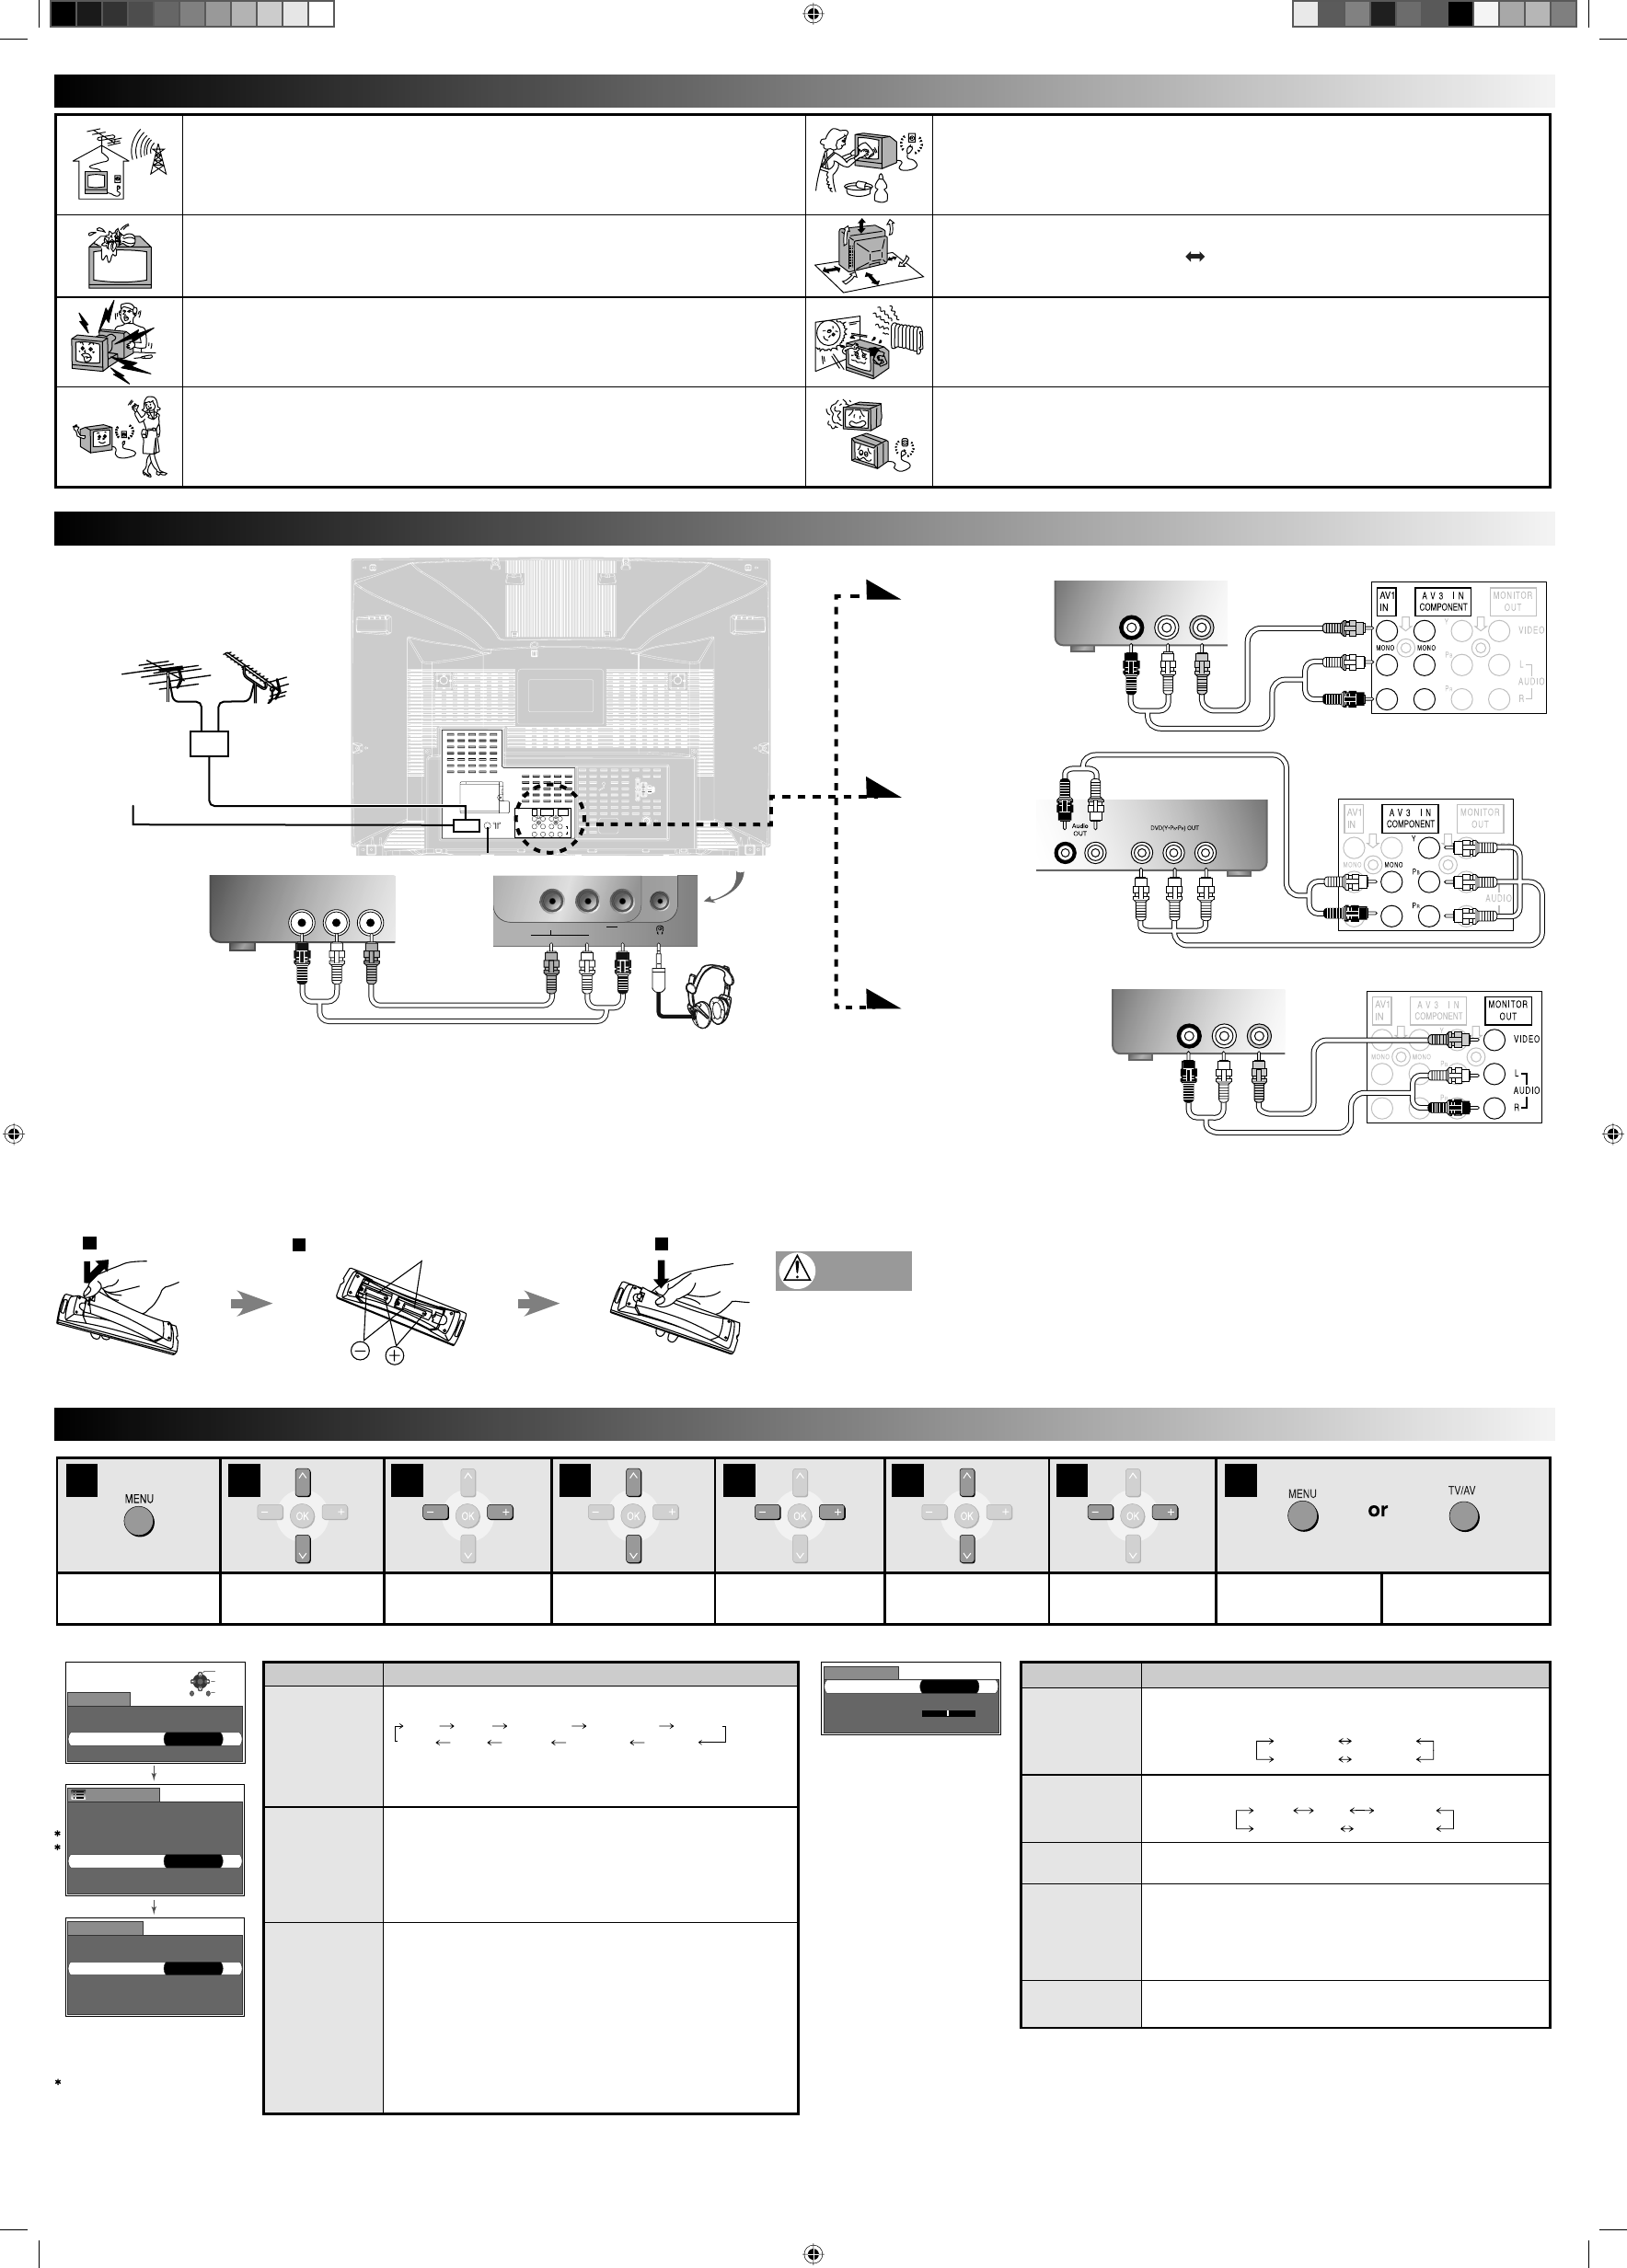
Access the Main menu. Select Setup menu. Access Setup menu. Choose Tuning menu. Access Tuning option. Choose menu option. Adjust/access chosen
menu.
Exit the menu
(press twice).
Return to normal TV
screen.
1 2 3 4 5 6 7 8
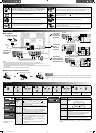
Connecting the aerial
VHF Aerial
UHF Aerial
Mixer
75 Ω Coaxial
Cable
Connecting
to the
DVD Input
Terminals
DVD player
Connecting
to the AV1
or AV3 Input
Terminals
Red
Yellow
White
Safety Instructions
Getting Started
Connecting
Other Equipment
to the AV Monitor
Output Terminals
Recording equipment (VHS VCR)
Connecting to
the AV2 Input
Terminals
(TV front panel)VHS VCR
Coaxial
Aerial Plug
RF in Terminal
L Connections
Notes
• When a Monaural VCR is used, connect the Monaural Audio cable to the Audio Out “L” (left) terminal.
• The AV3 audio input terminals serves as the audio input terminal for both the video input and for the DVD input.
• The DVD signal input terminal takes priority over the AV3 video signal input terminals.
• Never connect the same video recorder with both the VIDEO IN and MONITOR OUT terminals on this TV set, as this could cause
incorrect operation.
• The DVD signal (Y·P
B
·P
R
) is not output at the MONITOR OUT terminals.
Red
Yellow
White
Red
White
Tuning menu Description
Sys select
(System
select)
Select the system.
China HK/UK Asia/M.East NZ/INDONES Australia
Japan CATV America SPECL Ver E.Europe
Note
You need to set the “Sys select” mode before carrying out
Auto and Manual tuning.
Auto tuning
Allows you to automatically retune the TV. Useful if you
move house and wish to retune your TV to the local
stations.
1. Press the Volume “–” or “+” button to start Auto tuning.
2. Once this operation is completed, the TV will display the
programmes now stored on programme position 1.
Manual tuning
Allows individual programme positions to be tuned manually.
1. Press the Volume “–” or “+” button to start Manual tuning.
2. Press the Programme Number “3” or “4”, Direct key
0~9 or – – (2 digit key) button to select the programme
position to be tuned.
3. Press the Volume “–” or “+” button repeatedly until the
required station is found.
4. Repeat the above steps to tune other programme
positions.
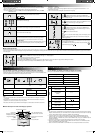
Tuning menu Description
Sound system
You can change the Sound system used for a programme
channel.
4.5 MHz 5.5 MHz
6.5 MHz 6.0 MHz
Colour system
Lets you select the correct transmission standard.
Auto PAL
SECAM
NTSC 3.58 NTSC 4.43
Fine tuning
Use to make small adjustments to the tuning of an individual
station.
Skip
To skip the undesired Programme Numbers from appearing
on the screen.
This function is only effective when selecting Programme
Numbers by pressing the Programme Number “3” or “4”
button. Skip mode can be switched on or off.
Ch Colour set
Variation in colour density between broadcast channels can
be adjusted to three levels of each reception channel.
Note:
The set is pre-tuned for Australian Ch’s 2, 7, 9, 10, 28, 31 and Auto tuning is NOT
required.
Tuning menu
L Installing the remote control’s batteries
Cautions
• Do not use rechargeable (Ni-Cd) batteries. They are different in shape and performance and may fail to ensure correct
operation.
• Incorrect use of batteries can cause electrolyte leakage which will corrode the remote control or cause the batteries to
burst.
1
Open
2
Insert the R6 (AA) size batteries.
3
Close
Headphone
Red
Yellow
White
Applicable for Teletext
models only.
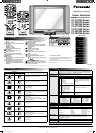
The TV set can be operated on AC AUTO 110-240V, 50/60Hz (TC-21FX20M,
TC-21FX20R, TC-29FX20M, TC-29FX20R, TC-29FX20U, TX-21FX50M, TX-29FX50M),
or AC SINGLE 230-240V, 50Hz (TX-21FX50A, TX-29FX50A), or AC SINGLE 220V, 50Hz
(TC-29FX50H), or AC SINGLE 220-240V, 50/60Hz (TX-21FX20R, TX-29FX20R).
The cabinet and picture tube can be kept in good condition by simply wiping with a clean,
soft cloth moistened with mild detergent and water. Do not use solutions containing benzol,
petroleum or a chemical cloth. For safety, remove the plug from the wall outlet.
The apparatus shall not be exposed to dripping or splashing and that no objects fi lled with
liquids, such as vases, shall be placed on the apparatus.
Adequate ventilation is essential to prevent failure of electrical components, so we
recommend a gap of at least 10 cm ( ) is left all around the unit when it is placed inside a
cabinet or between shelves.
Do not remove the rear cover, as live parts are accessible when it is removed. Avoid exposing the TV set to direct sunlight and other source of heat.
Remove the plug from the wall outlet (Power point) when the TV set is not used for a
prolonged period of time. The main plug is used as the disconnecting device.
Do not use this set if abnormal operation occurs.
Ex: smoke, odd sounds or smells, turn the power switch off and disconnect the AC power if
you notice any unusual operation.
Do not put the AC cord underneath your TV set or any other object.
TC_TX-21_29FX20_50_EN.indd 3TC_TX-21_29FX20_50_EN.indd 3 2/16/06 10:22:27 AM2/16/06 10:22:27 AM