8 Pelco Manual C681M-D (2/02)
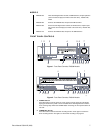
3. Recording indicators
TIMER REC indicator
This light illuminates during timer recording and timer recording standby mode.
The POWER button does not work when the TIMER REC indicator is lit. To turn on the
power when the TIMER REC indicator is lit in the standby mode, press the TIMER
REC button.
M-DET indicator
The light illuminates whenever the motion detection setting is ON in the Initial Set Up
menu. When the setting is ON, the light goes out if you are in a programming menu.
PRE ALARM REC indicator
The light illuminates whenever SHORT, MEDIUM, or LONG is selected in the pre-alarm
recording (PRE A-REC) field in the alarm recording and motion detection (A-Rec/M-Det
Setting) menu.
4. Multiplexer buttons
Camera number buttons
Buttons 1-9 on DX3009 models
Buttons 1-16 on DX3016 models
Press the number of the camera you want to display on the monitor. In addition, these
buttons are used to set the password in the Password Lock function.
SPLIT/SEQUENCE button
Press this button to switch between the single-camera, four-camera, and nine-camera
displays on DX3009 models and between single-camera, four-camera, nine-camera,
and sixteen-camera displays on DX3016 models. Also use to switch sequence func-
tions.
ZOOM button
Press this button to display the Zoom Pointer (X) on the monitor. In addition, this but-
ton can be used as the number 0 to set the password in the Password Lock function.
ZOOM IN button
Button 4 on DX3009 models
Button 1 on DX3016 models
Pressing this button after pressing the ZOOM button enlarges the image in two steps.
ZOOM OUT button
Button 5 on DX3009 models
Button 2 on DX3016 models
Pressing this button after pressing the ZOOM IN button reduces the image.
Move buttons
Buttons 6-9 on DX3009 models
Buttons 3-6 on DX3016 models
Press these buttons to move the Zoom Pointer to the desired position.
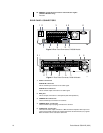
5. REC button
Press this button to begin recording.
6. ARCHIVE button
Press this button to begin making a backup copy of the hard drive. If there is no pe-
ripheral recording device connected, this button cannot be used.
7. Jog and shuttle operation
SHUTTLE ring
Use the ring to set various menus and search functions, to adjust the playback speed,
and to rewind or forward the image.
JOG dial
Use the dial to set various menus and search functions, and to forward or reverse the
image during playback (field-by-field).


