


Helpful Hints (cont’d) 53
TV/VCR has no power.
• Make sure the power plug is completely connected to an AC (alternating current) outlet.
A power failure occurred.
• Follow the steps on page eight to select a language and program channels, if necessary. Then set the
clock (pages 12 - 17).
TV/VCR power shuts off after 15 minutes.
• To save energy, the TV/VCR will shut itself off after 15 minutes when it is on a channel that is not
receiving a broadcast signal (for example, a station that has gone off the air for the night). This is normal.
Channel reception is poor.
• Check connections, then program channels again (page 10).
TV/VCR does not have a picture.
• Adjust the antenna (pages six - seven).
• Connect the antenna or cable directly to the TV/VCR.
• Adjust the TV/VCR picture controls (pages 24 - 25).
TV/VCR has poor sound or no sound.
• Adjust the volume.
• Press the MUTE button to restore the volume.
Tape playback is poor or tape is destroyed.
• Adjust the tracking. Details are on page 49.
• If moisture has accumulated in your TV/VCR, keep the power on for at least two hours, but do not try
to play a tape. Details are on page 52.
TV/VCR does not display closed captioning.
• Cancel Counter Only mode. Details are on page 26.
• Make sure closed captioning is available for the program. Refer to the TV listings in your local newspa-
per.
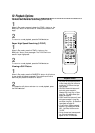
Remote control does not operate TV/VCR.
• Aim the remote control directly at the TV/VCR’s remote sensor. Details are on pages five and 20.
• Remove all obstacles between the remote control and the TV/VCR.
• Inspect and replace the batteries in the remote control. Details are on page five.
Number buttons won’t work for channels above 69.
• Select CABLE from the INPUT section of the pop up menu, then let the TV/VCR program the channels.
Details are on page 10.
TV/VCR can’t receive channels above 13.
• Select CABLE from the INPUT section of the pop up menu, then let the TV/VCR program the channels.
Details are on page 10.
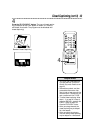
A tape can’t be inserted into the TV/VCR.
• Insert the tape window side up, with the record tab facing you.
• Make sure a tape isn’t already in the TV/VCR by pressing the STOP/EJECT button on the TV/VCR.
• Gently push on the center of the tape. Never force a tape into the TV/VCR.
A tape can’t be removed from the TV/VCR.
• Make sure the power plug is completely connected to an AC (alternating current) outlet.
• If a timer recording is programmed, turn on the TV/VCR power, then eject the tape. Be sure to insert a
tape and turn off the TV/VCR power for the timer recording.
TV/VCR ejects the tape when you try to start a recording.
• Make sure the tape has a record tab. Details are on page five.
The cylinder rotates when the TV/VCR is in Stop mode.
• To enable the quick play mechanism, the cylinder will rotate for about five minutes. This is normal.
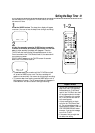
Daylight-Saving Time
• When Daylight-Saving Time is ON, the clock time will change automatically as follows: on the first
Sunday of April, from 2 a.m. to 3 a.m.; on the last Sunday of October, from 2 a.m. to 1 a.m.
• When programmed timer recordings start between 2 a.m. and 2:59 a.m. on the first Sunday of April, the
TV/VCR will start recording at 3 a.m. (summer time).
• When programmed timer recordings end between 2 a.m. and 2:59 a.m. on the first Sunday of April, the
TV/VCR will stop at 3 a.m.
• When using this feature, a program that occurs during the spring time change may not record complete-
ly. Adjust the start and stop times accordingly.