


Making a recording
1
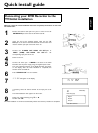
Press MONITOR to display the selected input signal on the
screen.
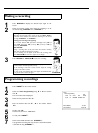
2
Select the program number from which the recording is to be
carried out using CHANNEL q or CHANNEL r .
Recording via the external jacks
Select either the front jack ('CAM1', 'CAM2') or the jack ('EXT1', 'EXT2',')
at the back of the recorder, from which the recording is to be carried
out, using CHANNEL q or CHANNEL r .
Selecting the recording mode (quality)
You can select between 'M1' (camcorder recordings/1 hour), 'M2'(2
hours), 'M2x' (2,5 hours), 'M3' (3 hours), 'M4' (4 hours) or 'M6'(6
hours) using REC MODE .
SAFE RECORD
Usually, a recording starts at the point where the previous recording
ended. This will delete all subsequent recordings.
If a new recording is to be placed at the end of all recordings, hold
down REC/OTR n until 'SAFE REC' appears on the display.
Tip
3
Press RECORD or REC/OTR n to start the recording.
a'NO SIGNAL' (no signal) will appear on the display
b Check whether the cable jacks fit correctly.
b If the recording is made from a video recorder, adjust the 'tracking'
setting on the video recorder.
b In case of bad, non-standard video input signals, the DVD Recorder
may not be able to detect the signal.
Problem
Programming recordings
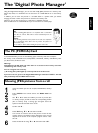
1
Press TIMER s on the remote control.
Timer
Timer Programming
Date
01/22
Ch.
01
Start
08:30AM
End
10:00PM
Rec
Mode
M1
Mo-Fr/Weekly
Press SELECT
To store
Press OK
2
Select line 'Timer Programming' using B or A and confirm
with C .
The current data will be displayed.
3
Select the entry field with D or C .
4
Enter the desired data with B , A or the number buttons
0..9 .
5
Confirm with OK .
The data was stored in a TIMER block.
6
To end, press TIMER s .
7
Switch off the DVD Recorder with STANDBY m .
A programmed recording will only function if the DVD Recorder
is switched off using STANDBY m .