


5
Setting Up a Cable Box
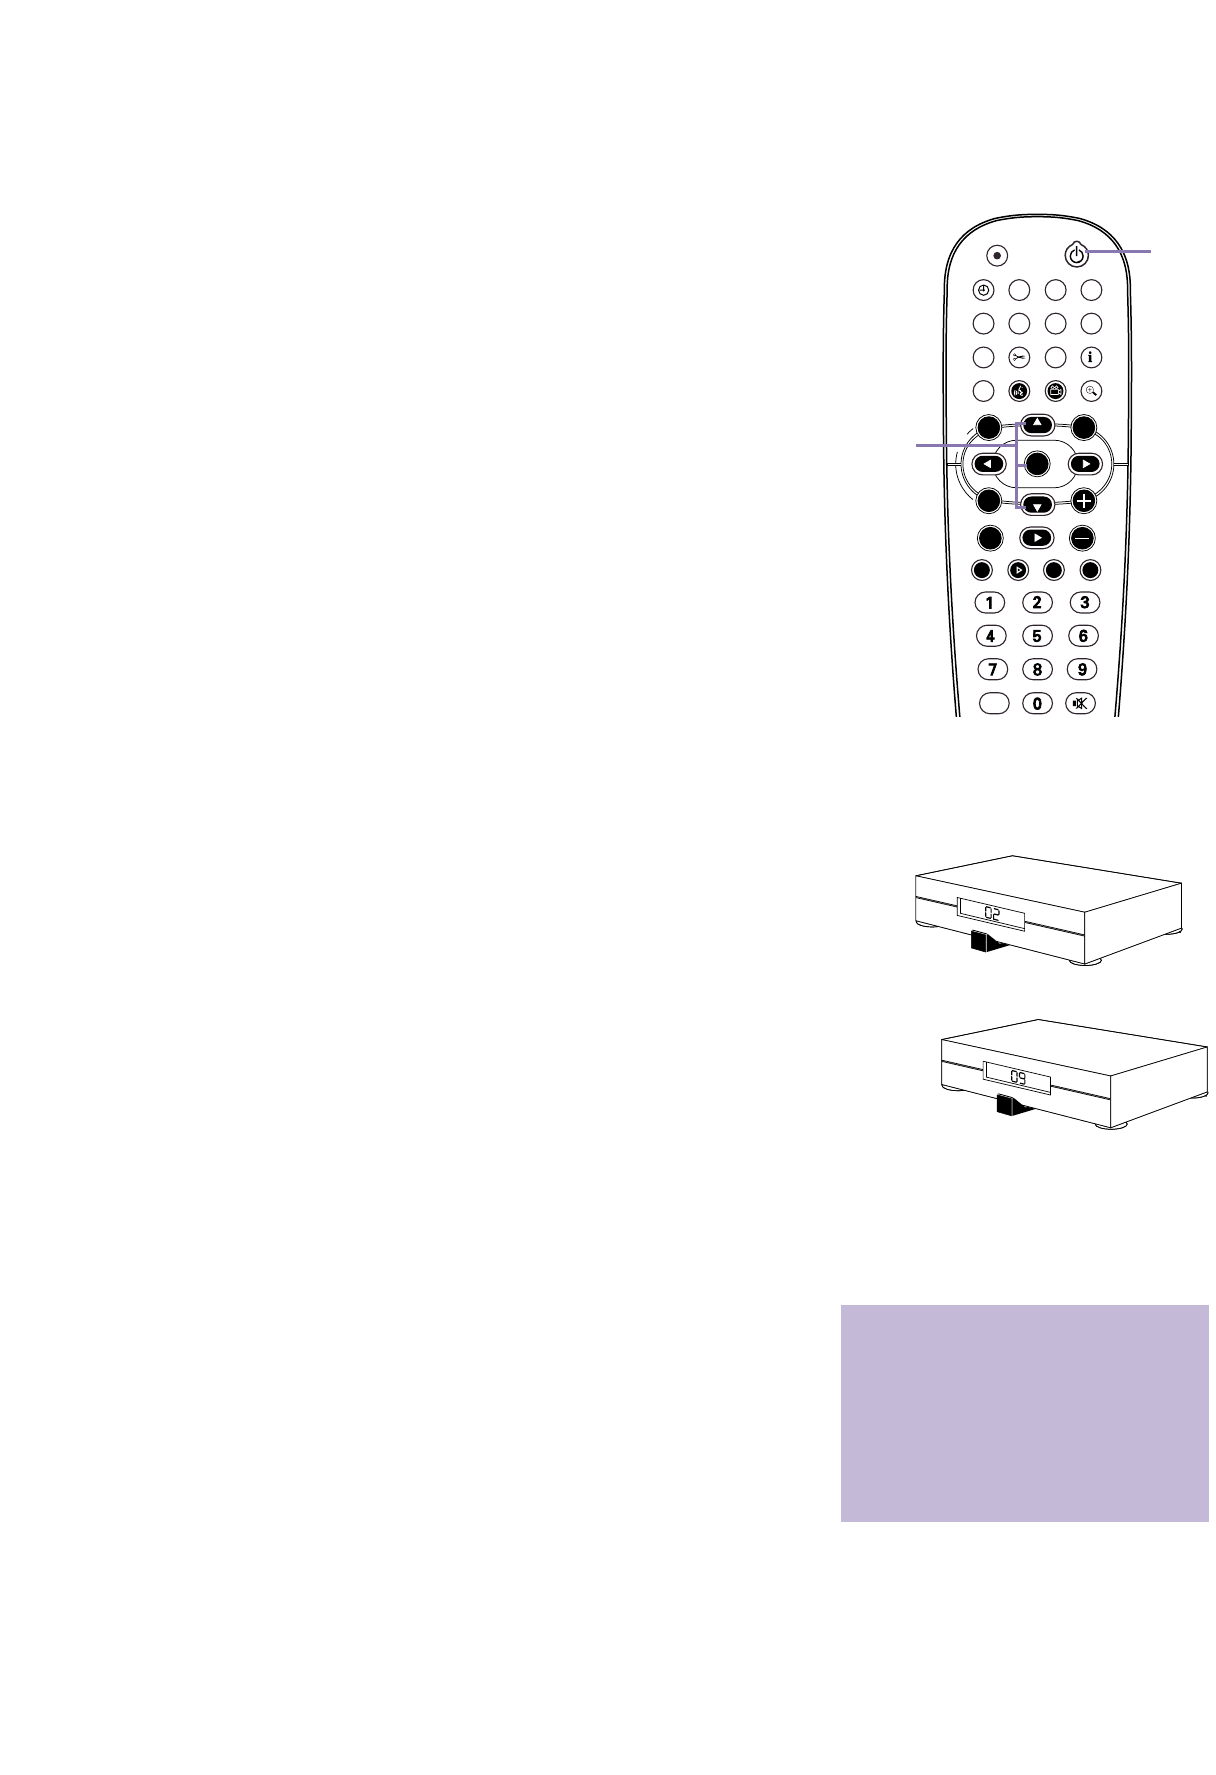
9
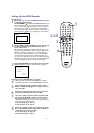
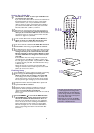
Press 8CH+ or 9CH- to select your Cable Box out-
put channel, then press OK.
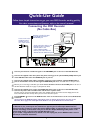
If you used an RF coaxial cable to connect the Cable Box to
the DVD Recorder (as shown on page 2 of this Guide),
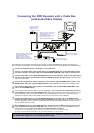
choose channel 2, 3, or 4. If you used Audio and Video
cables as shown on page 3 of this Guide, choose EXT2. If
you connected the Cable Box to other jacks of the DVD
Recorder, select EXT 1, CAM 1, or CAM 2.
10
Directions for connecting the G-Link cable will appear on
the TV screen. If you have not connected the G-Link
cable yet, do so now. Press OK when the G-Link cable is
connected and you are ready to continue. More connection
details are on pages 2-3 of this Guide.
11
A list of Cable Box brands will appear. Press 8CH+ or
9CH- to select your Cable Box brand, then press
OK. If your brand is not listed, select “Not Listed.”
12
You will be advised to turn on the Cable Box and set it
to channel 2. After doing this, press OK to continue.
13
The DVD Recorder will start testing codes, which will allow
the G-Link cable to change the Cable Box to channel 9. A
message will ask you to confirm whether the Cable
Box has changed to channel 9. Press 8CH+ to select
Yes if the Cable Box has changed to channel 9, then
press OK.
If the Cable Box does not change to channel 9, check all
connections.Then, press 8CH+ or 9CH- to select “Test
this code again,” then press OK. Or, press 8CH+ or 9CH-
to choose No, then press OK. The DVD Recorder will try
a different code.
Repeat this process as necessary until the Cable Box
changes to channel 9. Several codes may have to be tested
before the correct one is found.
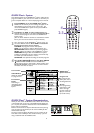
Finalizing Setup
14
The GUIDE Plus+
®
System settings will appear (“Confirming
Your Settings”). If the settings are correct, press
8CH+ to choose “Yes, end setup,” then press OK.
If the settings are incorrect, press 9CH- to choose “No,
repeat setup process,” then press OK.You will go through
the setup screens again. Change any incorrect information.
15
Helpful information about the GUIDE Plus+
®
System will
appear. Press OK to continue.
16
Another message confirming completion of setup will
appear.You will be prompted to press OK to activate
“Watch TV.” Press OK.You are finished!
Within a few seconds, the DVD Recorder will turn itself off,
then on again.
17
Press STANDBY
yy
to turn off the DVD Recorder.
The GUIDE Plus+
®
System programming informa-
tion will be available in about 24 hours. When the
Recorder is off, channels will change on your Cable Box.
This is normal, as the unit is searching for GUIDE Plus+
®
System information. For best results, turn off the DVD
Recorder overnight so it can receive the GUIDE Plus+
®
System programming information. Leave the Cable Box
turned on.
STANDBY
REC/OTR
TIMER REC MODE PLAY MODE TV/DVD
MONITOR
•TV
DIM RETURN T/C
DISC MANAGER FSS SELECT
SUBTITLE
STOP TV VOLUME
PAUSESLOW
PLAY
AUDIO ANGLE ZOOM
GUIDE/TV
MUTECLEAR
`
CH
-
CH
+
OKOK
SYSTEM
DISC
Ç
H Gk
MENU
17
12
13
9-16
CABLE
BOX
CABLE
BOX
CABLE
BOX
CABLE
BOX
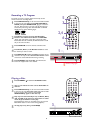
• You must connect the G-Link cable in order
to make programmed recordings with a
Cable Box. Otherwise, the DVD Recorder
cannot change channels at the Cable Box.
The wrong channel may record if you do
not use the G-Link cable.
• Remember, you cannot use the GUIDE
Plus+
®
System if you connected the DVD
Recorder to a Satellite Receiver.