English
17
Getting Started
1 In disc mode, press SYSTEM MENU.
2 Press à / á / 4 / 3 keys on the remote
control to navigate in the menu.
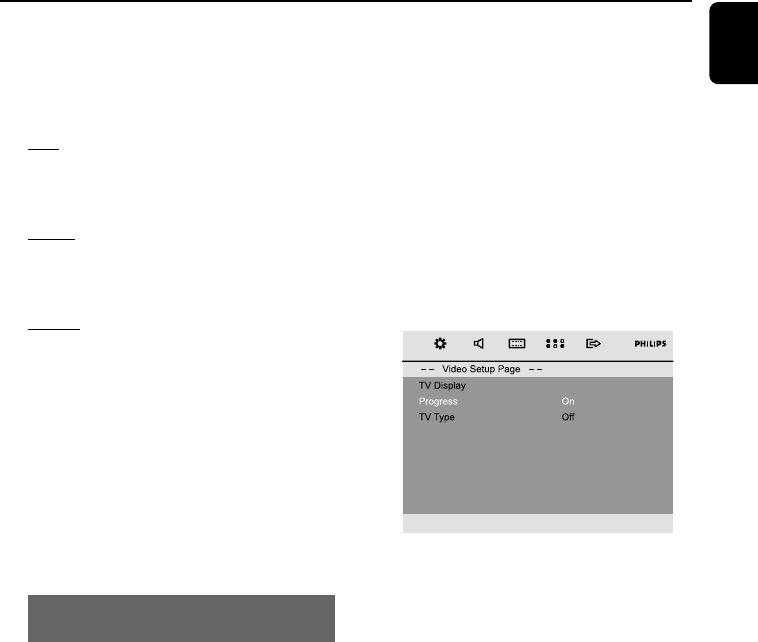
➜ Move to “Video Setup Page”and press 4.
➜ Move to “TV TYPE” and press á.
PAL
– Select this if the connected TV set is PAL
system. It will change the video signal of an
NTSC disc and output to PAL format.
NTSC
– Select this if the connected TV set is NTSC
system. It will change the video signal of a PAL
video disc and output to NTSC system.
MULTI
– Select this if the connected TV set is
compatible with both NTSC and PAL (multi
system). The output format will be consistent wit
the video signal of the disc.
3 Select an item and press OK.
➜ The screen messages for further setting
confirmation may appear. Follow the on-screen
instructions to proceed to confirm the setting or
not.
To remove the menu
Press SYSTEM MENU.
Setting up Progressive Scan feature (for
Progressive Scan TV only)
The progressive scan display twice the number
of frames per seconds than interlaced scanning
(ordinary normal TV system). With nearly double
the number of lines, progressive scan offers
higher picture resolution and quality.
IMPORTANT!
Before enabling the progressive scan
feature, you must ensure:
1) Your TV can accept progressive signals, a
progressive scan TV is required.
2) You have connected the DVD player to your
TV using Y Pb Pr (see “Connecting TV set”)
3) Make sure Component has been set to YUV.
1 Turn on your TV.
2 Turn off your TV progressive scan mode or turn
on interlaced mode (refer to your TV user
manual).
3 Press STANDBY-ONB to turn on the DVD
player.
4 Select the correct Video Input channel.
5 In disc mode, press SYSTEM MENU.
6 Press à / á / 4 / 3 keys on the remote
control to navigate in the menu.
➜ Move to “Video Setup Page”and press 4.
➜ Move to “Progressive”>”On” and press OK.
There will be a distorted picture on your
TV at this state until you turn on the
progressive scan mode on your TV.
7 Turn on your TV progressive scan mode (refer to
your TV user manual).
8 In the confirmation menu, press à / á to
highlight OK in the menu and press OK on the
remote to confirm.
➜ Progressive scan is now set on.
➜ If distorted picture still appears, it indicates
that your TV doesn’t support progressive scan. In
this case, turn off progressive scan as described
in “To deactivate Progressive manually”.
9 Press SYSTEM MENU on the remote to exit
the system menu.
➜ The setup is complete now and you can start
enjoying the high quality picture.
pg001-020_MCD177_79_Eng 3/13/08, 10:5417


