18
English
Step 1: Inserting batteries into
the Remote Control
1
3
2
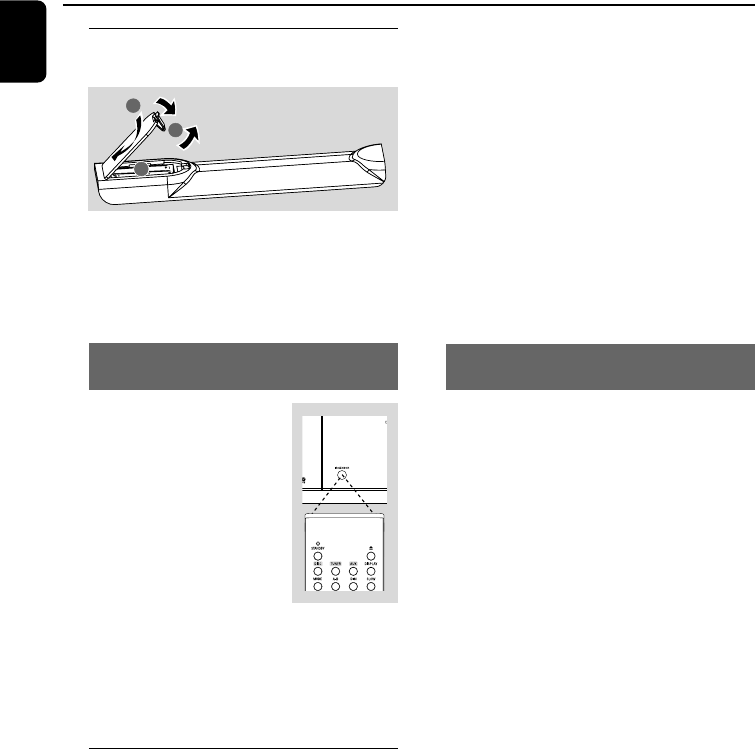
1 Open the battery compartment.
2 Insert two AAA batteries following the
indications (+/-) inside the compartment.
3 Close the cover.
Using the Remote Control to operate
the Player
1 Aim the Remote Control
directly at the remote sensor
(IR) on the front panel.
2 Do not put any objects
between the Remote Control
and the DVD Player while
operating the DVD Player.
CAUTION!
– Remove batteries if
they are exhausted or if the Remote
Control is not being used for a long time.
– Do not use old and new or different
types of batteries in combination.
– Batteries contain chemical substances,
so they should be disposed of properly.
Step 2: Setting up the TV
IMPORTANT!
Make sure you have completed all the
necessary connections. (See
“Connecting TV”).
1 Switch the DVD system on and then select DISC
source. (See “Switching the system on/off”).
2 Turn on the TV and set to the correct video-in
channel. You should see the blue Philips DVD
background screen on the TV.
➜ Usually these channels are between the
lowest and highest channels and may be called
FRONT, A/V IN, or VIDEO. See your TV manual
for more details.
➜ Or, you may go to channel 1 on your TV, then
press the Channel down button repeatedly until
you see the Video In channel.
➜ Or, the TV Remote Control may have a
button or switch that chooses different video
modes.
➜ Or, set the TV to channel 3 or 4 if you are
using an RF modulator.
Selecting the colour system that
corresponds to your TV
This DVD Player is compatible with both NTSC
and PAL. In order for a DVD disc to play on this
Player, the colour system of the Disc, the TV and
the DVD Player should match.
1 Press SYSTEM MENU in full stop mode.
2 Press 1 2 to select “PREFERENCE PAGE”.
3 Use 1 2 3 4 on the remote to navigate in
the menu.
Move to “TV TYPE” and press 2.
➜ PAL : Select this if the connected TV is PAL
system. It will change the video signal of a NTSC
disc and output in PAL format.
➜ Auto: Select this if the connected TV is
compatible with both NTSC and PAL (multi-
system). The output format will be in accordance
with the video signal of the disc.
➜ NTSC: Select this if the connected TV is
NTSC system. It will change the video signal of a
PAL disc and output in NTSC format.
4 Select an item and press OK.
Notes:
– This option is available only when the "HDMI" is
set to "OFF".
– Before changing the current TV Type setting,
ensure that your TV supports the selected TV Type.
Getting Started
pg 001-022_MCD728_93_Eng 2007.7.31, 16:4718
