


6
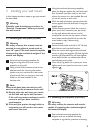
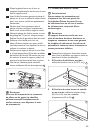
2 Using the enclosed mounting template,
place the diagram against the wall and mark
four locations on the wall where the mount
is to be Installed.
3 With the help of another person, place the
mount against the wall and level it using the
bubble guide.
4 While another person holds the mount
in place, mark four locations on the wall
where the mount is to be installed.
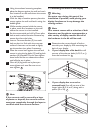
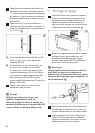
5 Set the mount aside and drill a 12mm pilot
hole at each marked location. Remove any
excess dust from the holes.
6 Insert a Concrete Anchor (P) into each
hole so that it is ush with the concrete
surface. A hammer can be used to lightly
tap the anchors into place if necessary.
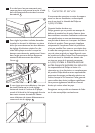
7 Place the mount back against the wall and
secure it using the lag bolts (Q) and lag bolt
washers (R) provided. Do not over-tighten
these bolts and do not release the mount
until all bolts are in place.
8 Once all (4) lag bolts are in place you
must tighten each one. Be sure not to
over tighten. 2
2
D Note
If the concrete wall is covered by a layer
of plaster or drywall, the concrete anchor
must pass completely through the layer to
rest ush with the concrete surface.
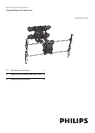
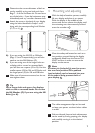
3.3 Attaching the arms to the display
B Warning
Use extra care during this part of the
installation. If possible, avoid placing your
display facedown as it may damage the
viewing surface.
D Note
Your mount comes with a selection of bolt
diameters and lengths to accommodate a
wide variety of display models. Not all of
the hardware in the kit will be used.
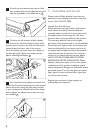
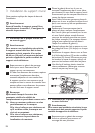
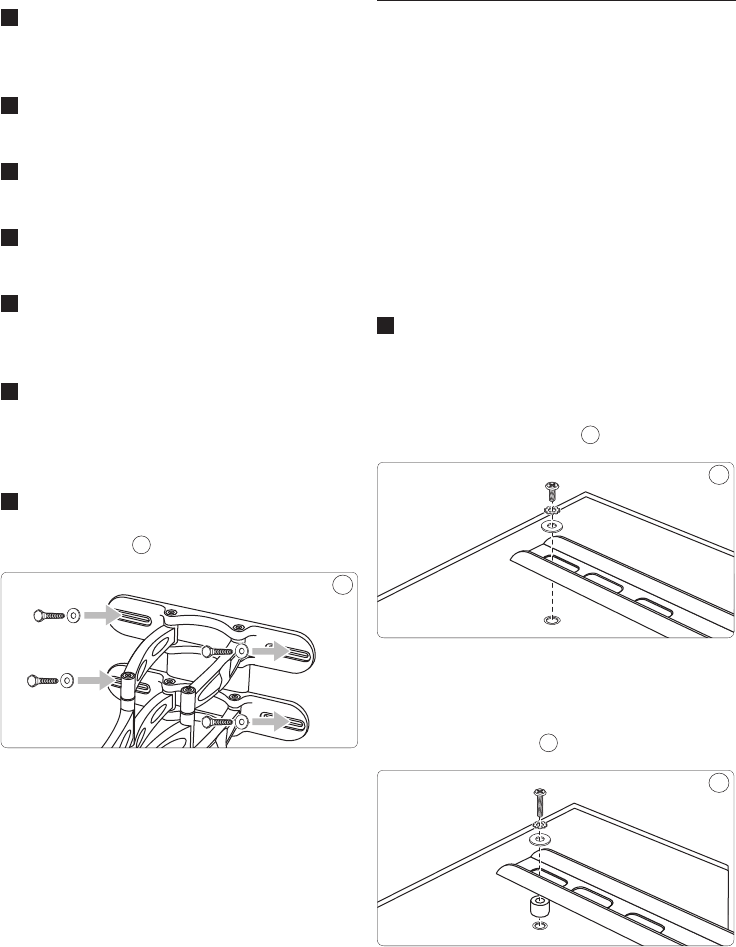
1
Determine the correct length of bolt to
use with your display by rst examining the
back of your display.
A. If your display has a flat back:
You will
use one of the shorter bolts (A, D, G, or J)
from the hardware kit.
3
3
B. If your display has a curved or
recessed back:
You will use one of the
longer bolts (B, E, H, or K) along with a
spacer (M or N).
4
4