


17
En
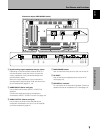
Setting Up the System
Français
English
Setting Up the System
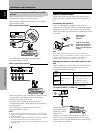
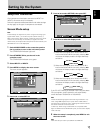
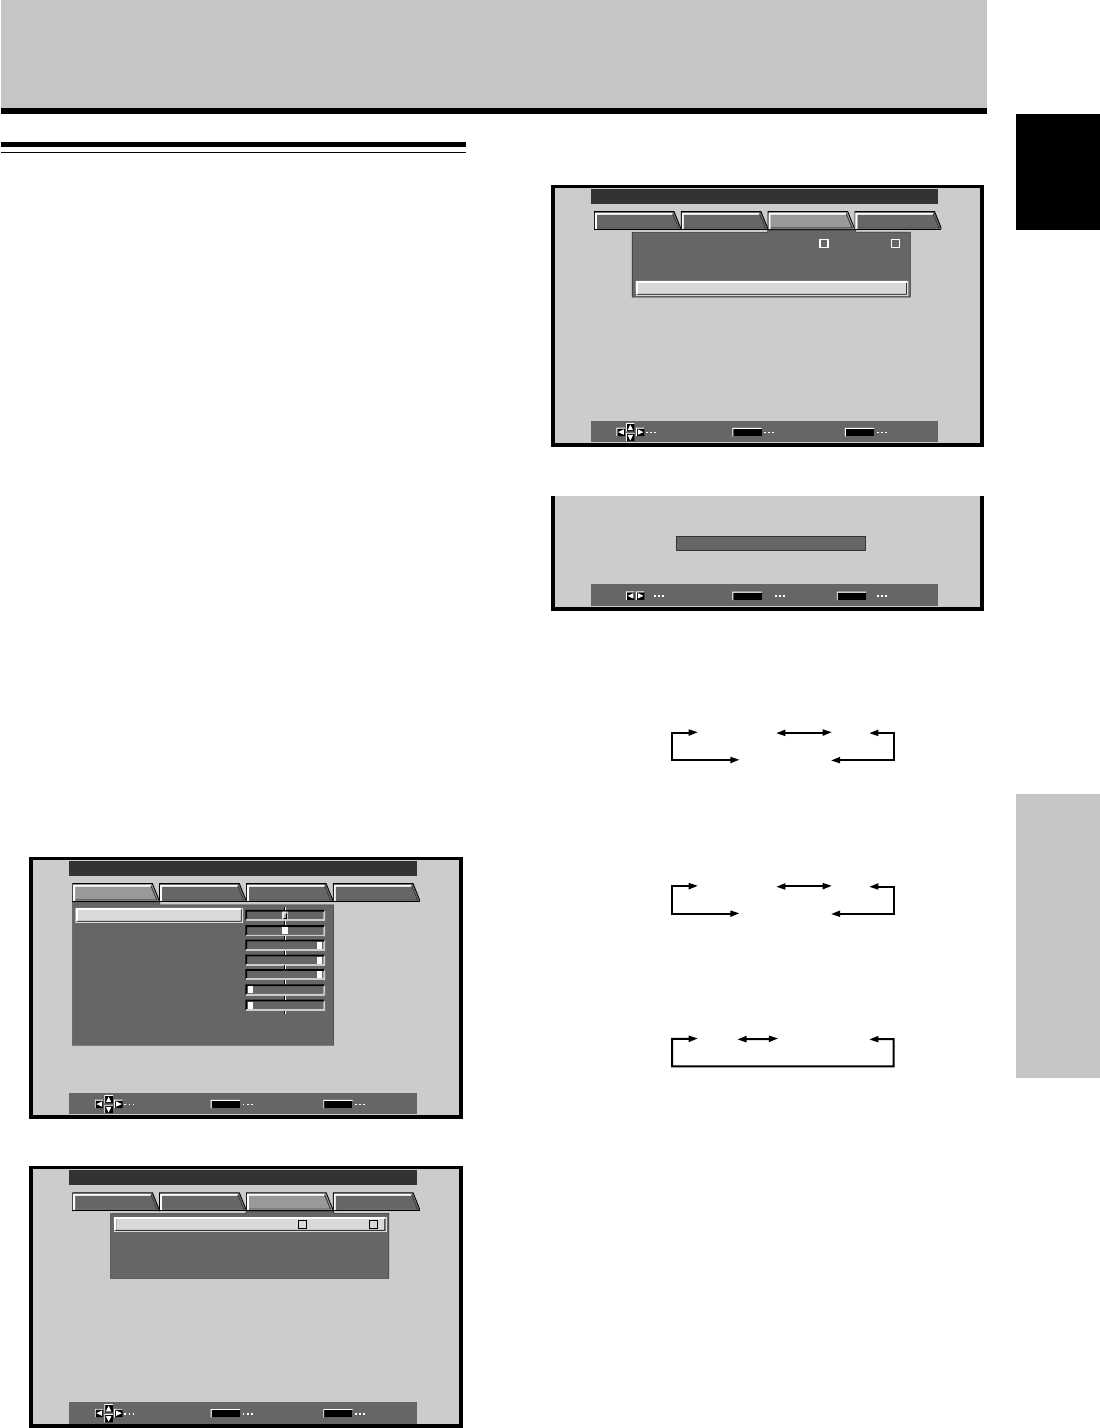
6 Press 5/∞ to select SETTING, then press SET.
SELECT ENTER EXIT
SET
MENU
PICTURE SCREEN SET UP OPTION
:
N
T
:
A
UTO
SETT IN
CLAMP
POWER
:
G
O
FF
PSITIONO
MNAGEMEA
INPUT INPUT
1
LEBLA
:
V
GA
MAIN MENU INPUT1
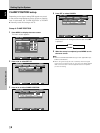
7 Press 2/3 to select the display mode.
SELECT SET EXIT
SET
MENU
SETT ING
:
V
GA
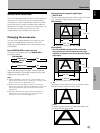
1 When the input signal has a refresh rate of 31.5
kHz (horizontal) and 60 Hz (vertical), pressing 2/3
will cause the display mode to change alternately
as follows:
VGA
PC AUTO
WIDE VGA
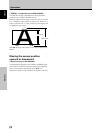
2 When the input signal has a refresh rate of 48.4
kHz (horizontal) and 60 Hz (vertical), pressing 2/3
will cause the display mode to change alternately
as follows:
XGA
PC AUTO
WIDE XGA
3 When the input signal has a refresh rate of 56.5
kHz (horizontal) and 70 Hz (vertical), pressing 2/3
will cause the display mode to change alternately
as follows:
XGA
WIDE XGA
If the PC AUTO setting is selected when using the above
PC input signals, screen resolution will automatically
switch between VGA/WVGA or XGA/WXGA.
Note
The PC AUTO setting supports automatic signal selection only
when using RGB separate Sync inputs. When G ON SYNC or
Composite Sync signals are input, selecting PC AUTO will cause
the screen resolution to be set to VGA
or XGA only. When using a G ON SYNC or Composite SYNC
signal for WIDE VGA or WIDE XGA inputs, set the screen display
mode manually.
8 When the setup is completed, press MENU to exit
the menu screen.
Note
Make this setup for each input (INPUT1 and INPUT2).
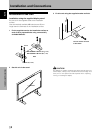
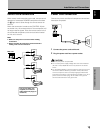
Setup after Connection
After components have been connected to INPUT1 or
INPUT2, on-screen setup is necessary.
Follow the procedure described below and make settings
as they apply to the type of components connected.
Screen Mode setup
Note
These settings are required only when using the following input
signal refresh rates: 1 31.5 kHz horizontal / 60 Hz vertical; 2
48.4 kHz horizontal / 60 Hz vertical; 3 56.5 kHz horizontal / 70 Hz
vertical. No manual setup is necessary for signals with other
refresh rates, since adjustments are performed automatically (the
SETTING item will not be displayed).
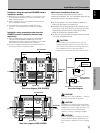
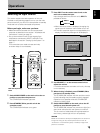
1 Switch MAIN POWER on the connection panel to
the on position to turn on the unit’s main power.
The STANDBY/ON indicator lights red.
2 Press STANDBY/ON to put the unit in the
operation mode.
The STANDBY/ON indicator turns green.
3 Select INPUT1 or INPUT2.
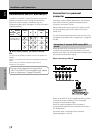
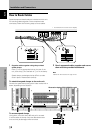
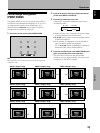
4 Press MENU to display the menu screen.
The menu screen appears.
MAIN MENU INPUT1
SELECT ENTER EXIT
SET
MENU
PICTURE SCREEN SET UP OPTION
:
0
:
6
+
+
+
0
:
60
:
60
:
0
:
0
CONTRAST
:
0
BR
RLEVEL
IGHT.
.
GLEVEL.
BLEVEL.
H ENHANCE.
V ENHANCE.
RSETE
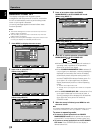
5 Press 2/3 to select SET UP.
SELECT ENTER EXIT
SET
MENU
PICTURE SCREEN SET UP OPTION
:
V
GA
:
N
T
:
A
UTO
SETT IN
CLAMP
POWER
:
G
O
FF
PSITIONO
MNAGEMEA
INPUT INPUT
1
LEBLA
MAIN MENU INPUT1