4
UA-PRO210INSTALLATION (2)
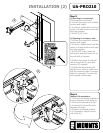
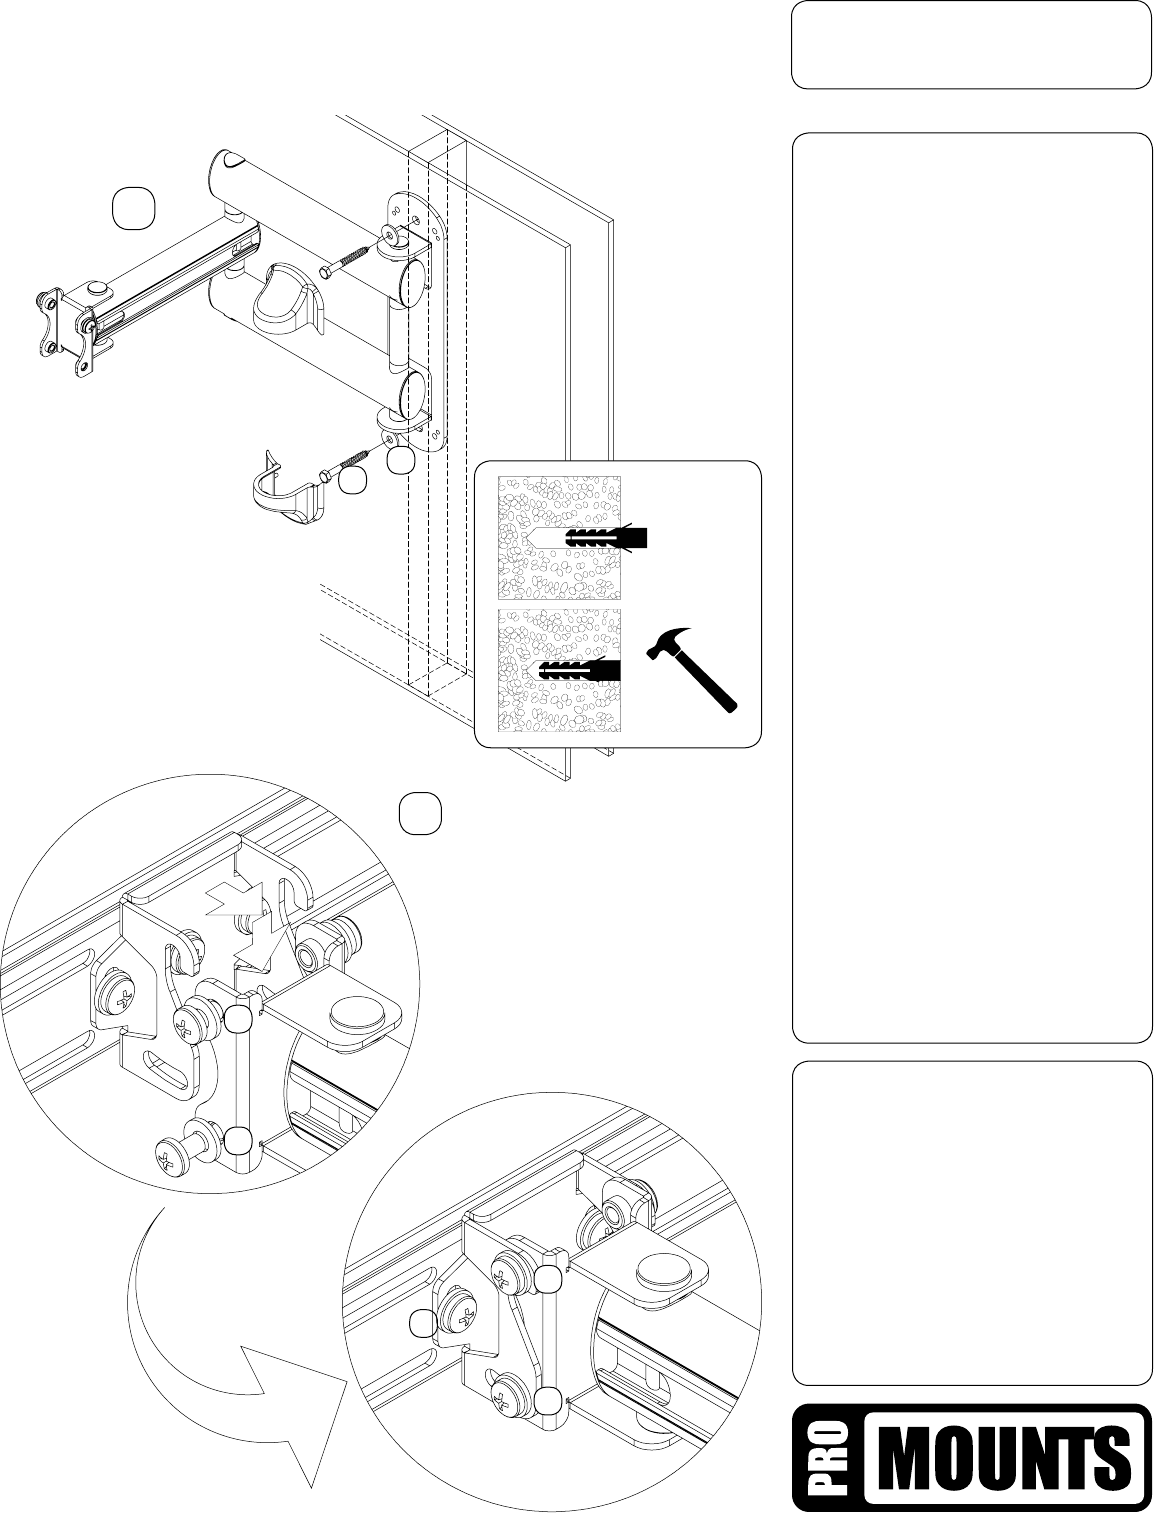
Step 3:
a) Mounting to a wood stud:
3.0a Locate the wood stud.
3.1a Place the mount to a suitable
location and height.
3.2a Using a bubble level, hold the
mount in a level position and mark
the holes position.
3.3a Drill 3/16” holes.
b) Mounting to a masonry wall:
3.1b Place the mount to a suitable
location and height.
3.2b Using a bubble level, hold the
mount in a level position and mark
the holes position.
3.3b Drill 3/8” holes, insert the
wall anchor and tap them ush to
the wall with a hammer.
3.4 Attach the mount to the wall
with the lag bolts (F) and steel
washers (G) supplied.
3.5 While the lag bolts are still
slightly loose, check to make sure
that the mounting plate is vertical.
Adjust if necessary. Covered with
the supplied molded caps.
Step 4:
Reattach tilt mechanism:
4.1 Put back the display bracket on
the arm hanging on left bolts (A).
4.2 Put back removed bolts (B).
4.3 Leave bolts (A and B) while
adjusting tilt angle.
4.4 Tighten at desired position.
4.5 If necessary, adjust horizon
with bolts (H).
4
A
B
H
A
B
3
F
G


