Preparation for using your new TV
Connecting your TV
Caution" Do not plug in the TV until you have finished connecting all of your equipment.
Connecting to an antenna
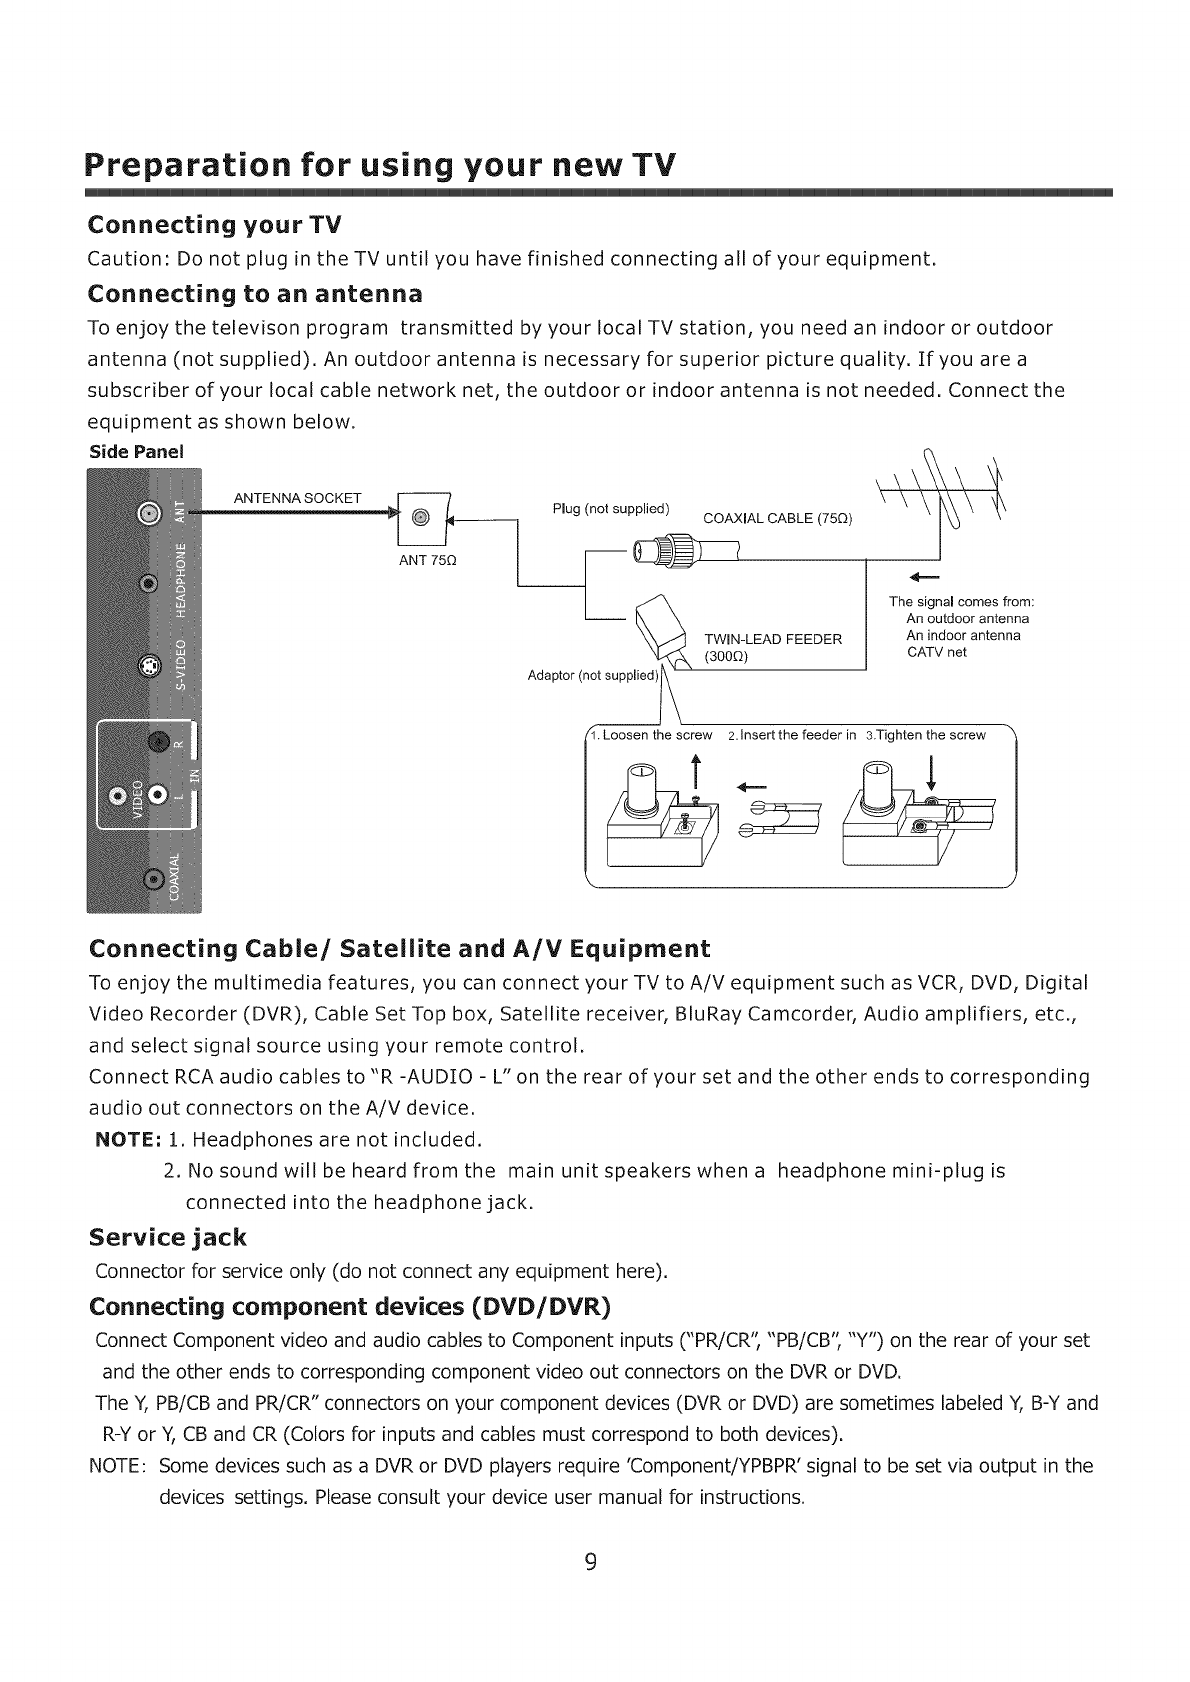
To enjoy the televison program transmitted by your IocaITVstation, you need an indoor or outdoor
antenna (not supplied). An outdoor antenna is necessary for superior picture quality. If you are a
subscriber of your local cable network net, the outdoor or indoor antenna is not needed. Connect the
equipment as shown below.
Side Panel
ANT 750
Plug (not supplied)
COAXIAL CABLE (750)
Adaptor (not suppl_
Loosen the screw
TWiN-LEAD FEEDER
The signal comes from:
An outdoor antenna
An indoor antenna
(3000)
CATV net
2.Insert the feeder in 3.Tighten the screw
Connecting Cable/Satellite and A/V Equipment
To enjoy the multimedia features, you can connect your TV to A/V equipment such as VCR, DVD, Digital
Video Recorder (DVR), Cable Set Top box, Satellite receiver, BluRay Camcorder, Audio amplifiers, etc.,
and select signal source using your remote control.
Connect RCA audio cables to"R-AUDIO - L" on the rear of your set and the other ends to corresponding
audio out connectors on the A/V device.
NOTE: 1. Headphones are not included.
2. No sound will be heard from the main unit speakers whena headphone mini-plug is
connected into the headphone jack.
Service jack
Connector for service only (do not connect any equipment here).
Connecting component devices (DVD/DVR)
Connect Component video and audio cables to Component inputs ("PR/CR', "PB/CB", "Y') on the rear of your set
and the other ends to corresponding component video out connectors on the DVR or DVD.
The Y, PB/CB and PR/CR" connectors on your component devices (DVR or DVD) are sometimes labeled Y, B-Y and
R-Y or Y, CB and CR (Colors for inputs and cables must correspond to both devices).
NOTE: Some devices such as a DVR or DVD players require 'Component/YPBPR' signal to be set via output in the
devices settings. Please consult your device user manual for instructions.
9


